最后更新于:2026年3月14日 晚上
一、Conda 安装(推荐轻量版 Miniconda) 1. 下载安装包 官方下载地址(选择对应系统):
2. 安装步骤
双击安装包,一路默认下一步
Windows 注意:勾选 Add to PATH (添加环境变量)
安装完成后,打开终端(Windows 用 Anaconda Prompt / PowerShell)
3. 验证安装 出现版本号即安装成功,例如:conda 24.3.0
二、Conda 基础配置(必做)
初始化 Conda
执行后关闭终端重新打开 ,配置生效。
关闭自动激活 base 环境
1 conda config --set auto_activate_base false
查看当前配置
三、配置国内清华镜像(加速下载) Conda 默认国外源,下载慢 / 失败,一键配置清华源:
1
2
3
4
5
6
conda config --add channels https:
还原默认源
1 conda config --remove-key channels
四、Python 环境管理(核心功能)
创建新环境
1 2 conda create -n myenv python=3 .10
myenv:自定义环境名(如 py310、ai、django)python=3.10:指定 Python 版本
激活 / 进入环境
激活成功,终端前缀变为 (myenv)
退出当前环境
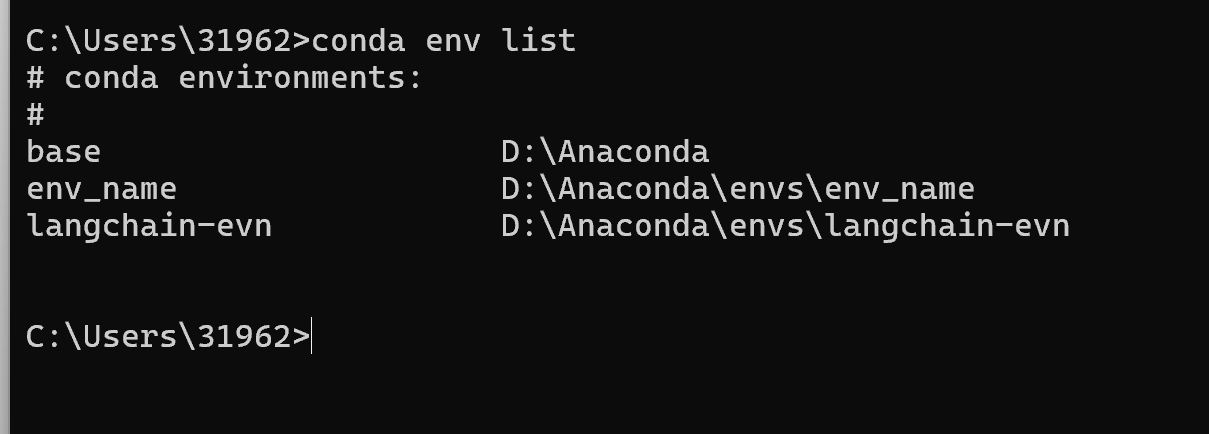
查看所有环境
删除环境
五、包管理命令(安装 / 卸载 / 更新) 必须先激活环境 再执行,只对当前环境生效:
1 2 3 4 5 6 7 8 9 10 11 12 13 14 15 16 17 numpy =1.26.0remove numpy
六、进阶常用命令
导出 / 备份环境
1 conda env export > environment.yml
从文件创建环境
1 conda env create -f environment.yml
清理缓存(释放空间)
更新 Conda 自身
1 conda update -n base conda
七、常用命令速查表
功能
命令
查看版本
conda –version
创建环境
conda create -n 环境名 python=3.10
激活环境
conda activate 环境名
退出环境
conda deactivate
查看所有环境
conda env list
删除环境
conda remove -n 环境名 –all
安装包
conda install 包名
卸载包
conda remove 包名
查看已安装包
conda list
清理缓存
conda clean -a
八、完整使用流程示例 1 2 3 4 5 6 7 8 9 10 11 12 13 14 conda create -n mypy310 python=3 .10 conda activate mypy310conda install numpy pandas matplotlibconda listconda deactivate
三.安装pycharm和vscode配置环境 📌 前置准备:安装 Python 解释器 无论使用 PyCharm 还是 VSCode,都需要先在电脑上安装 Python 解释器。
步骤一:下载 Python 打开浏览器,访问 Python 官方网站:https://www.python.org/downloads/[1](https://blog.csdn.net/2301_80035882/article/details/157432536)
版本选择:✅ 新手建议安装 Python 3.10+(稳定且兼容性强);❌ 切勿选择 Python 2.x(已停止维护)。2
步骤二:安装 Python 安装时一定要勾选 “Add Python To Path” 这个复选框,它会将 Python 自动添加到环境变量中。3
建议点击 “Customize installation” 进行自定义安装,选择 D 盘等非 C 盘路径(避免权限问题)。安装完毕后看到 “Setup Was successful” 标题即代表安装成功。3
步骤三:验证安装 打开 命令提示符(CMD) 或 终端 ,输入:
如果返回类似 Python 3.10.x 的版本号,说明安装成功 ✅
📺 B站视频推荐:
1 2 3 4 5 6 7 8 ┌──────────────────────────────────────────────┐[✓] Add Python 3 .x to PATH ← 务必勾选! │
🅰️ 方案一:PyCharm 配置 Python 环境 PyCharm 是程序员为程序员设计的开发环境,提供您进行高效 Python 开发所需的所有工具。4
第一步:下载 PyCharm 自 2025.3 起,PyCharm 已整合为统一产品(不再区分 Community 和 Professional 两个独立安装包)。核心功能免费,试用结束后可无缝退回免费模式。初学者和专业开发者都建议直接下载最新版即可。1
🔗 官网下载地址:https://www.jetbrains.com/pycharm/download/
1 2 3 4 5 6 7 8 9 ┌──────────────────────────────────────────────┐/ macOS / Linux │ │
第二步:安装 PyCharm 双击打开安装包 → 点击下一步 → 选择安装位置 → 勾选桌面快捷方式等选项 → 点击安装 → 点击完成。5
安装过程中建议勾选以下选项:
✅ Create Desktop Shortcut(创建桌面快捷方式)
✅ Add “Open Folder as Project”(右键添加 “以项目方式打开” 选项)
✅ Add to PATH(添加到环境变量)
text
1 2 3 4 5 6 7 8 9 ┌──────────────────────────────────────────────────┐Options : │64 -bit launcher │Add "Open Folder as Project" │with PyCharm │Add launchers dir to the PATH │
第三步:首次启动 & 初始设置 返回桌面,双击图标打开软件 → 勾选同意协议 → 点击 Customize 进行初步设置 → 点击 Color Theme 设置主题颜色 → 点击 IDE Font 设置字号大小。5
安装中文插件(可选): 点击 Plugins,搜索并安装 “Chinese” 汉语插件。插件安装完成后重启软件,界面即变成中文界面。5
1 2 3 4 5 6 7 8 9 10 11 12 13 ┌──────────────────────────────────────────────────────┐to PyCharm │ │New Project │ │Open │ │Get from VCS │ │
第四步:新建项目 & 配置 Python 解释器 点击 “新建项目” → 选择项目保存文件夹 → 选择 “自定义环境 - Select Existing(已存在环境)” → 类型可选择 Conda 或 System Interpreter → 点击创建。5
方式 A:使用系统解释器(最简单)
点击 New Project
在 Python Interpreter 区域选择 Previously configured interpreter
点击右侧 ...
选择 System Interpreter → 浏览找到 Python 安装路径(如 D:\Python310\python.exe)
点击 OK → Create
方式 B:使用虚拟环境(推荐)
点击 New Project
选择 New environment using Virtualenv
设置项目路径和虚拟环境路径
Base interpreter 选择已安装的 Python
点击 Create
1 2 3 4 5 6 7 8 9 10 11 12 13 14 15 ┌──────────────────────────────────────────────────────────┐
第五步:运行第一个程序 在项目中创建 .py 文件,输入 print("hello world"),运行一下试试看!5
右键 → Run ‘hello’ ,或使用快捷键 Shift + F10
1 2 print ("Hello, World! 🎉" )
1 2 3 4 5 ┌────────────────────────────────────────┐exit code 0 │
💡 PyCharm 常见问题:配置 Conda 环境 在 File → Settings 里面打开 PyCharm 的 Setting,点 Project → Python Interpreter,点右上角齿轮 → Show All,可以看到 PyCharm 识别到的所有环境。6
如果新版本 PyCharm 未能自动识别 Anaconda,需要手动指定路径。一开始指定 D:\Anaconda3\Scripts\conda.exe 可能无法识别已创建的 conda 环境,需配置为路径 D:\Anaconda3\Library\bin\conda.bat。6
📺 B站 PyCharm 教程视频推荐:
🅱️ 方案二:VSCode 配置 Python 环境 Visual Studio Code(简称 VSCode)凭借其轻量级、高扩展性和强大的社区支持,已成为开发者首选的编辑器之一。7
第一步:下载安装 VSCode VSCode 安装很简单,打开官网 https://code.visualstudio.com/,下载软件包,一步步安装即可。安装过程注意安装路径设置、环境变量默认自动添加到系统中。[8](https://www.runoob.com/python3/python-vscode-setup.html)
安装时建议勾选所有选项 :
✅ 添加到 PATH
✅ 注册为文件编辑器
✅ 添加右键 “Open with Code” 菜单
text
1 2 3 4 5 6 7 8 9 10 ┌──────────────────────────────────────────────────────┐Select Additional Tasks: │Create a desktop icon │Add "Open with Code" action (file context) │Add "Open with Code" action (folder context) │as editor for supported types │Add to PATH │
第二步:安装 Python 扩展 VSCode 本身并不直接支持 Python 开发,但可以通过安装插件来实现。在 VS Code 的插件市场搜索 “Python”,安装由微软官方维护的 Python 扩展。该插件提供了代码智能补全、调试支持、Jupyter Notebook 集成等核心功能。7
操作步骤:
打开 VSCode
点击左侧 扩展图标 (或按 Ctrl+Shift+X)
搜索 “Python”
安装由 Microsoft 发布的 Python 扩展
(推荐)同时安装 Pylance 扩展(更好的智能提示)
text
1 2 3 4 5 6 7 8 9 10 11 12 13 14 15 16 17 18 ┌──────────────────────────────────────────────────────────────┐Install ] │ │Install ] │ │Jupyter │ │Jupyter notebook support │ │Install ] │ │
推荐安装的插件清单:
插件名称
作者
用途
Python
Microsoft
Python 核心支持
Pylance
Microsoft
高级智能提示
Jupyter
Microsoft
Notebook 支持
Python Indent
Kevin Rose
自动缩进
autoDocstring
Nils Werner
自动生成文档注释
Chinese (Simplified)
Microsoft
中文汉化
第三步:选择 Python 解释器 安装完插件后,打开 Python 文件会自动提示选择 Python 解释器。也可以通过 Ctrl+Shift+P 打开命令面板,输入 “Select Interpreter” 来选择需要的解释器。9
具体操作有两种方式:一是直接点击界面右下角的 Python 环境切换图标;二是通过组合键 Ctrl+Shift+P 调出命令面板,输入 “Python: 选择解释器” 或 “Python: Select Interpreter” 进行选择。10
text
1 2 3 4 5 6 7 8 9 10 11 12 13 14 15 16 17 ┌──────────────────────────────────────────────────────────────┐3.10 .2 ('bas e': conda) │ │ │ │ C:\U sers\x xx\a naconda3\p ython.exe │ │ │ │ │ │ │ │ 🐍 Python 3.10.2 64-bit │ │ │ │ D:\P ython310\p ython.exe │ │ │ │ │ │ │ │ 🔧 Enter interpreter path... │ │ │ └──────────────────────────────────────────────────────┘ │ │ │ │ 状态栏右下角:[ Python 3.10.2 64-bit ] ← 点击可切换 │ └──────────────────────────────────────────────────────────────┘
第四步:创建虚拟环境(推荐) 打开命令面板(⇧⌘P / Ctrl+Shift+P),开始键入 “Python: Create Environment” 命令进行搜索,然后选择该命令。该命令显示环境类型列表:Venv 或 Conda。11
或者使用终端命令:
Bash
1 2 3 4 5 6 7 8 .venv .venv \Scripts\activate.venv/bin/activate
完成创建后,务必在解释器选择器中选择新建的虚拟环境(路径通常为项目目录/.venv/Scripts/python),并重启 VS Code 使环境配置完全生效。10
text
1 2 3 4 5 6 7 8 9 10 ┌──────────────────────────────────────────────┐\myproject> python -m venv .venv │\myproject> .venv\Scripts\activate │\myproject> python --version │3.10 .2 │\myproject> pip install numpy │
第五步:运行第一个 Python 程序
在项目中新建 hello.py 文件
输入代码:print("Hello, VSCode! 🎉")
右上角点击 ▶ 运行按钮 ,或按 Ctrl+F5
text
1 2 3 4 5 6 7 8 9 10 11 12 ┌──────────────────────────────────────────────────────────────┐py ────────────────────────────────────────┐ ▶ │1 │ print ("Hello, VSCode! 🎉" ) │ │python hello.py │ │
📺 B站 VSCode 配置 Python 教程视频推荐:
📊 PyCharm vs VSCode 对比
对比项
PyCharm
VSCode
类型
专业 Python IDE
轻量级通用编辑器
体积
~1GB+
~200MB
启动速度
较慢
快
Python 支持
开箱即用
需安装插件
虚拟环境管理
内置图形化管理
通过命令面板操作
智能补全
非常强大
安装 Pylance 后很好
适合人群
Python 专注开发者
多语言/轻量开发者
价格
核心免费,高级功能付费
完全免费
🎬 B站推荐视频汇总
⚠️ 常见问题 FAQ Q1:python 命令提示 “不是内部或外部命令”
原因:安装时未勾选 “Add to PATH”
解决:手动添加 Python 路径到系统环境变量,或重新安装并勾选
Q2:PyCharm 找不到 Python 解释器 在 File → Settings → Project → Python Interpreter 中手动添加解释器路径。6
Q3:VSCode 运行 Python 没有输出
确认已安装 Python 扩展
确认右下角已选择正确的 Python 解释器
使用 Ctrl+Shift+P → “Python: Select Interpreter” 重新选择
Q4:pip 下载速度慢 更换为国内镜像源:
Bash
1 pip install numpy -i https:
💡 小贴士: 对于初学者来说,PyCharm 仍是不二的选择。3 而 VSCode 作为轻量级且功能强大的代码编辑器,占用系统资源少,启动速度快,即便是配置较低的计算机也能轻松驾驭。12 建议根据个人需求选择合适的工具!
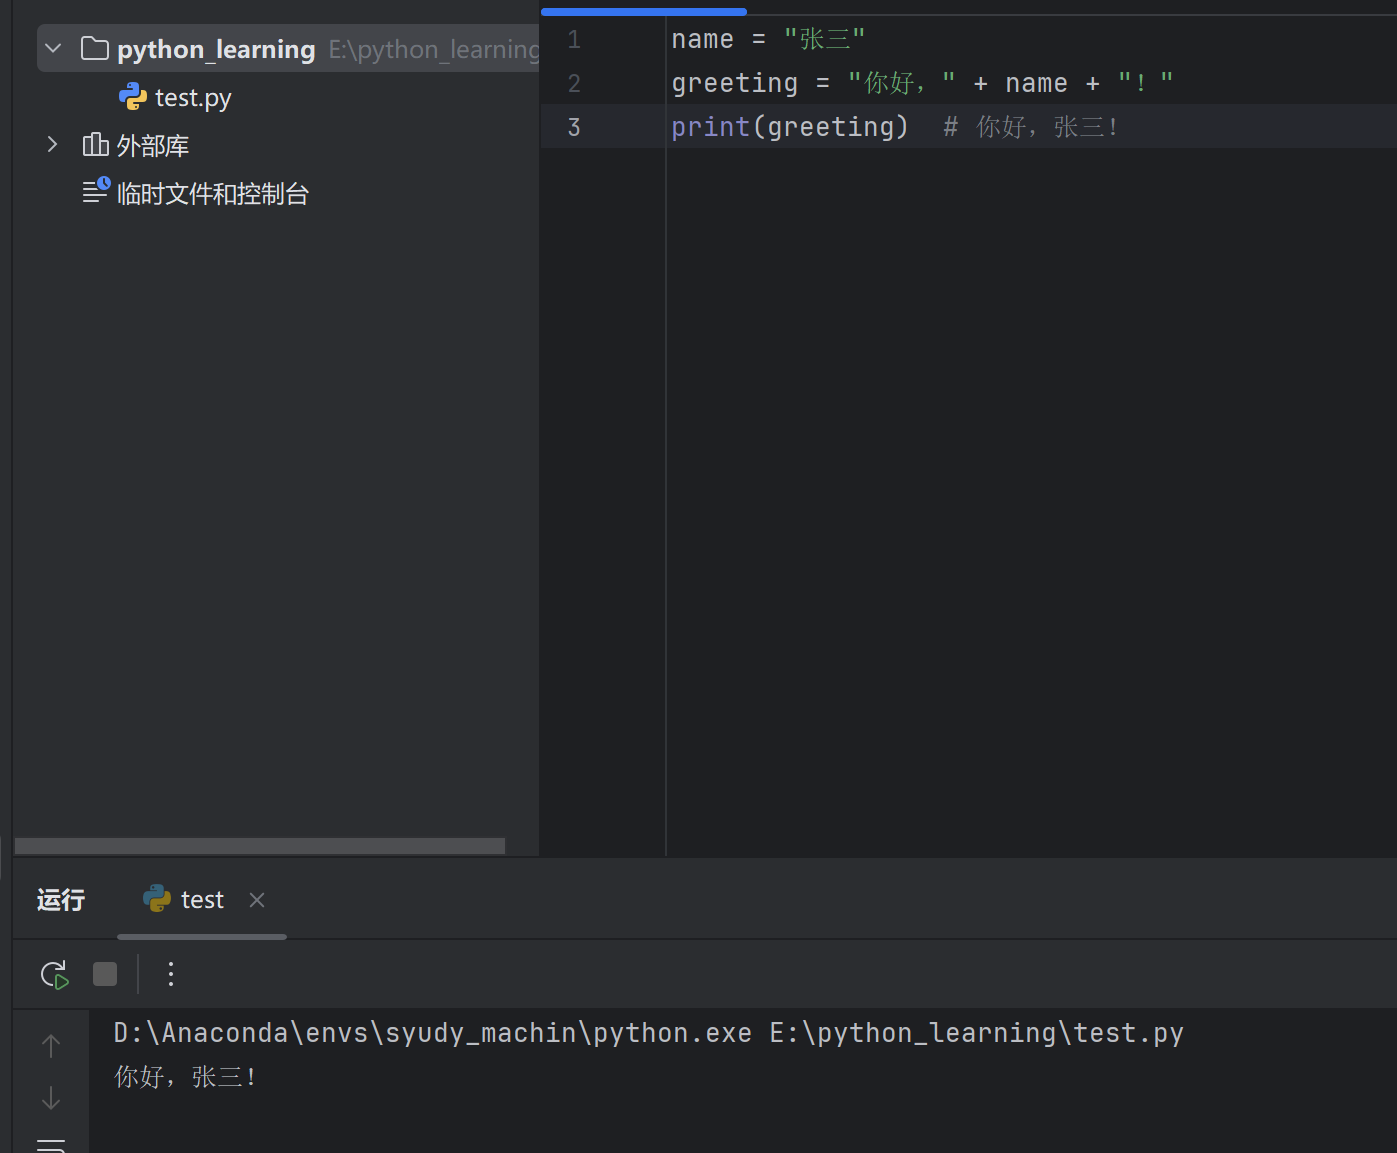
三、Python 字符串拼接与格式化 3.1 字符串拼接 1. 使用 + 号拼接 最基础的方式,将两个字符串直接相连:
1 2 3 name = "张三" "你好," + name + "!"
⚠️ 注意: + 号不能直接拼接字符串和数字,需要先用 str() 转换。
1 2 3 age = 18 # print("我今年" + age + "岁" ) ❌ 报错 print ("我今年" + str (age) + "岁" ) # ✅ 我今年18 岁
2. 使用逗号(print 中直接传多个参数) 1 2 print ("我叫" , "张三" , "今年" , 18, "岁" )
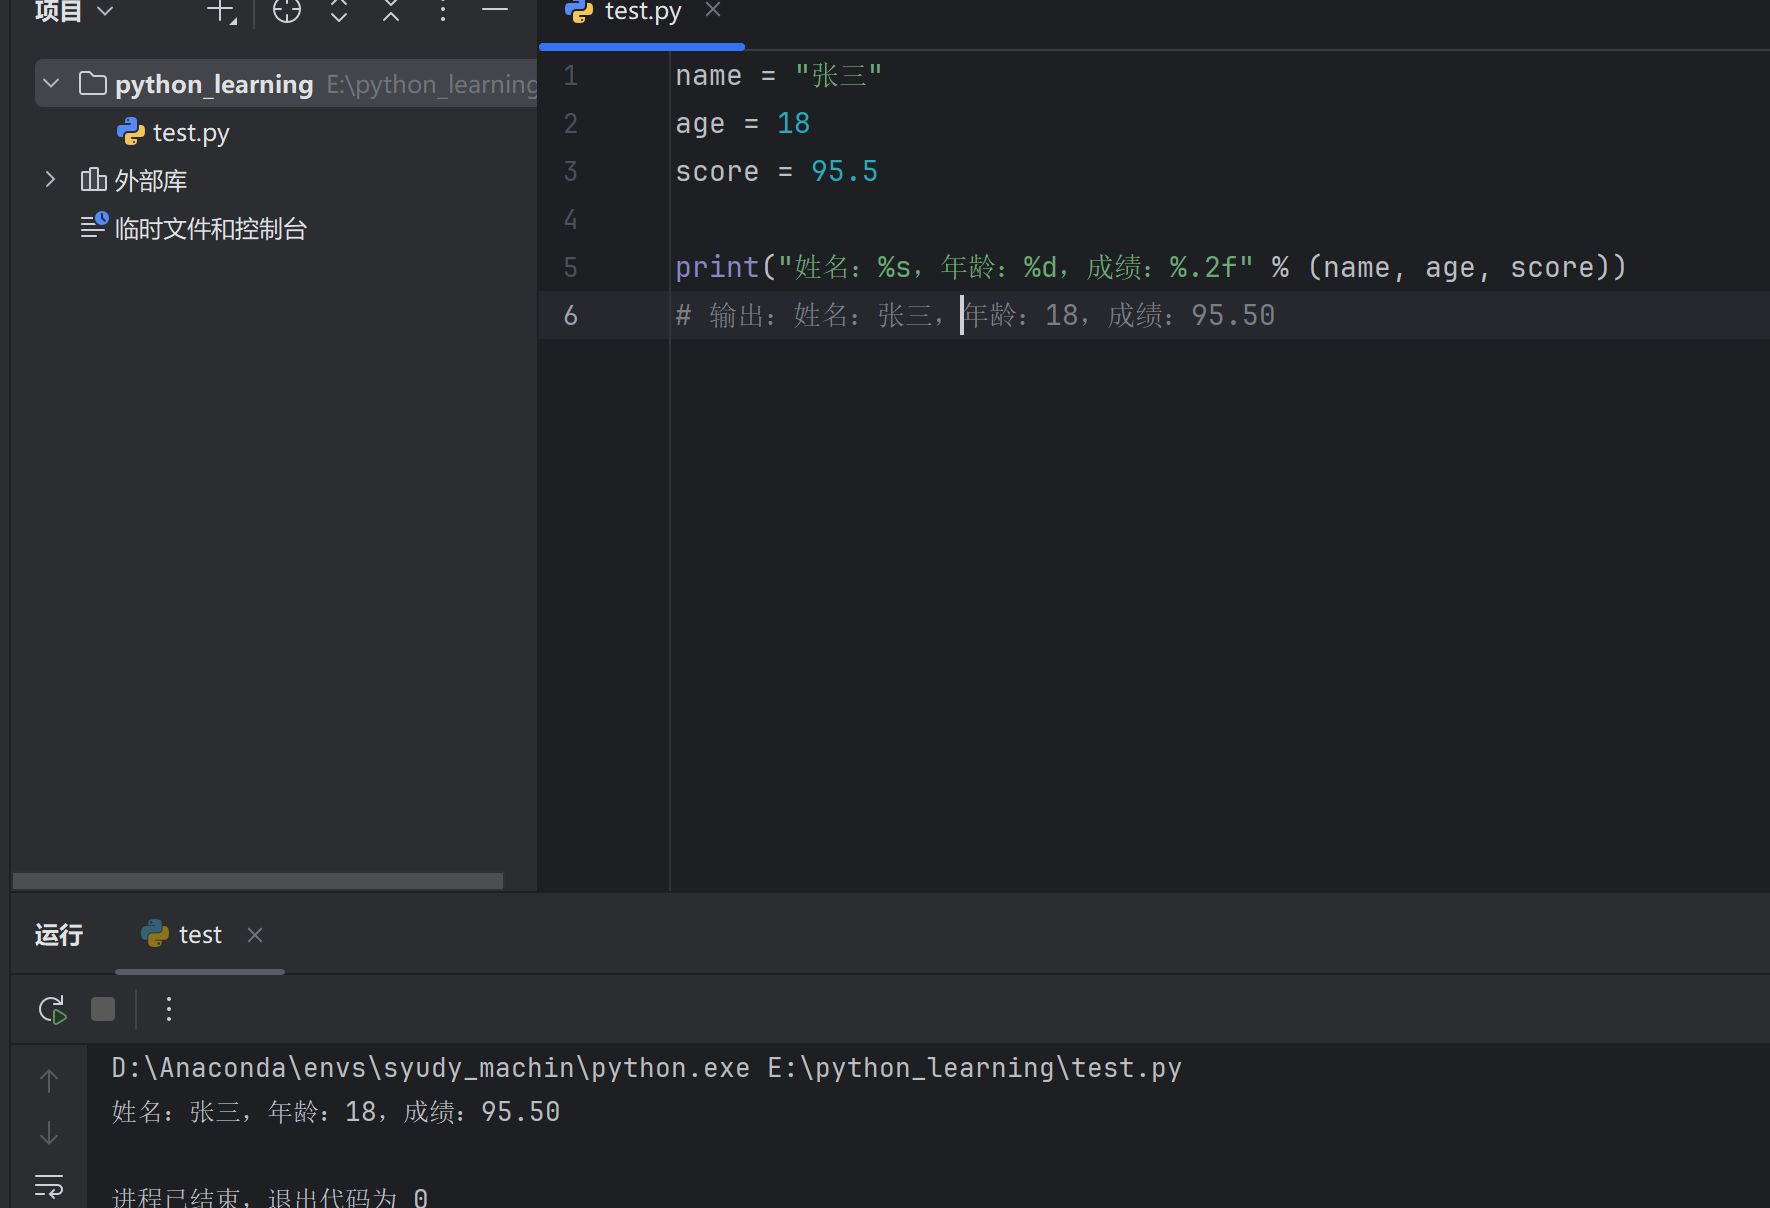
3.2 占位符格式化(%) 使用 % 进行格式化是 Python 中较经典的方式:
占位符
说明
%s字符串
%d整数
%f浮点数
1 2 3 4 5 6 name = "张三" 18 95.5 print ("姓名:%s ,年龄:%d ,成绩:%f " % (name, age, score))
3.3 精度控制 %f 默认保留 6 位小数,可以通过 %.nf 控制小数位数:
1 2 3 4 pi = 3 .14159265 print ("保留2位:%.2f" % pi) # 保留2 位:3 .14 print ("保留4位:%.4f" % pi) # 保留4 位:3 .1416 (四舍五入)
也可以控制整体宽度 ,格式为 %m.nf(m 为总宽度,n 为小数位数):
1 2 3 4 num = 3 .14 print ("结果:%8.2f" % num) # 结果: 3 .14 (总宽度8 ,右对齐,不足补空格)print ("结果:%08.2f" % num) # 结果:00003 .14 (不足补0 )
对整数也可以控制宽度:
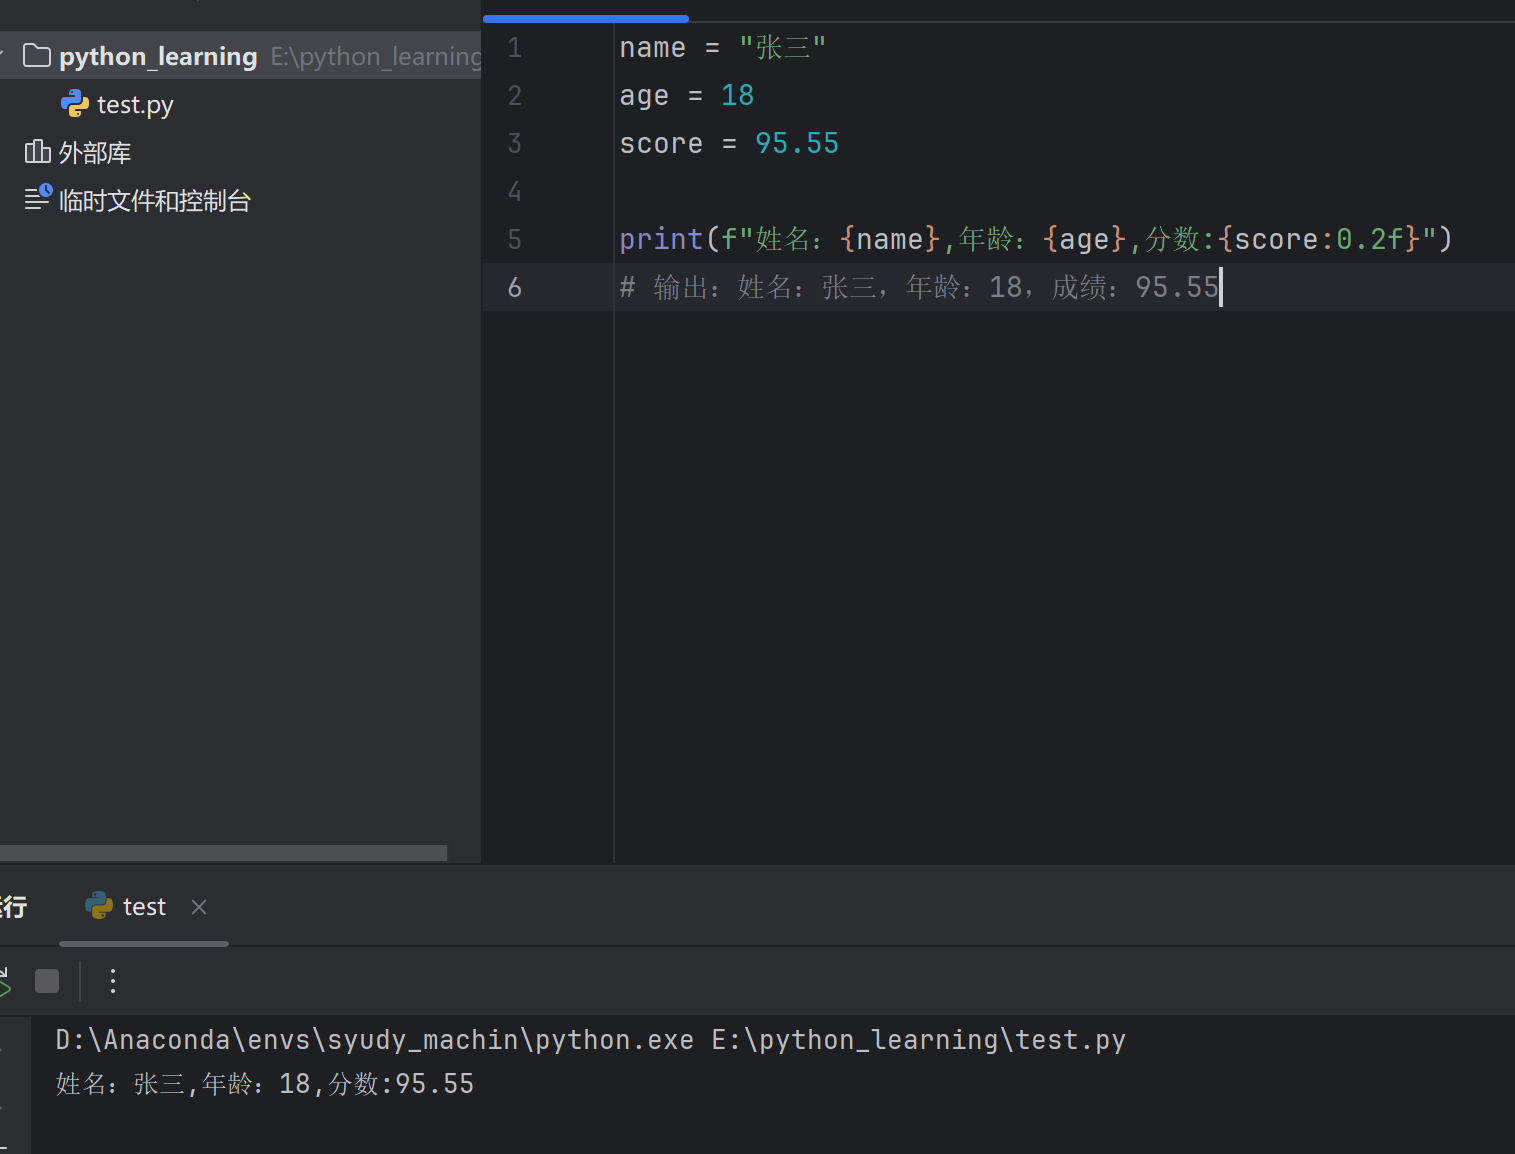
3.4 更推荐的方式:f-string(Python 3.6+) f-string 写法更简洁直观,是目前最推荐 的格式化方式:
1 2 3 4 5 6 name = "张三" 18 95.678 print (f"姓名:{name} ,年龄:{age} ,成绩:{score:.2 f} " )
精度控制同样适用:
1 2 3 4 5 pi = 3 .14159265 print (f"圆周率:{pi:.2f}" ) # 圆周率:3 .14 print (f"圆周率:{pi:10.3f}" ) # 圆周率: 3 .142 (总宽度10 )print (f"百分比:{0.856:.1%}" ) # 百分比:85 .6 %
3.5 小结对比 1 2 3 4 5 6 7 8 9 10 11 name = "张三" 95.5 print ("姓名:" + name + ",成绩:" + str (score))print ("姓名:%s,成绩:%.1f" % (name, score))print (f"姓名:{name} ,成绩:{score:.1 f} " )
💡 建议: 日常开发优先使用 f-string,简洁易读,功能强大。
四、Python 转义字符 4.1 什么是转义字符 转义字符是以反斜杠 \ 开头的特殊字符组合,用于表示一些无法直接输入或有特殊含义的字符。
4.2 常用转义字符
转义字符
说明
\n换行
\t制表符(Tab)
\\反斜杠本身
\'单引号
\"双引号
\r回车
4.3 使用示例 1. 换行符 \n 输出:
2. 制表符 \t 用于对齐输出,相当于按一次 Tab 键:
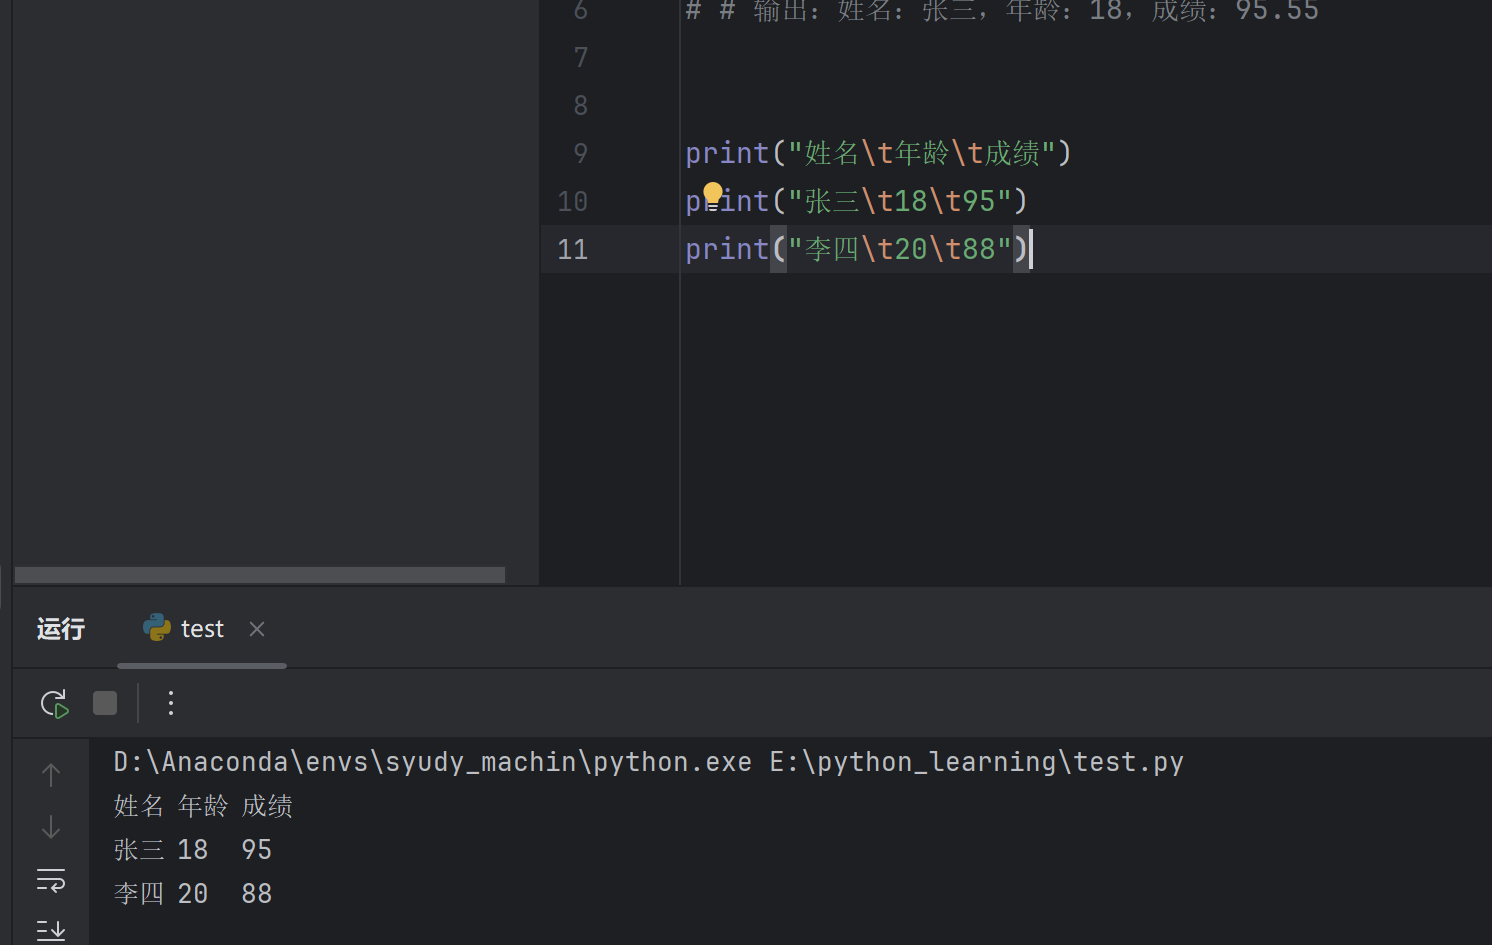
1 2 3 print ("姓名\t年龄\t成绩" ) print ("张三\t18\t95" ) print ("李四\t20\t88" )
输出:
1 2 3 姓名 年龄 成绩 18 95 20 88
3. 输出引号 当字符串中需要包含引号时:
1 2 3 4 5 print ("他说:\"你好!\"" )print ('他说:"你好!"' )
输出:
4. 输出反斜杠 反斜杠本身需要转义:
1 print ("文件路径:C:\\Users\\Desktop" )
输出:
4.4 原始字符串(取消转义) 在字符串前加 r 或 R,表示原始字符串 ,所有转义字符失效:
1 2 3 4 5 print ("C:\new\test" ) print (r"C:\new\test" )
输出对比:
💡 应用场景: 写文件路径、正则表达式时常用原始字符串。
1 2 path = r"D:\Python\project\data.txt" print (path)
4.5 三引号保留格式 使用三引号 """ 或 ''' 可以保留字符串的原始换行格式:
1 2 3 4 5 text = """这是第一行 这是第二行 这是第三行""" print (text)
输出:
4.6 小结 1 2 3 4 5 6 7 8 print ("换行:第一行\n第二行" )print ("制表:A\tB\tC" )print ("引号:\'单引号\' \"双引号\"" )print ("反斜杠:\\" )print (r"原始字符串:\n \t \\" )
输出:
1 2 3 4 5 6 换行:第一行'单引号' "双引号" \ \n \t \\
💡 记忆技巧: \n = new line(新行),\t = tab(制表),\\ = 一个 \
五、Python 算术运算符 5.1 基本算术运算符
运算符
说明
示例
结果
+加法
3 + 25
-减法
3 - 21
*乘法
3 * 26
/除法
7 / 23.5
//整除(取整)
7 // 23
%取余(取模)
7 % 21
**幂运算
2 ** 38
5.2 使用示例 1. 加减乘除 1 2 3 4 5 6 7 a = 10 3 a + b) a - b) a * b) a / b)
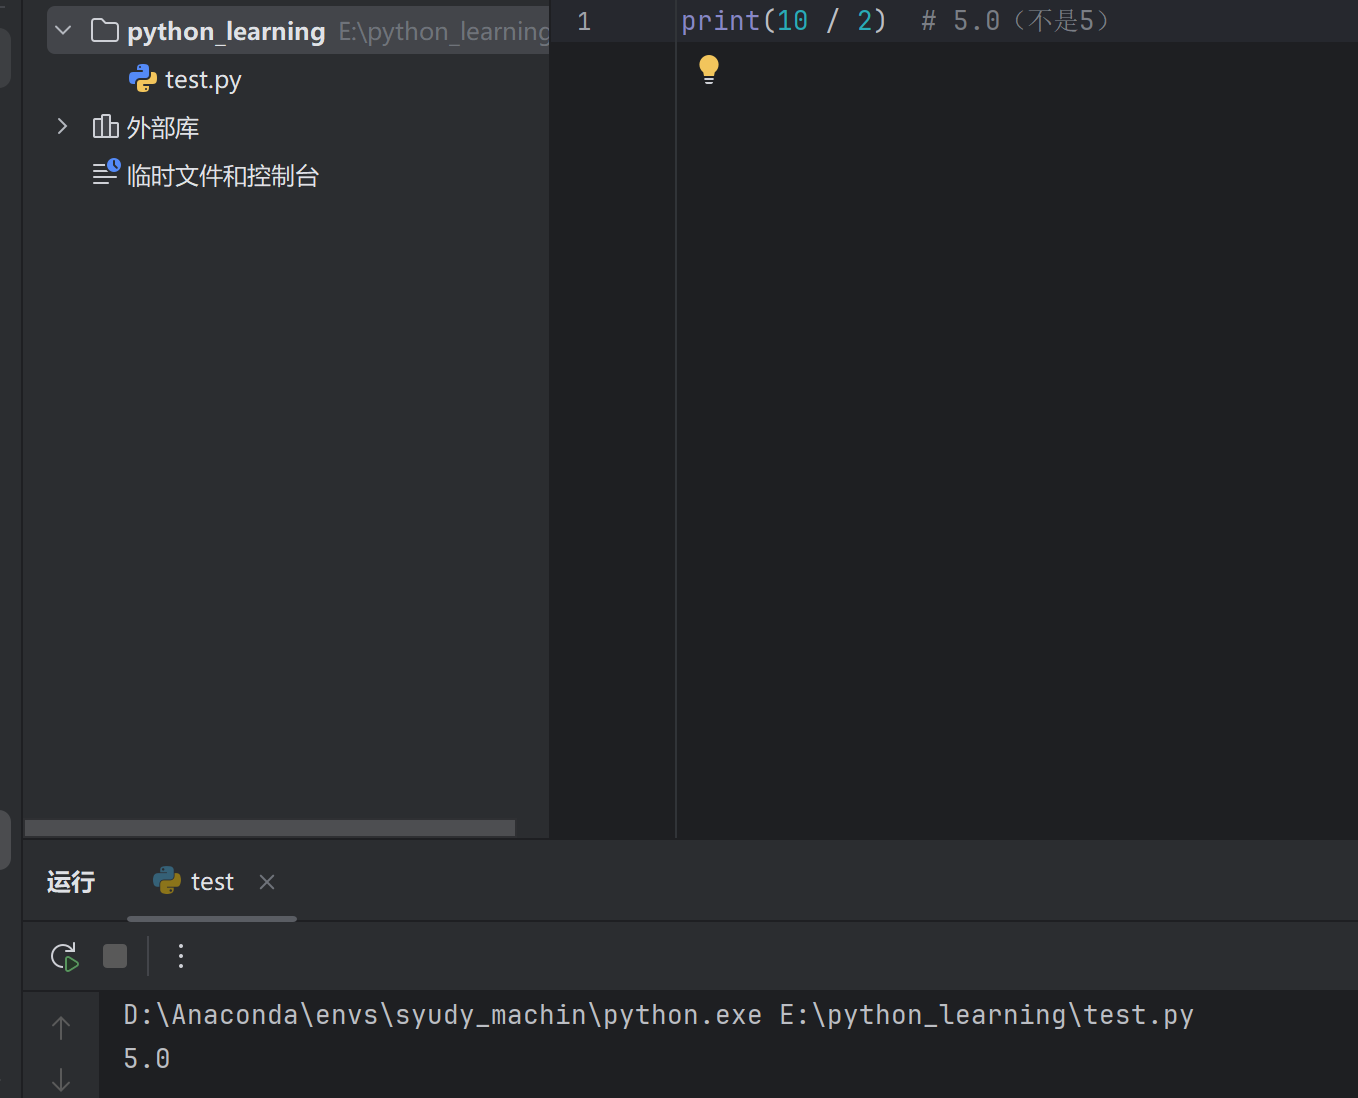
⚠️ 注意: / 除法结果永远是浮点数 ,即使能整除。
1 print (10 / 2 ) # 5 .0 (不是5 )
2. 整除 // 只保留整数部分,舍弃小数:
1 2 3 print (7 // 2 ) # 3 print (10 // 3 ) # 3 print (-7 // 2 ) # -4 (向下取整)
3. 取余 % 获取除法的余数:
1 2 3 print (7 % 2 ) # 1 print (10 % 3 ) # 1 print (9 % 3 ) # 0 (整除时余数为0 )
💡 常见用途: 判断奇偶数、是否整除
1 2 3 4 5 num = 8 if num % 2 == 0 :print ("偶数" )else :print ("奇数" )
4. 幂运算 ** 1 2 3 print (2 ** 3 ) # 8 (2 的3 次方)print (3 ** 2 ) # 9 (3 的平方)print (4 ** 0 .5 ) # 2 .0 (4 的开方)
5.3 运算符优先级 从高到低排列:
优先级
运算符
高
**
↓
* / // %
低
+ -
1 2 3 4 print (2 + 3 * 4 ) # 14 (先乘后加)print (2 ** 3 * 2 ) # 16 (先幂后乘:8 * 2 )print ((2 + 3 ) * 4 ) # 20 (括号优先)
💡 建议: 复杂运算时多用括号 明确优先级,增强可读性。
5.4 复合赋值运算符 将运算与赋值结合,简化代码:
运算符
等价写法
+=a = a + b
-=a = a - b
*=a = a * b
/=a = a / b
//=a = a // b
%=a = a % b
**=a = a ** b
1 2 3 4 5 6 7 8 9 10 num = 10 num += 5 # num = 10 + 5 print (num) # 15 num *= 2 # num = 15 * 2 print (num) # 30 num **= 2 # num = 30 ** 2 print (num) # 900
5.5 小结 1 2 3 4 5 6 7 8 9 a, b = 17 , 5 print (f"加法:{a} + {b} = {a + b} " ) print (f"减法:{a} - {b} = {a - b} " ) print (f"乘法:{a} * {b} = {a * b} " ) print (f"除法:{a} / {b} = {a / b} " ) print (f"整除:{a} // {b} = {a // b} " ) print (f"取余:{a} % {b} = {a % b} " ) print (f"幂运算:{a} ** 2 = {a ** 2 } " )
输出:
1 2 3 4 5 6 7 加法:17 + 5 = 22 5 = 12 5 = 85 5 = 3.4 5 = 3 5 = 2 2 = 289
六、Python 逻辑运算符 6.1 三种逻辑运算符
运算符
说明
示例
and与(两者都为真)
True and False → False
or或(至少一个为真)
True or False → True
not非(取反)
not True → False
6.2 and(与) 规则: 两边都为 True,结果才为 True
1 2 3 4 print (True and True ) # True print (True and False ) # False print (False and True ) # False print (False and False ) # False
实际应用:
1 2 3 4 5 6 age = 20 score = 85 if age >= 18 and score >= 60 :print ("成年且及格" )
6.3 or(或) 规则: 只要有一个为 True,结果就为 True
1 2 3 4 print (True or True ) print (True or False ) print (False or True ) print (False or False )
实际应用:
1 2 3 4 5 day = "周六" if day == "周六" or day == "周日" :"休息日" )
6.4 not(非) 规则: 取反,真变假,假变真
1 2 print (not True ) # False print (not False ) # True
实际应用:
1 2 3 4 is_raining = False if not is_raining :print ("可以出门" )
6.5 运算符优先级 从高到低:not > and > or
1 2 3 4 5 6 7 print (not True or False ) print (not (True or False )) print (True or False and False ) print ((True or False ) and False )
💡 建议: 多用括号明确优先级,避免混淆。
6.6 短路运算 Python 逻辑运算存在”短路”特性:
and 短路 如果第一个为 False,直接返回,不再判断第二个:
1 2 print (False and print ("不会执行" )) # False
or 短路 如果第一个为 True,直接返回,不再判断第二个:
1 2 print (True or print ("不会执行" )) # True
6.7 逻辑运算符与数值 逻辑运算符也可用于非布尔值:
1 2 3 4 5 6 7 8 print (3 and 5 ) # 5 print (0 and 5 ) # 0 print (3 or 5 ) # 3 print (0 or 5 ) # 5 print (0 or "" ) # ""
💡 假值包括: False、0、""、None、[]、{}
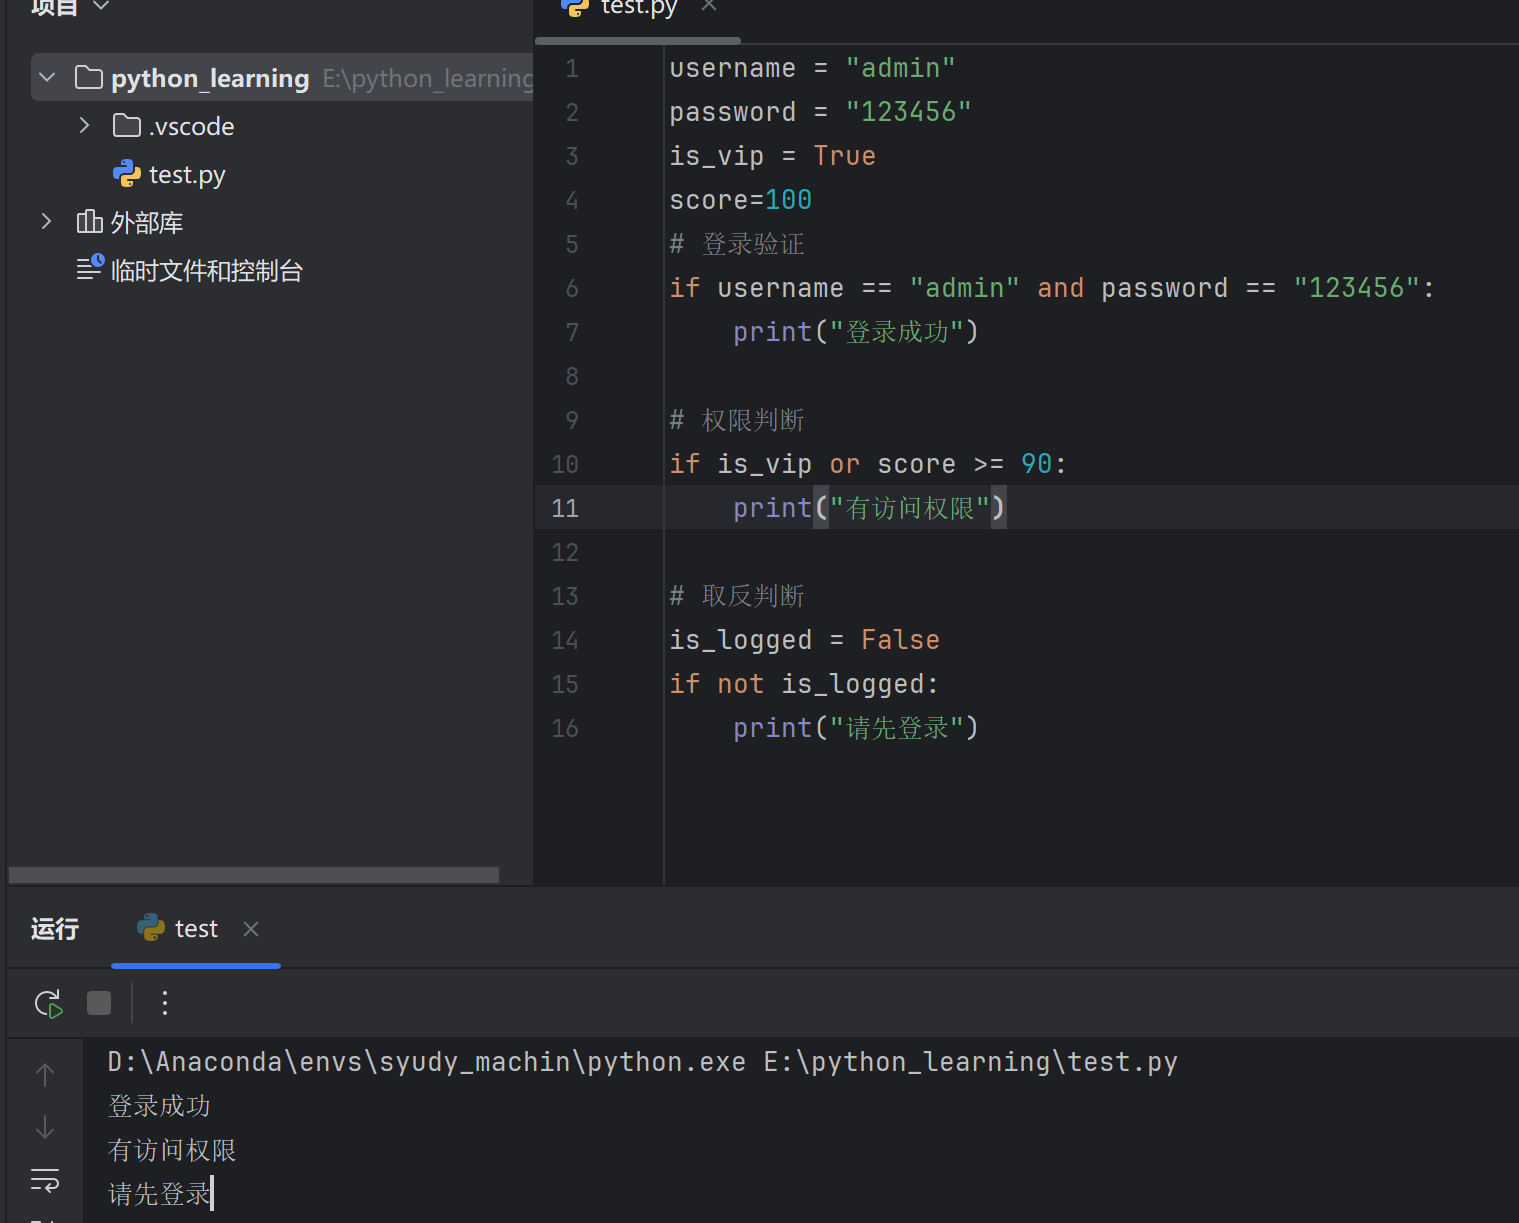
6.8 综合示例 1 2 3 4 5 6 7 8 9 10 11 12 13 14 15 16 username = "admin" "123456" True if username == "admin" and password == "123456" :print ("登录成功" )if is_vip or score >= 90:print ("有访问权限" )False if not is_logged:print ("请先登录" )
6.9 小结 1 2 3 4 5 6 7 8 9 10 a, b = True , False print (f"and:{a} and {b} = {a and b} " ) print (f"or:{a} or {b} = {a or b} " ) print (f"not:not {a} = {not a} " ) 5 , 10 , 3 and y > zprint (f"5 < 10 and 10 > 3 = {result} " )
输出:
1 2 3 4 and :True and False = False or :True or False = True not :not True = False 5 < 10 and 10 > 3 = True
七、Python 进制表示与转换 7.1 四种进制表示
进制
前缀
示例
说明
二进制
0b 或 0B0b1010只有 0 和 1
八进制
0o 或 0O0o17数字 0-7
十进制
无
100默认方式
十六进制
0x 或 0X0x1F数字 0-9,字母 A-F
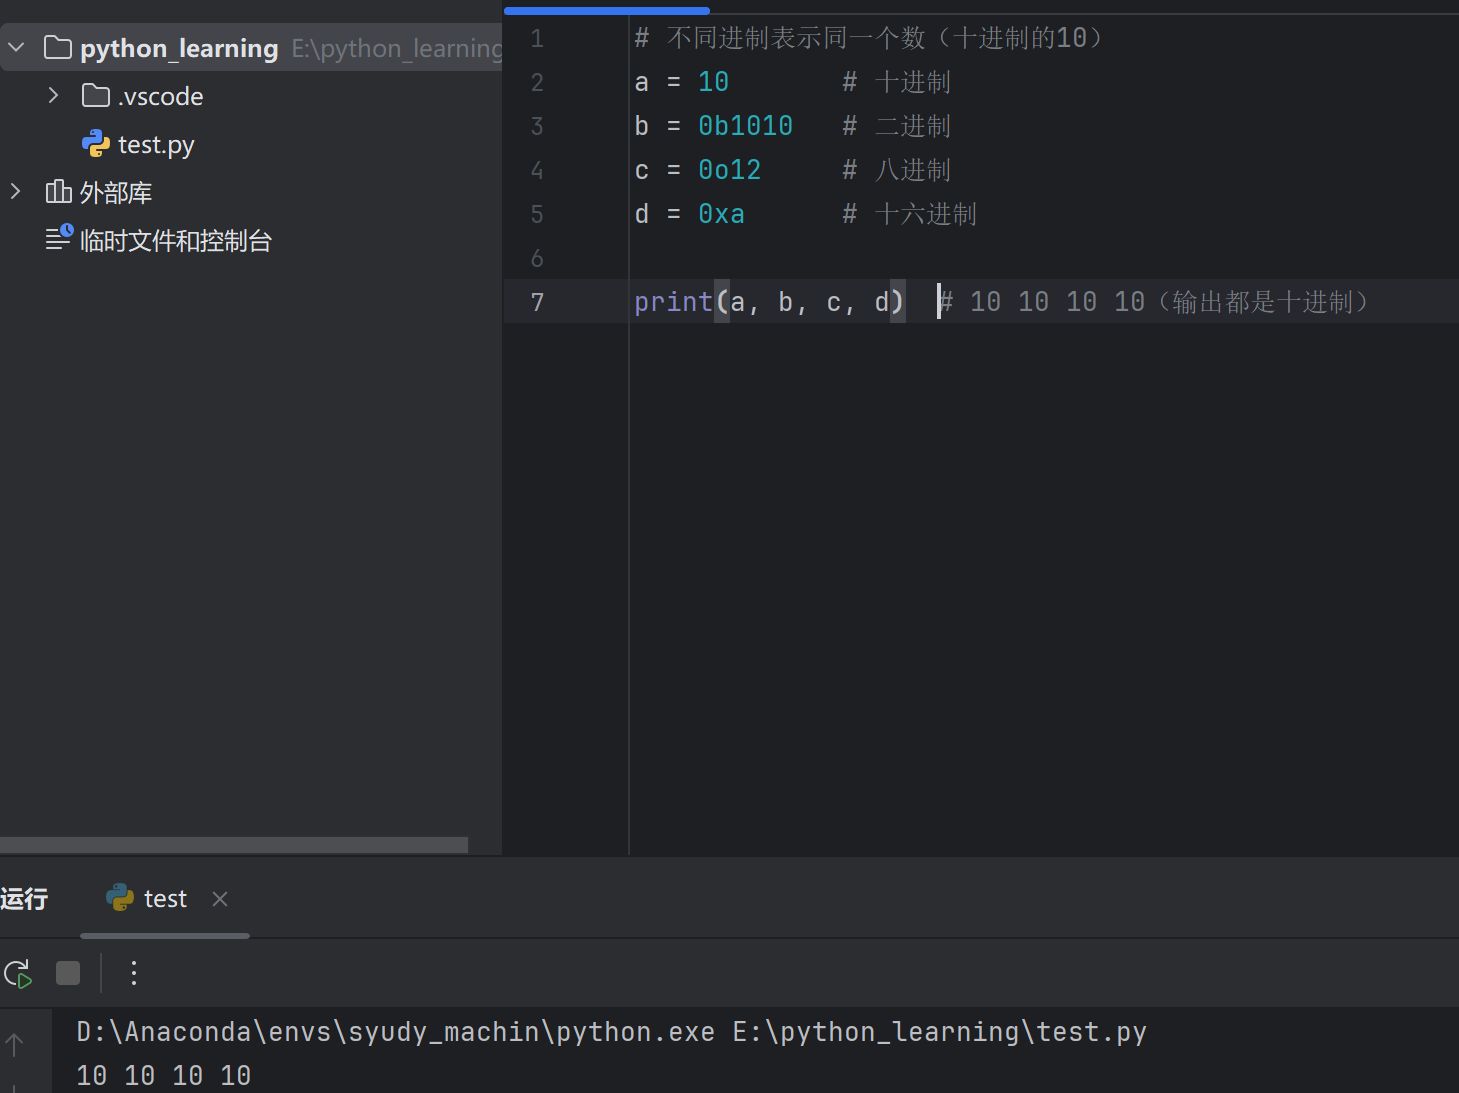
7.2 进制表示示例 1 2 3 4 5 6 7 # 不同进制表示同一个数(十进制的10 )10 # 十进制0b1010 # 二进制0o12 # 八进制0xa # 十六进制print (a, b, c, d) # 10 10 10 10 (输出都是十进制)
验证它们相等:
7.3 进制转换函数 其他进制 → 十进制 直接使用或参与运算,Python 自动转为十进制:
1 2 3 print (0b1010 ) # 10 print (0o17 ) # 15 print (0xFF ) # 255
十进制 → 其他进制
函数
说明
返回类型
bin()转二进制
字符串
oct()转八进制
字符串
hex()转十六进制
字符串
1 2 3 4 5 num = 100 print (bin(num )) # 0b1100100 print (oct(num )) # 0o144 print (hex(num )) # 0x64
7.4 int() 万能转换 int(x, base) 可以将任意进制字符串 转为十进制:
1 2 3 4 5 6 7 8 9 10 11 12 # 二进制字符串 → 十进制 print (int ("1010" , 2 )) # 10 # 八进制字符串 → 十进制 print (int ("17" , 8 )) # 15 # 十六进制字符串 → 十进制 print (int ("FF" , 16 )) # 255 # 带前缀也可以 print (int ("0b1010" , 2 )) # 10 print (int ("0xFF" , 16 )) # 255
7.5 去掉进制前缀 转换结果带前缀,若需要去掉:
1 2 3 4 5 6 7 8 9 10 11 num = 255 print (bin (num)[2 :]) print (hex (num)[2 :]) print (format (num, 'b' )) print (format (num, 'o' )) print (format (num, 'x' )) print (format (num, 'X' ))
7.6 补零对齐 1 2 3 4 5 6 7 8 9 num = 10 print (format (num, '08b' )) print (format (num, '04x' )) print (f"{num:08b} " ) print (f"{num:04X} " )
7.7 进制转换速查表 1 2 3 4 5 6 7 8 9 10 11 12 13 十进制 10 bin (10 ) ──→ '0b1010' 二进制oct (10 ) ──→ '0o12' 八进制hex (10 ) ──→ '0xa' 十六进制'1010' int ('1010' , 2 ) ──→ 10 十进制'12' int ('12' , 8 ) ──→ 10 十进制'a' int ('a' , 16 ) ──→ 10 十进制
7.8 综合示例 1 2 3 4 5 6 7 8 9 10 11 12 13 200 print (f"十进制:{num} " )print (f"二进制:{bin (num)} → {num:b} " )print (f"八进制:{oct (num)} → {num:o} " )print (f"十六进制:{hex (num)} → {num:X} " )print (f"\n二进制 '11001000' → {int ('11001000' , 2 )} " )print (f"八进制 '310' → {int ('310' , 8 )} " )print (f"十六进制 'C8' → {int ('C8' , 16 )} " )
输出:
1 2 3 4 5 6 7 8 十进制:200 0b11001000 → 11001000 0o310 → 310 0xc8 → C811001000 ' → 200 310 ' → 200 200
7.9 小结
需求
方法
十进制 → 二进制
bin(num)
十进制 → 八进制
oct(num)
十进制 → 十六进制
hex(num)
任意进制 → 十进制
int(str, base)
去前缀 / 补零
format(num, '08b') 或 f-string
💡 记忆技巧: bin=binary, oct=octal, hex=hexadecimal
八、Python 输入输出语句 8.1 输出语句 print() 1. 基本输出 1 2 3 print ("Hello, World!" ) print (100 ) print (3.14 )
2. 输出多个值 1 2 print ("姓名" , "年龄" , "成绩" ) # 姓名 年龄 成绩(默认空格分隔)print ("张三" , 18 , 95 .5 ) # 张三 18 95 .5
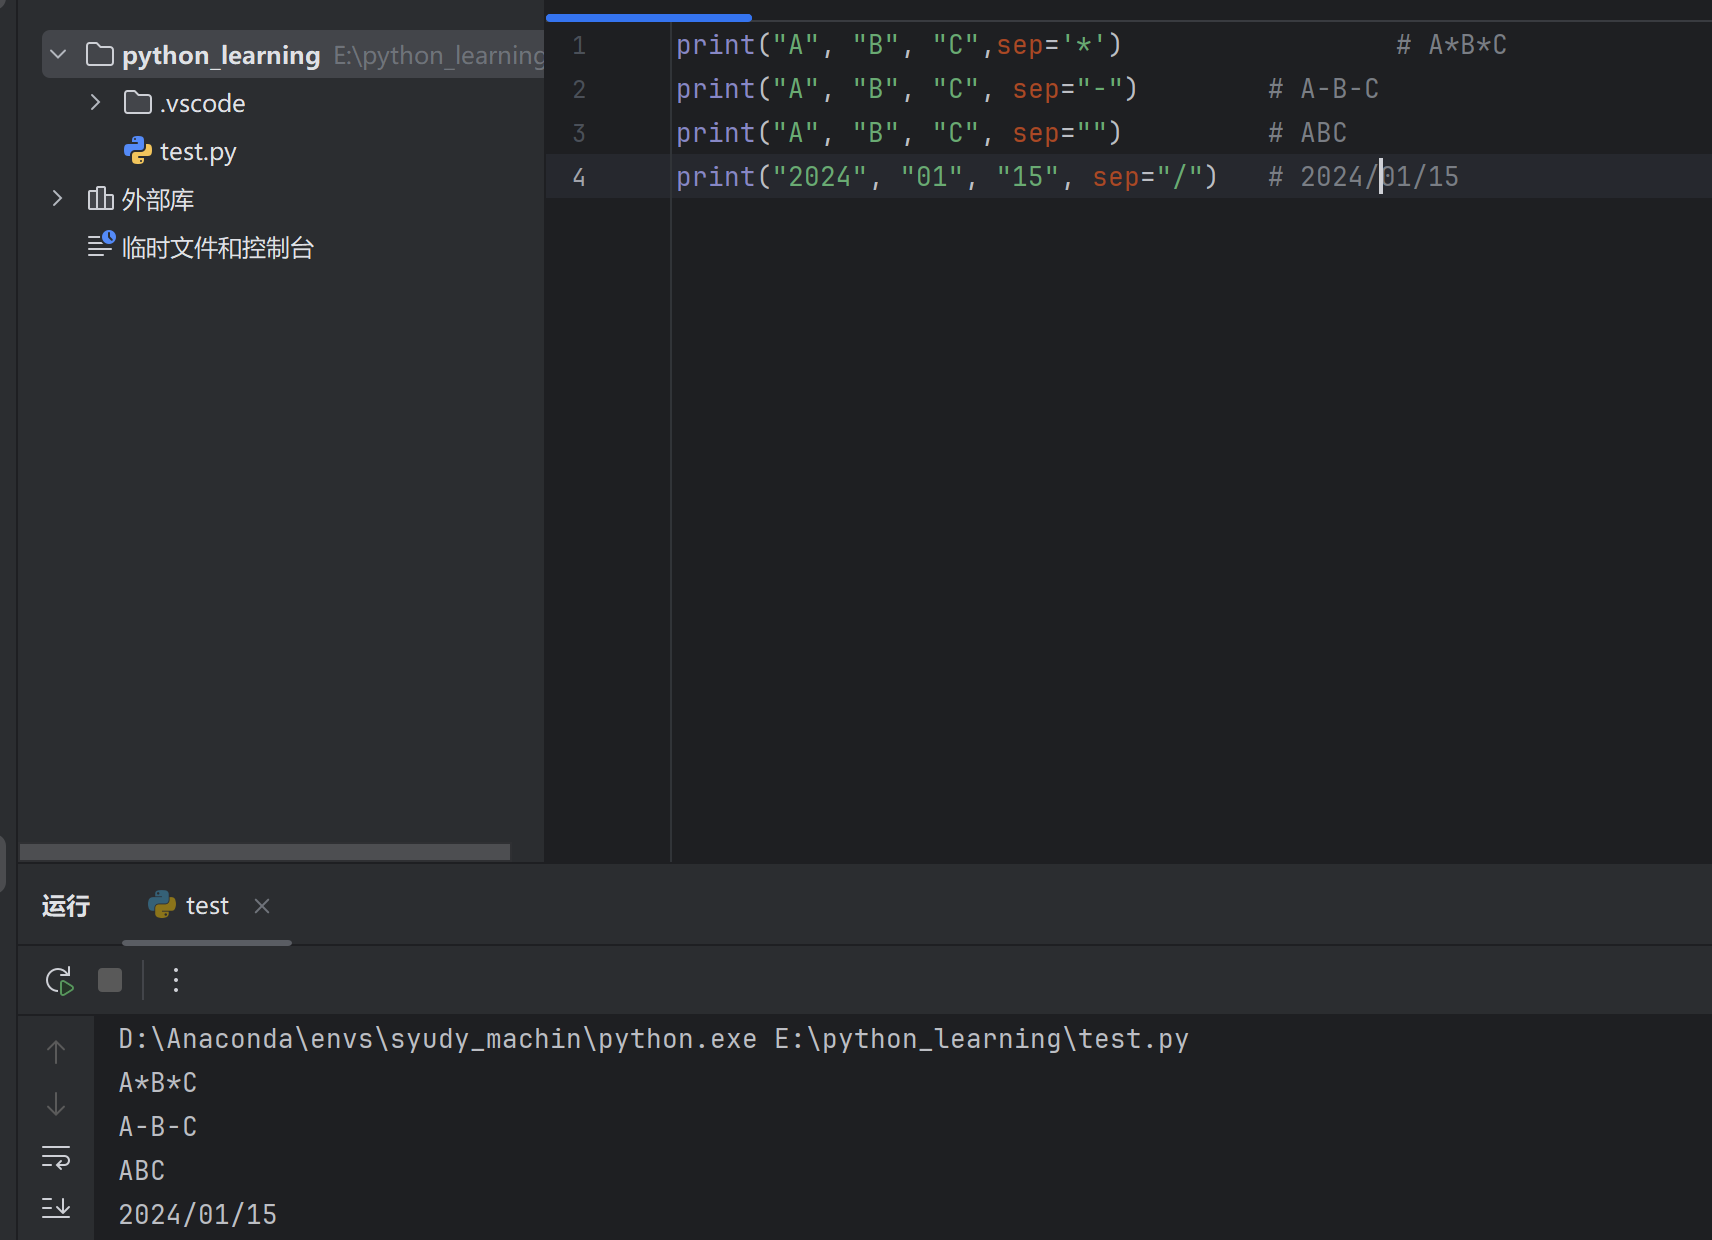
3. sep 参数(自定义分隔符) 1 2 3 4 print ("A" , "B" , "C" ) print ("A" , "B" , "C" , sep="-" ) print ("A" , "B" , "C" , sep="" ) print ("2024" , "01" , "15" , sep="/" )
4. end 参数(自定义结尾) 默认 end="\n" 换行,可修改:
1 2 3 4 5 6 7 8 9 print ("Hello" , end =" " )print ("World" )print ("加载中" , end ="" )print ("..." , end ="" )print ("完成" )
5. 格式化输出(回顾) 1 2 3 4 5 6 7 8 name = "张三" 95.5 print (f"姓名:{name} ,成绩:{score:.1 f} " )print ("姓名:%s,成绩:%.1f" % (name, score))
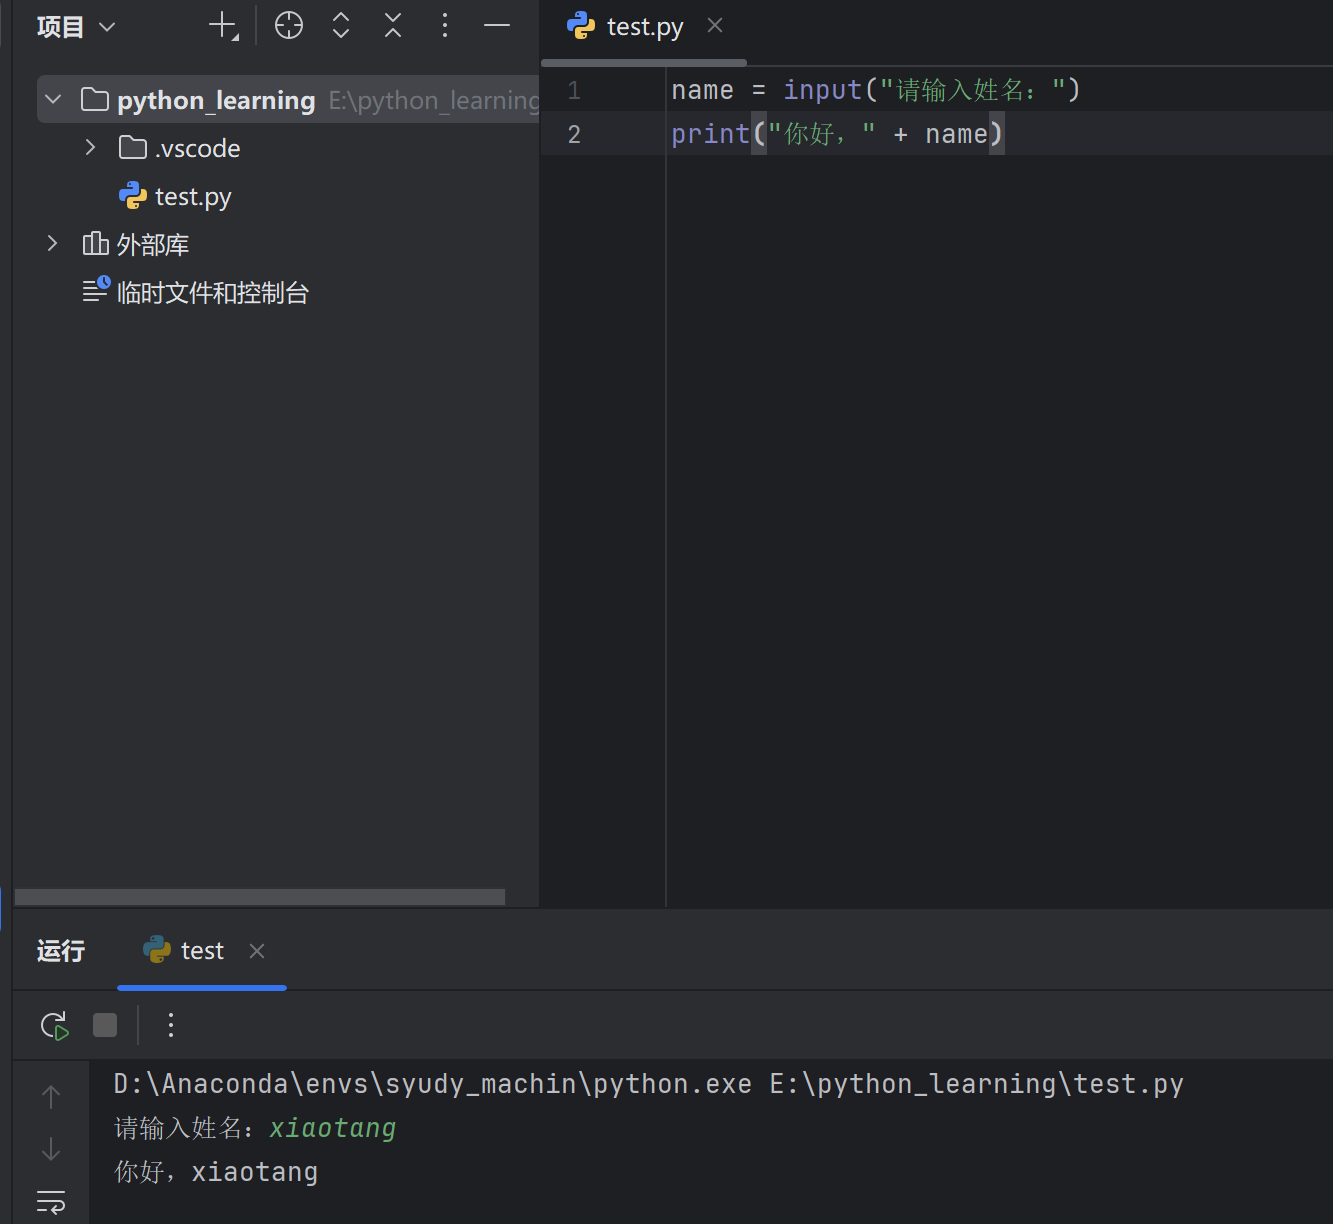
1. 基本输入 1 2 name = input ("请输入姓名:" )print ("你好," + name )
运行效果:
⚠️ 重点: input() 返回值永远是字符串
1 2 age = input("请输入年龄:" )type (age )) # <class 'str'>
3. 类型转换 输入数字时需要转换类型:
1 2 3 4 5 6 7 int (input ("请输入年龄:" ))print (f"明年你 {age + 1 } 岁" )float (input ("请输入价格:" ))print (f"打折后:{price * 0.8 } " )
4. 一次输入多个值 1 2 3 4 5 6 7 8 9 10 11 12 13 input ("姓名:" )input ("年龄:" )input ("请输入姓名和年龄(空格分隔):" )print (f"姓名:{name} ,年龄:{age} " )input ("输入两个数:" ).split()int (x), int (y)print (f"和:{x + y} " )
运行效果:
1 2 请输入姓名和年龄(空格分隔):张三 18
5. map 批量转换 输入多个数字时更简洁:
1 2 3 4 5 6 7 map (int , input ("输入两个整数:" ).split())print (f"{a} + {b} = {a + b} " )list (map (float , input ("输入多个数:" ).split()))print (f"平均值:{sum (nums) / len (nums)} " )
8.3 综合示例 示例1:简单计算器 1 2 3 4 5 6 7 num1 = float (input ("输入第一个数:" ))float (input ("输入第二个数:" ))print (f"{num1} + {num2} = {num1 + num2} " )print (f"{num1} - {num2} = {num1 - num2} " )print (f"{num1} × {num2} = {num1 * num2} " )print (f"{num1} ÷ {num2} = {num1 / num2:.2 f} " )
示例2:学生信息录入 1 2 3 4 5 6 7 8 9 name = input ("姓名:" )int (input ("年龄:" ))float (input ("成绩:" ))print ("-" * 20 ) print (f"姓名:{name}" ) print (f"年龄:{age}" ) print (f"成绩:{score:.1f}" ) print (f"等级:{'及格' if score >= 60 else '不及格'}" )
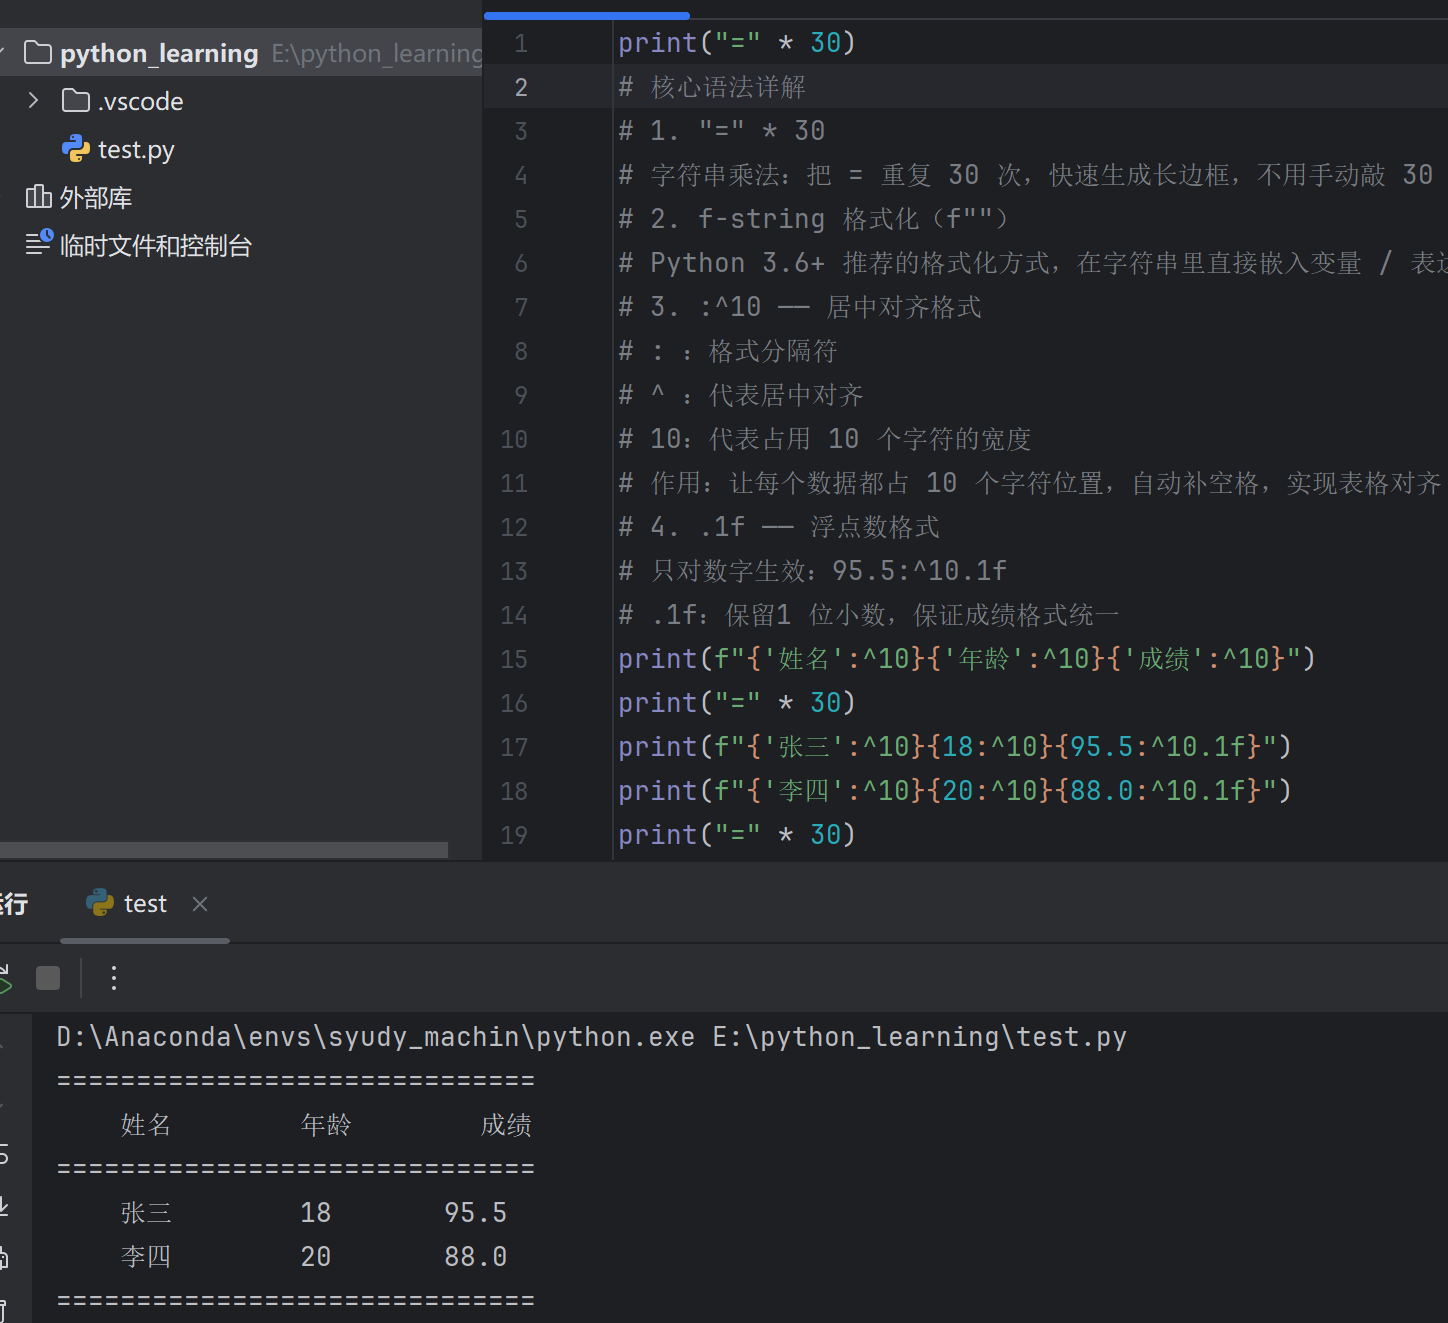
示例3:格式化表格输出 1 2 3 4 5 6 print ("=" * 30 )print (f"{'姓名' :^10 } {'年龄' :^10 } {'成绩' :^10 } " )print ("=" * 30 )print (f"{'张三' :^10 } {18 :^10 } {95.5 :^10.1 f} " )print (f"{'李四' :^10 } {20 :^10 } {88.0 :^10.1 f} " )print ("=" * 30 )
输出:
1 2 3 4 5 6 = = = = = = = = = = = = = = = = = = = = = = = = = = = = = = = = = = = = = = = = = = = = = = = = = = = = = = = = = = = = 18 95.5 20 88.0 = = = = = = = = = = = = = = = = = = = = = = = = = = = = = =
8.4 小结 print() 常用参数
参数
说明
默认值
sep多个值之间的分隔符
空格 " "
end输出结尾
换行 "\n"
要点
说明
返回类型
始终是字符串
转整数
int(input())
转浮点数
float(input())
多值输入
a, b = input().split()
批量转换
a, b = map(int, input().split())
1 2 3 4 5 input ("姓名:" ) int (input ("年龄:" )) float (input ("成绩:" )) map (int , input ("两个数:" ).split())
九、Python 函数 9.1 什么是函数 函数是一段可重复使用 的代码块,用于完成特定功能。
优点:
代码复用,避免重复
结构清晰,便于维护
分工协作,模块化开发
9.2 函数的定义与调用 基本语法 1 2 3 4 def 函数名 (参数 ):"""函数说明文档""" return 返回值
简单示例 1 2 3 4 5 6 7 def say_hello ():"Hello, World!" )
9.3 函数参数 1. 无参函数 1 2 3 4 def greet (): print ("欢迎光临!" ) greet ()
2. 有参函数 1 2 3 4 5 def greet (name ):print (f"你好,{name} !" )"张三" ) "李四" )
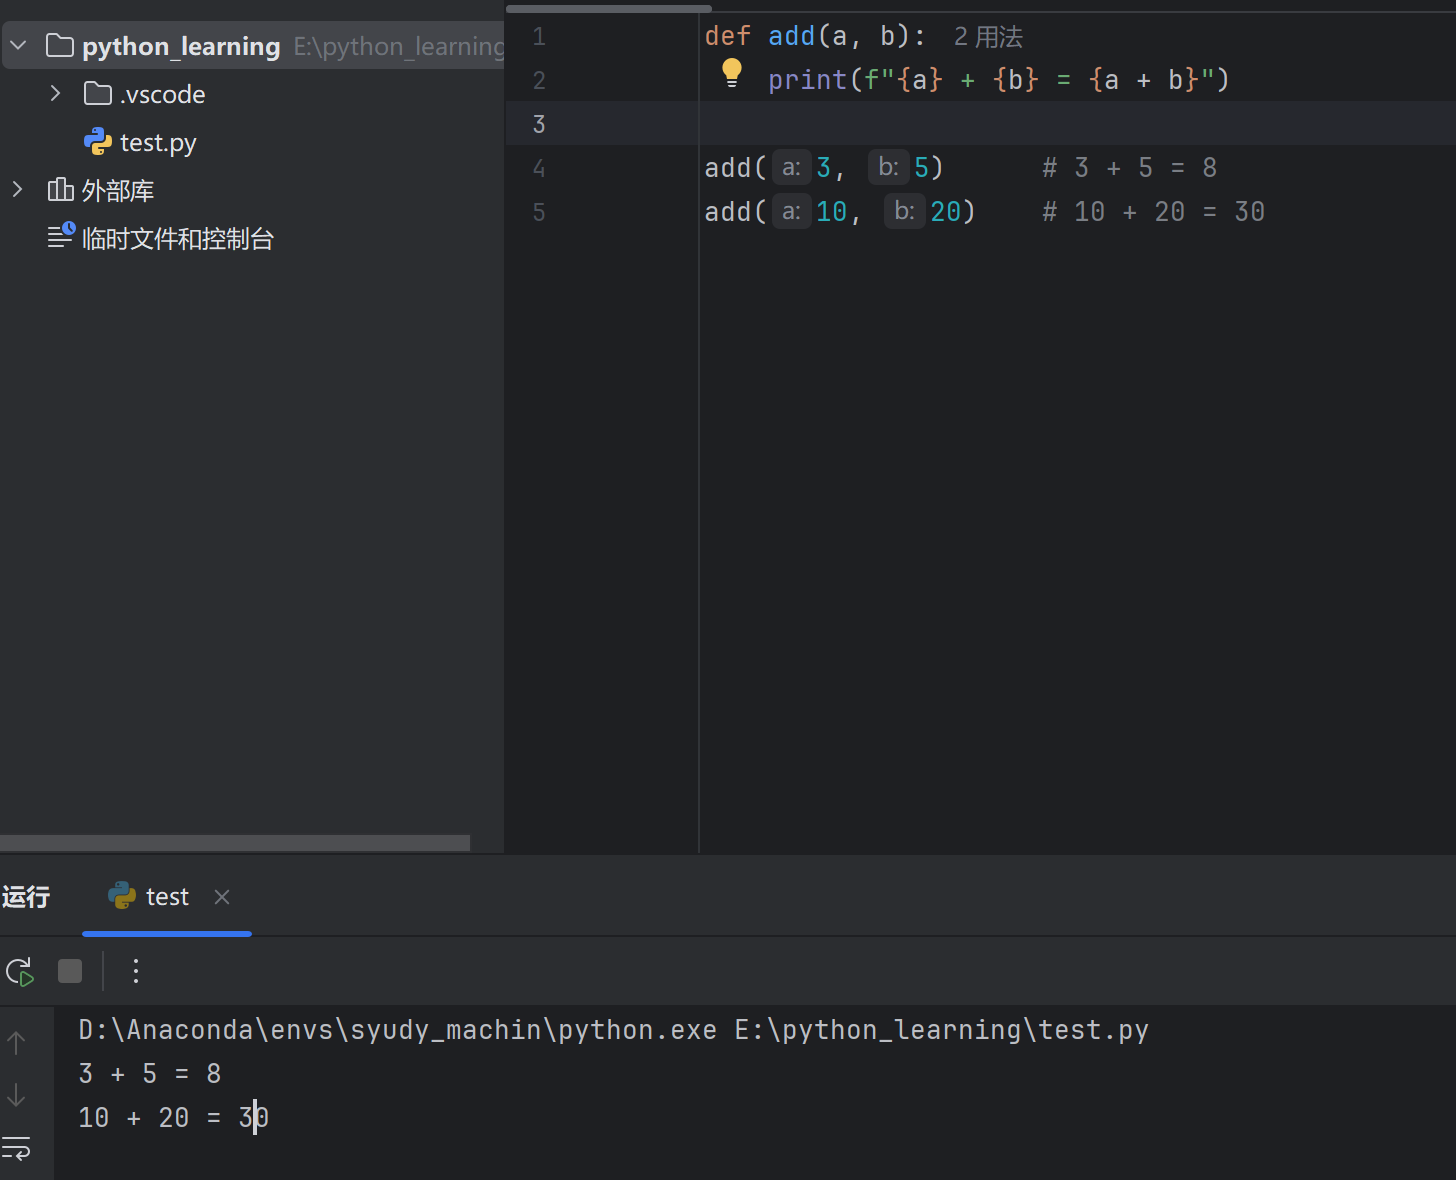
3. 多个参数 1 2 3 4 5 def add(a, b):print (f"{a} + {b} = {a + b}" )add (3 , 5 ) # 3 + 5 = 8 add (10 , 20 ) # 10 + 20 = 30
9.4 函数返回值 使用 return 返回结果:
1 2 3 4 5 6 def add (a , b):return a + bresult = add (3 , 5 )result ) add (10 , 20 ))
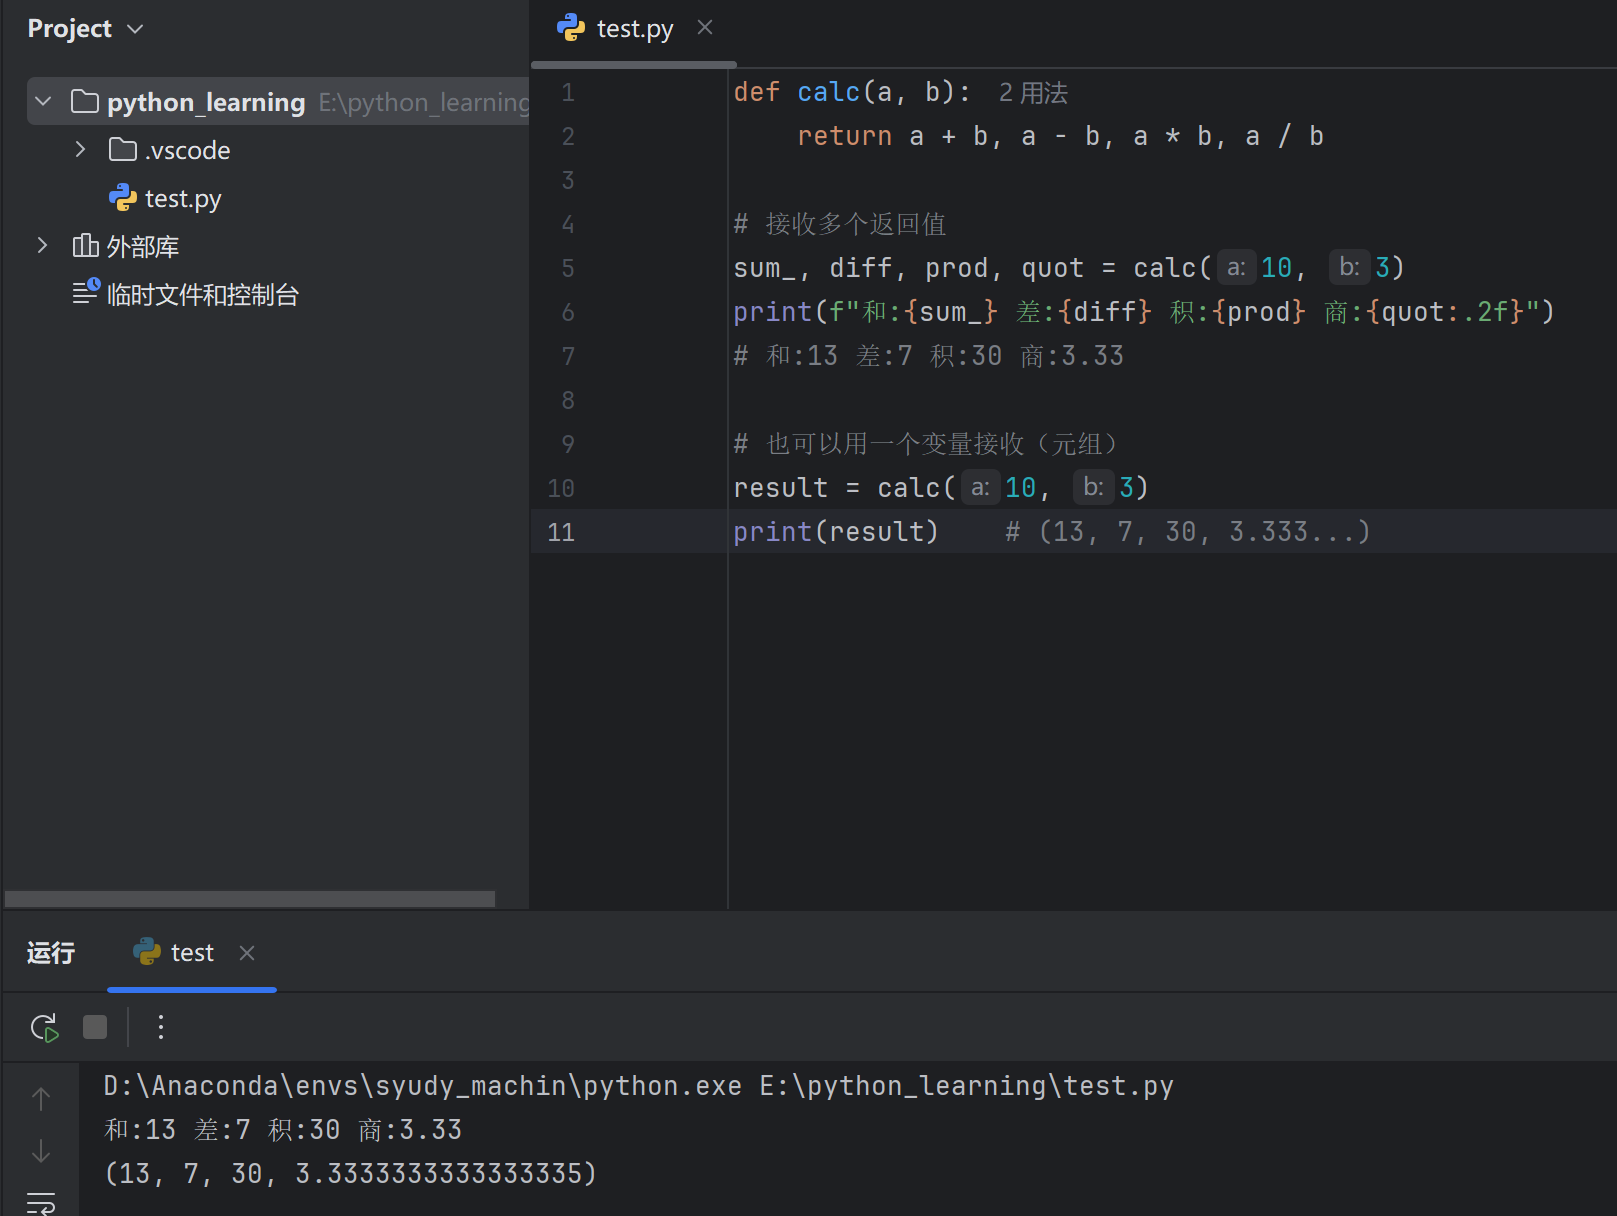
返回多个值 1 2 3 4 5 6 7 8 9 10 11 def calc (a, b ):return a + b, a - b, a * b, a / b10 , 3 )print (f"和:{sum_} 差:{diff} 积:{prod} 商:{quot:.2 f} " )10 , 3 )print (result)
无返回值 不写 return 或只写 return,返回 None:
1 2 3 4 5 def say_hi ():print ("Hi!" )say_hi ()print (result) # None
9.5 参数类型 1. 位置参数 按顺序传递:
1 2 3 4 def info (name, age ):print (f"姓名:{name} ,年龄:{age} " )"张三" , 18 )
2. 关键字参数 指定参数名,顺序可变:
1 info (age =20, name ="李四" ) # 姓名:李四,年龄:20
3. 默认参数 给参数设置默认值:
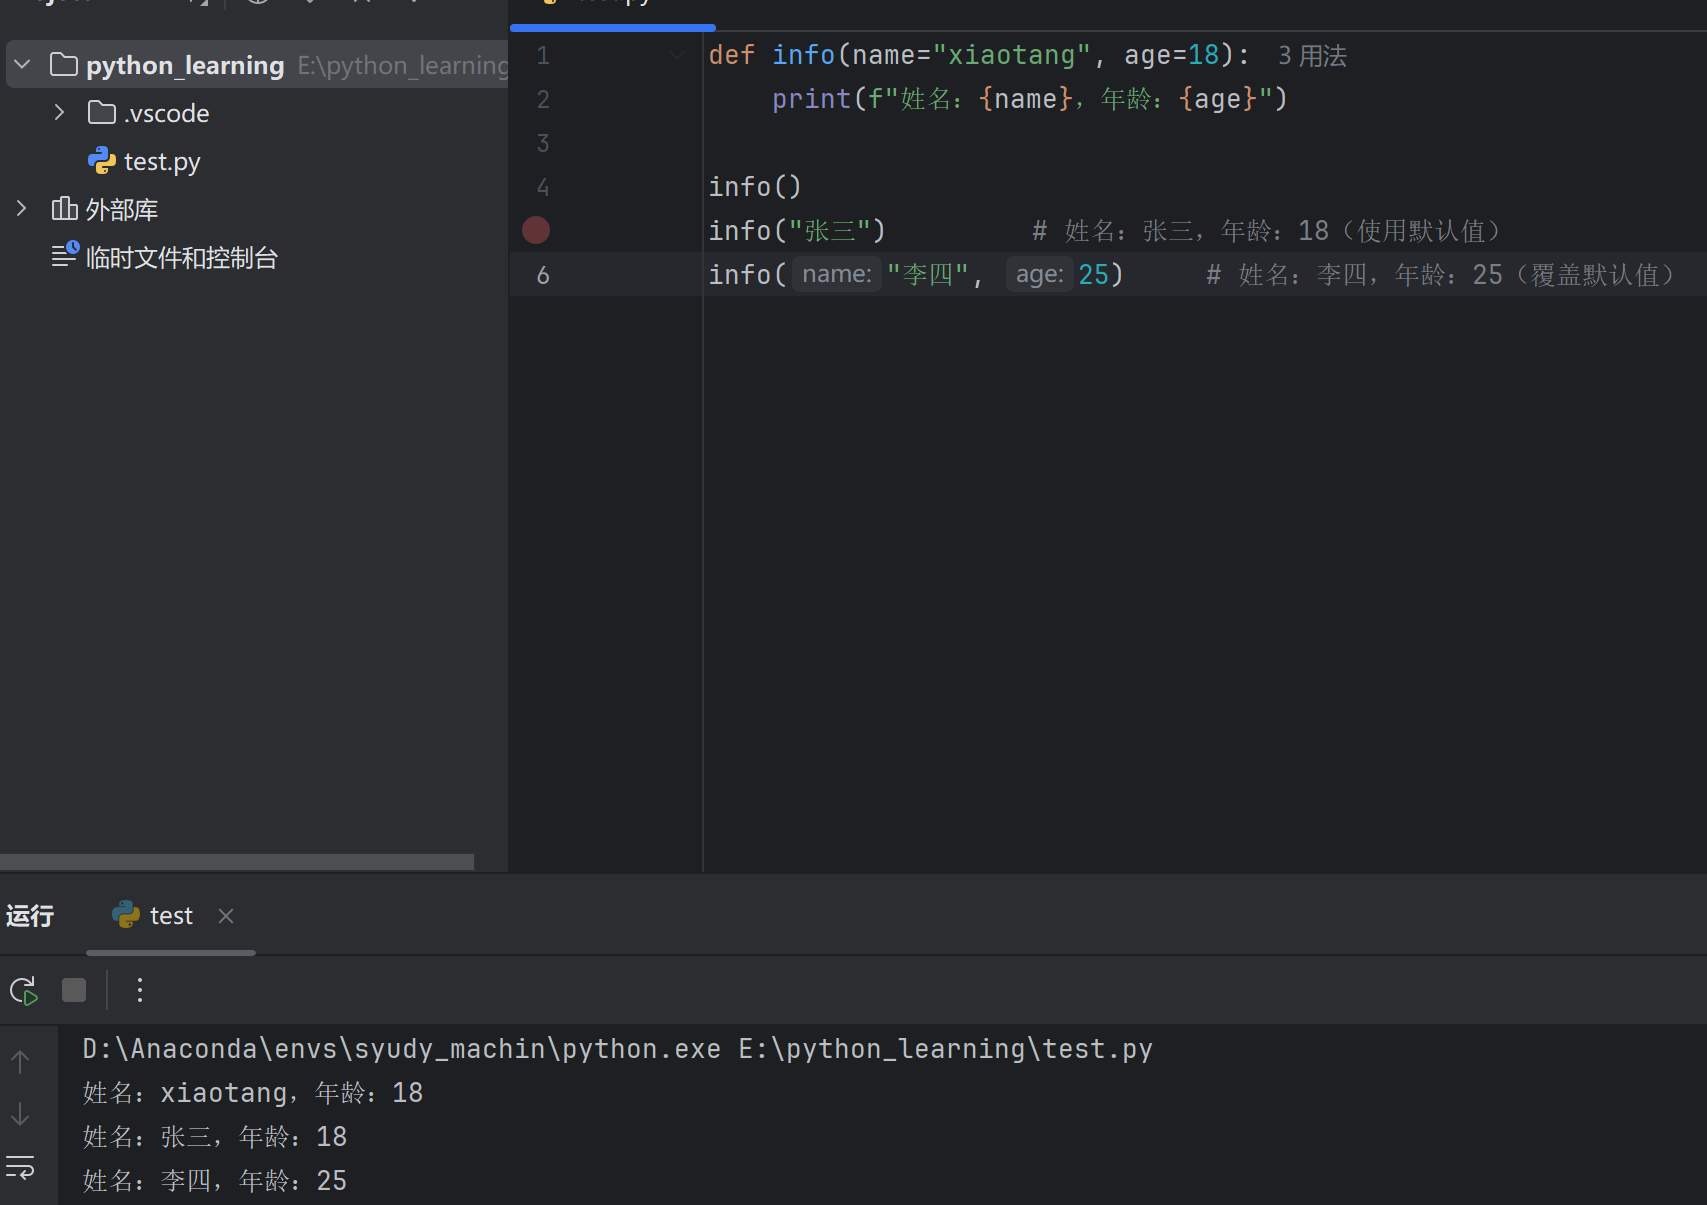
1 2 3 4 5 def info (name, age=18 ):print (f"姓名:{name} ,年龄:{age} " )"张三" ) "李四" , 25 )
⚠️ 注意: 默认参数必须放在非默认参数后面。
4.可变参数 *args 接收任意数量的位置参数,打包成元组 :
1 2 3 4 5 6 def add (*nums):print (nums) # 元组print (add (1, 2)) # 3print (add (1, 2, 3, 4, 5)) # 15
5. 关键字可变参数 **kwargs 接收任意数量的关键字参数,打包成字典 :
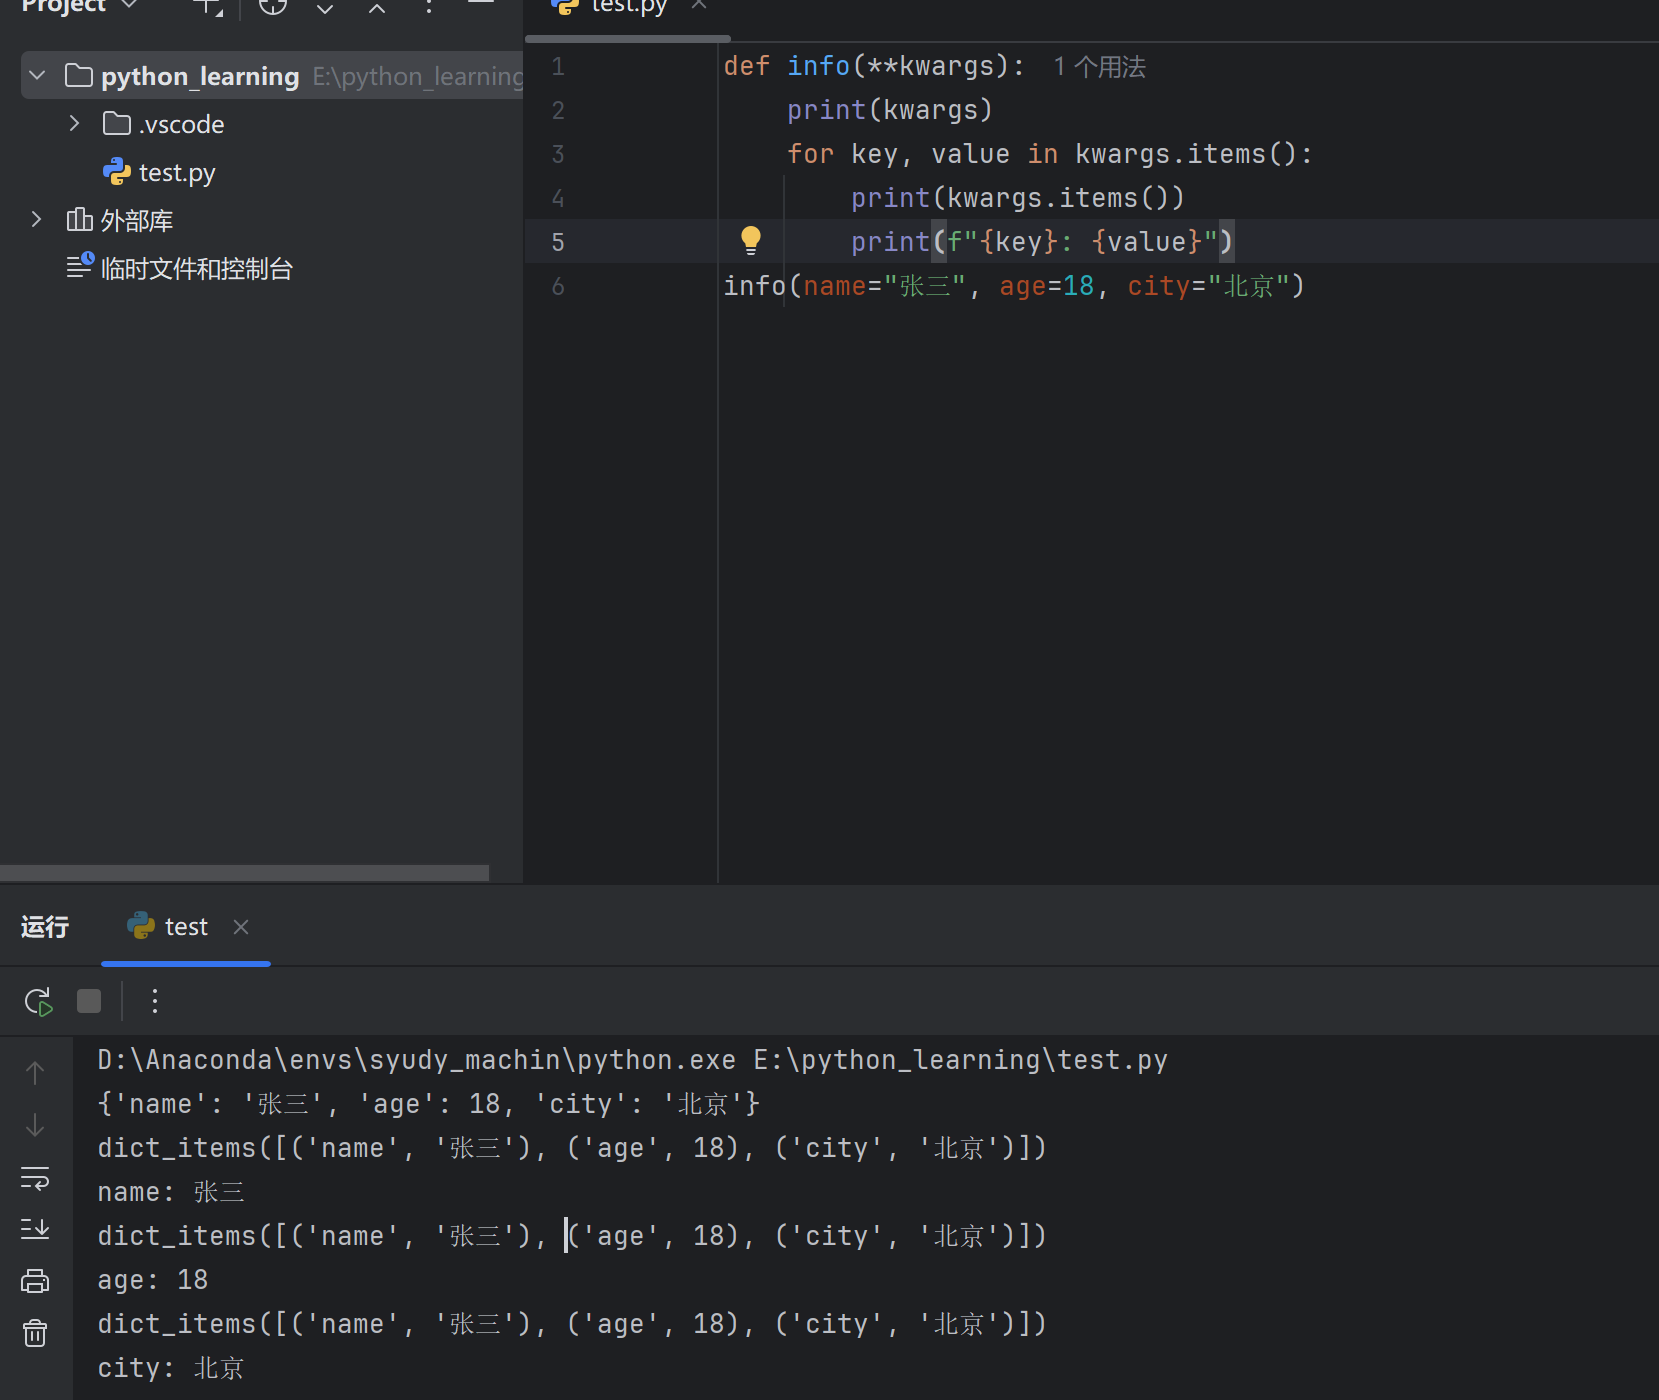
1 2 3 4 5 6 7 8 9 10 def info (**kwargs ):print (kwargs)for key, value in kwargs.items():print (f"{key} : {value} " )"张三" , age=18 , city="北京" )
6. 参数组合 1 2 3 4 5 6 7 8 9 def func(a, b, c =10, *a rgs, **kwargs):print (f"a={a}, b={b}, c={c}" )print (f"args={args}" )print (f"kwargs={kwargs}" )x =100, y =200)
9.6 变量作用域 局部变量 函数内部定义,只在函数内有效:
1 2 3 4 5 6 def test ():print (x)test ()
全局变量 函数外部定义,整个程序有效:
1 2 3 4 5 6 7 x = 100 test ():print (x)test () print (x)
global 关键字 在函数内修改全局变量:
1 2 3 4 5 6 7 8 9 count = 0 add_count(): count count += 1 add_count() add_count() count )
9.7 匿名函数 lambda 简单函数的简写形式:
1 2 3 4 5 6 7 8 add (a , b):return a + badd = lambda a , b: a + badd (3 , 5 ))
常用于简单场景:
1 2 3 4 5 6 7 8 9 10 "张三" , 85 ), ("李四" , 92 ), ("王五" , 78 )]lambda x: x[1 ]) print (students)1 , 2 , 3 , 4 , 5 ]list (map (lambda x: x**2 , nums))print (squares)
9.8 综合示例 示例1:计算器函数 1 2 3 4 5 6 7 8 9 10 11 12 13 14 15 16 17 def calculator (a, b, op="+" ):"""简单计算器""" if op == "+" :return a + belif op == "-" :return a - belif op == "*" :return a * belif op == "/" :return a / b if b != 0 else "除数不能为0" else :return "不支持的运算" print (calculator(10 , 3 )) print (calculator(10 , 3 , "-" )) print (calculator(10 , 3 , "*" )) print (calculator(10 , 0 , "/" ))
示例2:学生成绩统计 1 2 3 4 5 6 7 8 9 10 11 12 13 14 15 16 17 18 19 20 def score_analysis (*scores ):"""成绩分析""" if not scores:return "无数据" sum (scores)len (scores)max (scores)min (scores)return {"总分" : total,"平均分" : round (avg, 2 ),"最高分" : max_score,"最低分" : min_score85 , 92 , 78 , 96 , 88 )for key, value in result.items():print (f"{key} :{value} " )
输出:
1 2 3 4 总分:439
9.9 小结
概念
说明
def定义函数
return返回值
位置参数
按顺序传递
默认参数
def func(a=10)
*args可变参数,打包为元组
**kwargs关键字可变参数,打包为字典
global声明全局变量
lambda匿名函数
1 2 3 4 5 6 def function_name (param1, param2, param3="default" , *args, **kwargs ):"""函数文档说明""" return result
十、Python 数据容器与列表 10.1 数据容器概述 Python 提供了多种数据容器,用于存储多个数据:
容器类型
符号
有序
可变
重复
示例
列表 list
[]✓
✓
✓
[1, 2, 3]
元组 tuple
()✓
✗
✓
(1, 2, 3)
字符串 str
""✓
✗
✓
"abc"
集合 set
{}✗
✓
✗
{1, 2, 3}
字典 dict
{}✓
✓
键不可重复
{"a": 1}
10.2 列表的创建 基本创建 1 2 3 4 5 6 7 8 9 10 "张三" , "李四" , "王五" ]"hello" , 3.14, True]
其他创建方式 1 2 3 4 5 6 7 8 9 10 11 "hello" )print (chars) # ['h' , 'e' , 'l' , 'l' , 'o' ]print (nums) # [1, 2, 3, 4, 5]*2 for x in range(1, 6)]print (squares) # [1, 4, 9, 16, 25]
10.3 列表索引 正向索引(从 0 开始) 1 2 3 4 5 fruits = ["苹果" , "香蕉" , "橙子" , "葡萄" ]# 0 1 2 3 print (fruits[0 ]) # 苹果 print (fruits[2 ]) # 橙子
负向索引(从 -1 开始) 1 2 3 4 5 fruits = ["苹果" , "香蕉" , "橙子" , "葡萄" ]# -4 -3 -2 -1 print (fruits[-1 ]) # 葡萄 print (fruits[-2 ]) # 橙子
索引图示 1 2 3 元素: 苹果 香蕉 橙子 葡萄-4 -3 -2 -1
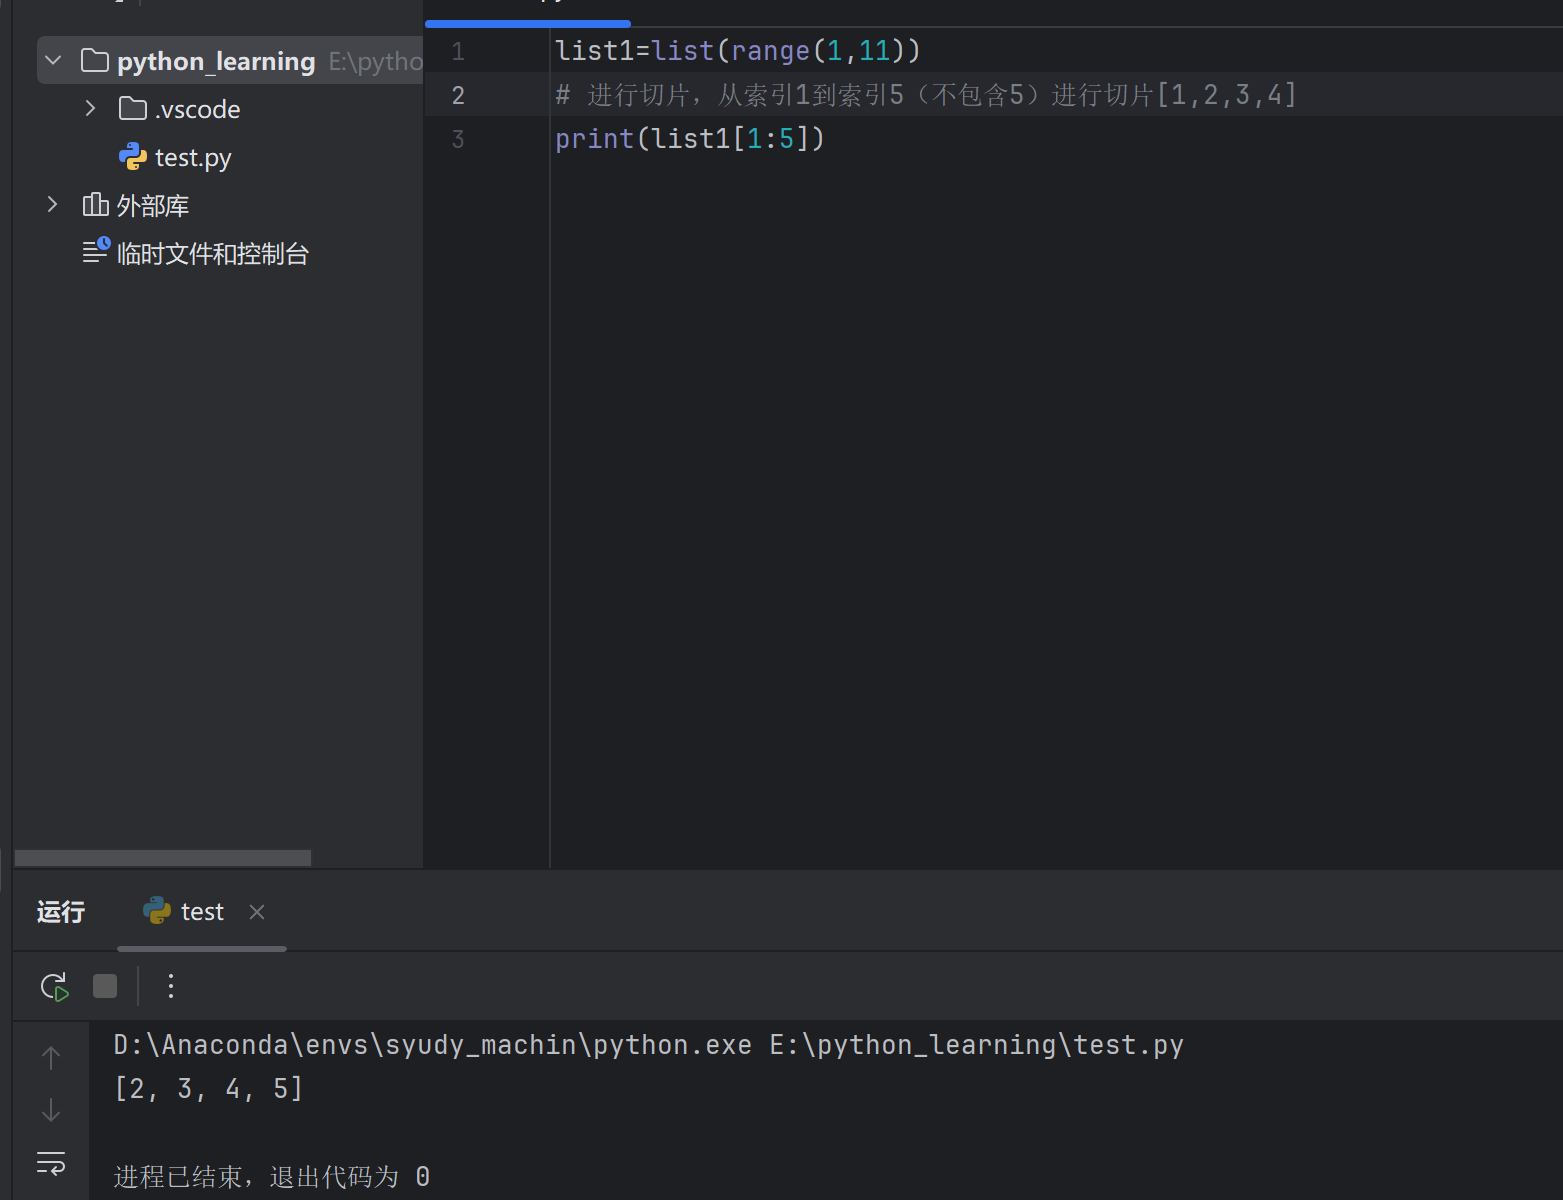
10.4 列表切片 语法:列表[start:end:step](左闭右开)
基本切片 1 2 3 4 5 6 nums = [0 , 1 , 2 , 3 , 4 , 5 , 6 , 7 , 8 , 9 ]print (nums[2 :6 ]) print (nums[:4 ]) print (nums[6 :]) print (nums[:])
带步长切片 1 2 3 4 5 nums = [0 , 1 , 2 , 3 , 4 , 5 , 6 , 7 , 8 , 9 ]2 ]) # [0 , 2 , 4 , 6 , 8 ](隔一个取)1 ::2 ]) # [1 , 3 , 5 , 7 , 9 ](奇数位置)1 ]) # [9 , 8 , 7 , 6 , 5 , 4 , 3 , 2 , 1 , 0 ](反转)
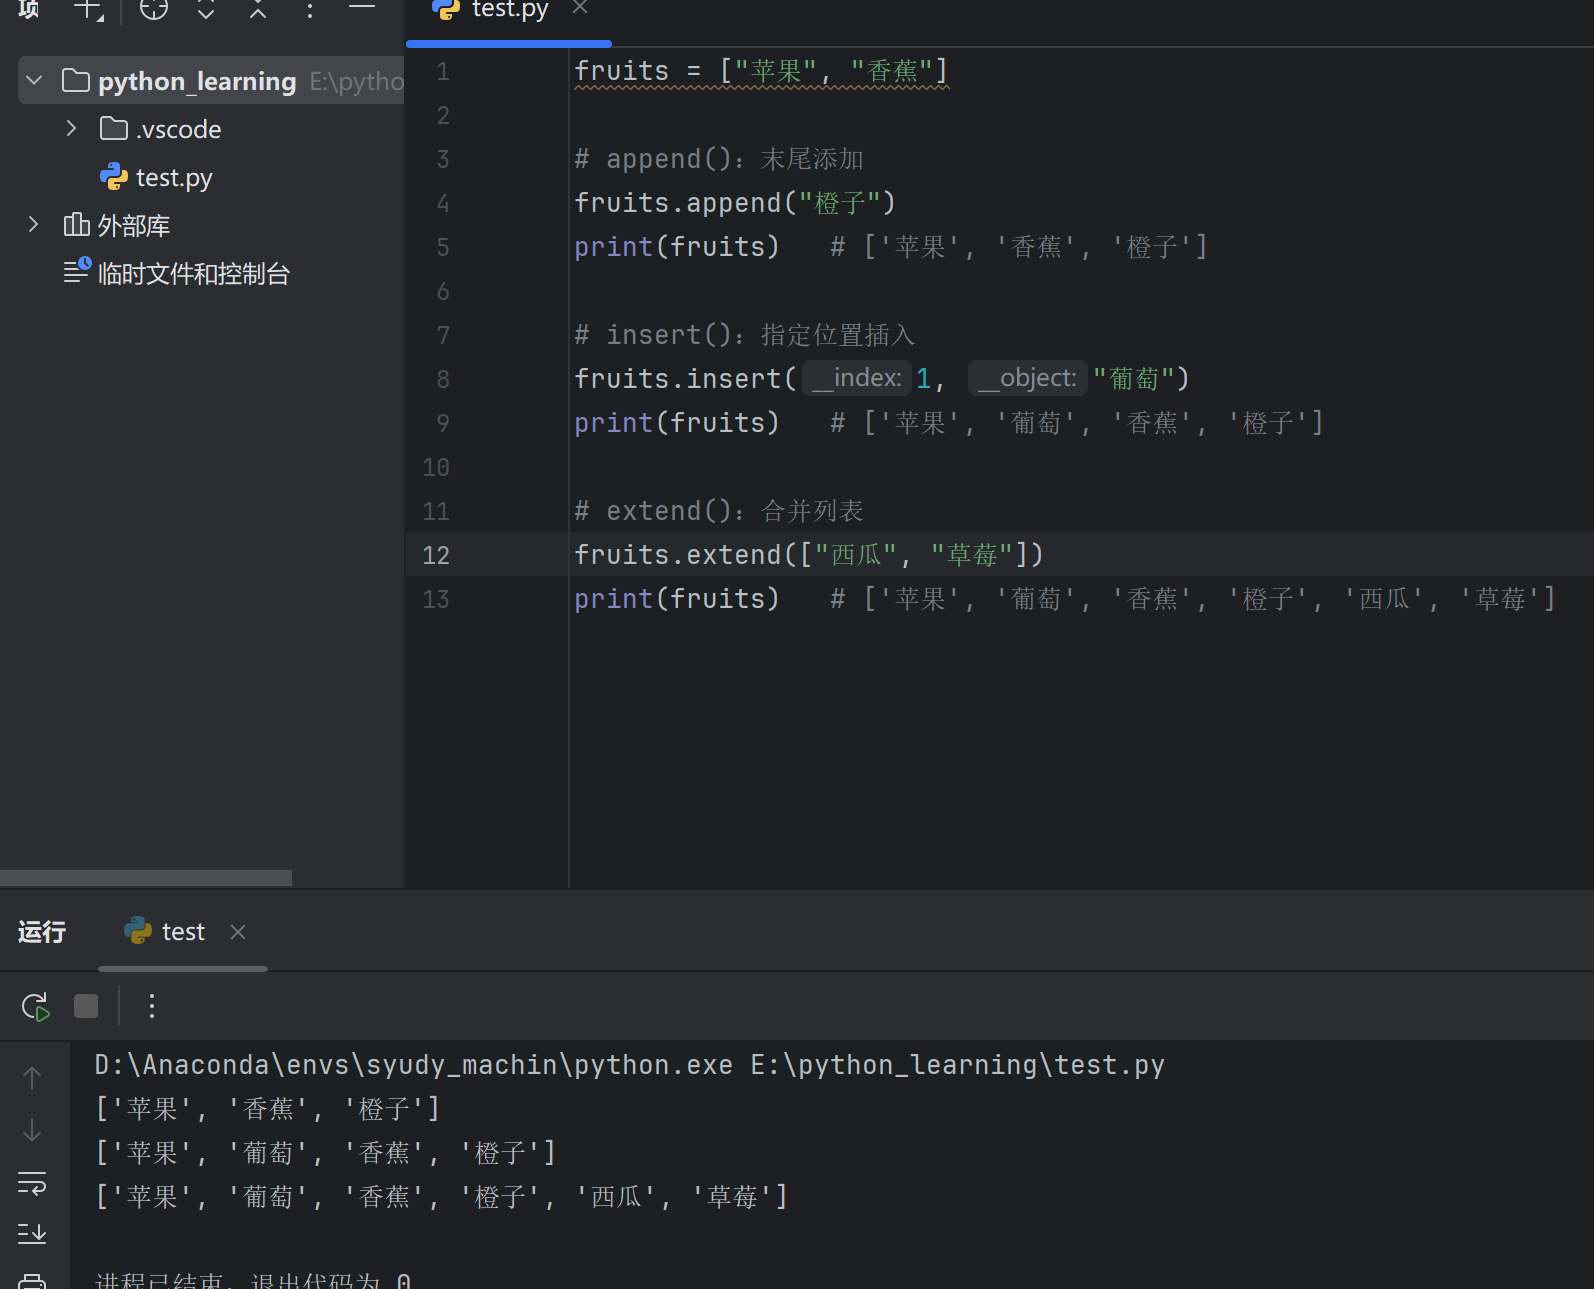
10.5 列表常用操作 1. 增加元素 1 2 3 4 5 6 7 8 9 10 11 12 13 fruits = ["苹果" , "香蕉" ]"橙子" )print (fruits) 1 , "葡萄" )print (fruits) "西瓜" , "草莓" ])print (fruits)
2. 删除元素 1 2 3 4 5 6 7 8 9 10 11 12 13 14 15 16 17 18 19 20 21 fruits = ["苹果" , "香蕉" , "橙子" , "香蕉" , "葡萄" ]remove ("香蕉" )print (fruits) # ['苹果' , '橙子' , '香蕉' , '葡萄' ]print (item) # 葡萄print (fruits) # ['苹果' , '橙子' , '香蕉' ]print (item) # 橙子print (fruits) # ['香蕉' ]print (fruits) # []
3. 修改元素 1 2 3 4 5 6 7 8 9 nums = [1, 2, 3, 4, 5] nums [0 ] = 100 print (nums) # [100, 2, 3, 4, 5] nums [1 :3 ] = [200, 300] print (nums) # [100, 200, 300, 4, 5]
4. 查找元素 1 2 3 4 5 6 7 8 9 10 11 fruits = ["苹果" , "香蕉" , "橙子" , "香蕉" ]# in:判断存在 print ("香蕉" in fruits) # True print ("西瓜" in fruits) # False # index():查找索引 print (fruits.index ("橙子" )) # 2 # count():统计次数 print (fruits.count ("香蕉" )) # 2
10.6 列表常用方法汇总
方法
说明
示例
append(x)末尾添加元素
list.append(1)
insert(i, x)指定位置插入
list.insert(0, 1)
extend(list2)合并列表
list.extend([1,2])
remove(x)删除指定值
list.remove(1)
pop(i)删除指定索引
list.pop(0)
clear()清空列表
list.clear()
index(x)查找索引
list.index(1)
count(x)统计次数
list.count(1)
sort()排序
list.sort()
reverse()反转
list.reverse()
copy()复制列表
list.copy()
10.7 列表排序 1 2 3 4 5 6 7 8 9 10 11 12 13 14 15 nums = [3, 1, 4, 1, 5, 9, 2, 6]print (nums) # [1, 1, 2, 3, 4, 5, 6, 9]reverse =True )print (nums) # [9, 6, 5, 4, 3, 2, 1, 1]print (nums) # [3, 1, 4, 1, 5](不变)print (new_nums) # [1, 1, 3, 4, 5]
自定义排序 1 2 3 4 5 6 7 8 9 students = [("张三" , 85), ("李四" , 92), ("王五" , 78)]key =lambda x: x[1])print (students) # [('王五' , 78), ('张三' , 85), ('李四' , 92)]key =lambda x: x[1], reverse =True )print (students) # [('李四' , 92), ('张三' , 85), ('王五' , 78)]
10.8 列表遍历 for 循环遍历 1 2 3 4 5 6 7 8 9 10 11 12 13 fruits = ["苹果" , "香蕉" , "橙子" ]for fruit in fruits:print (fruit)for i in range (len (fruits)):print (f"索引{i} : {fruits[i]} " )for i, fruit in enumerate (fruits):print (f"索引{i} : {fruit} " )
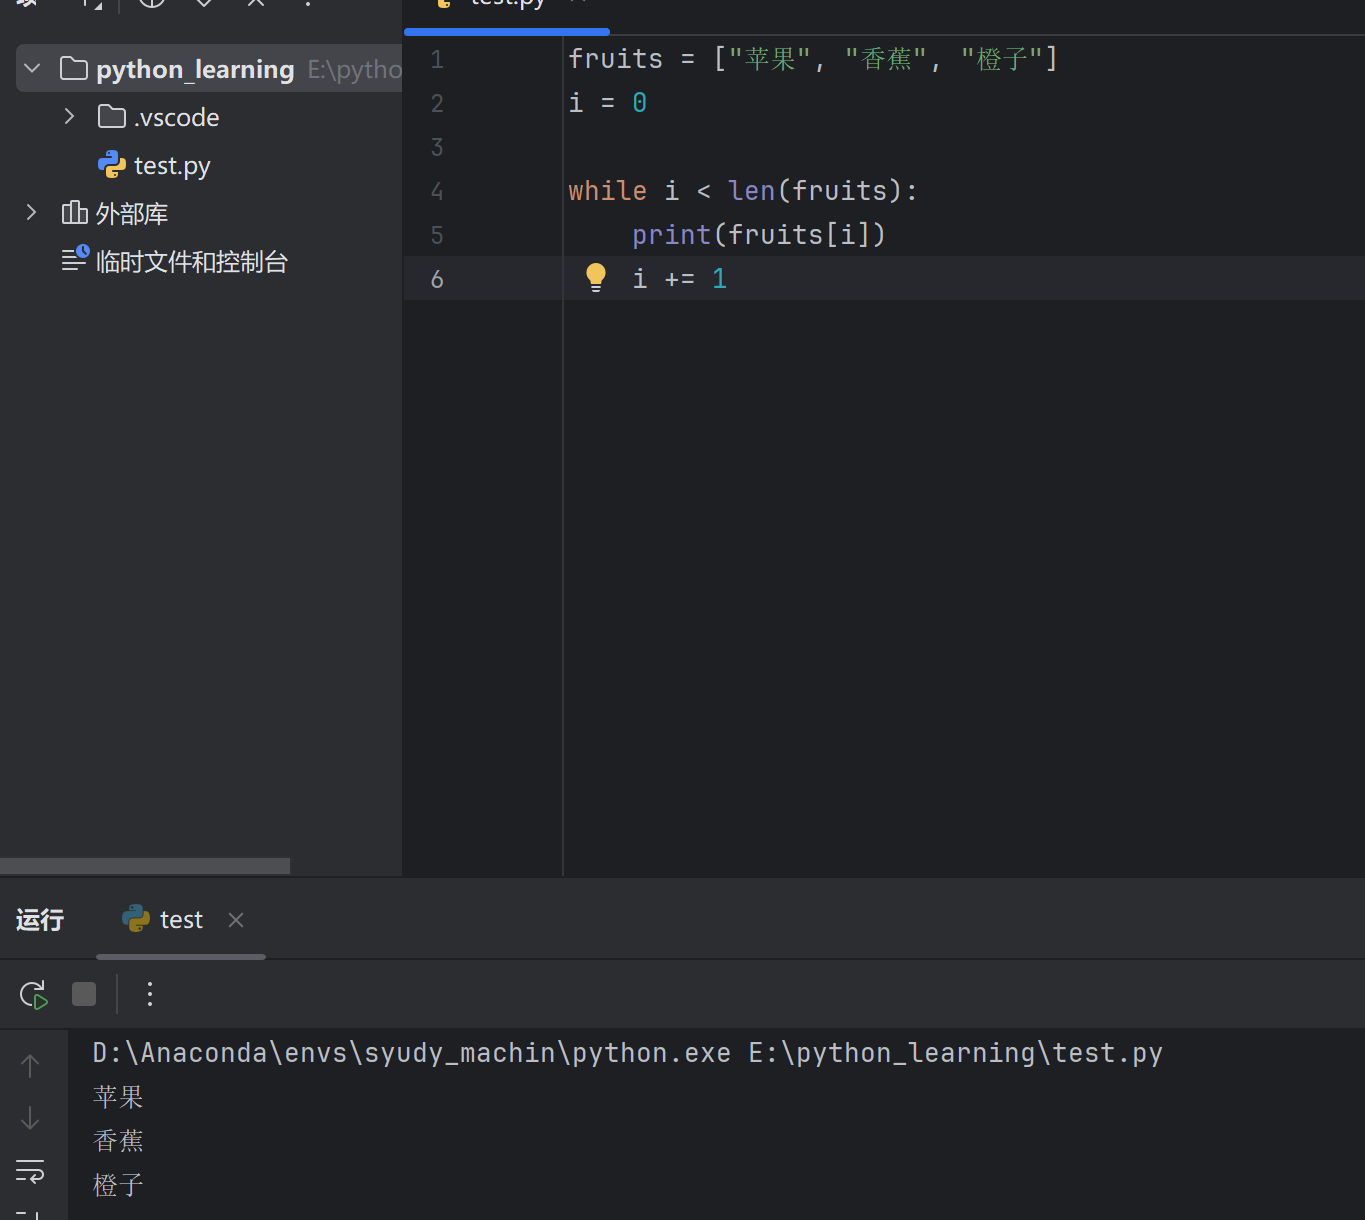
while 循环遍历 1 2 3 4 5 6 fruits = ["苹果" , "香蕉" , "橙子" ]0 while i < len (fruits):print (fruits[i])1
10.9 列表推导式 快速生成列表的简洁语法:
1 2 3 4 5 6 7 8 9 10 11 12 13 14 15 *2 for x in range(1, 6)]print (squares) # [1, 4, 9, 16, 25]for x in range(10) if x % 2 == 0]print (evens) # [0, 2, 4, 6, 8]"alice" , "bob" , "charlie" ]for name in names]print (upper_names) # ['ALICE' , 'BOB' , 'CHARLIE' ]
10.10 嵌套列表(二维列表) 1 2 3 4 5 6 7 8 9 10 11 12 13 14 15 16 17 18 19 20 21 matrix = [1 , 2 , 3 ],4 , 5 , 6 ],7 , 8 , 9 ]print (matrix [0 ]) print (matrix [1 ][2 ]) for row in matrix :for item in row :print (item, end=" " )print ()
10.11 综合示例 示例:学生成绩管理 1 2 3 4 5 6 7 8 9 10 11 12 13 14 15 16 17 18 19 20 21 22 23 24 25 26 27 28 29 85 , 92 , 78 , 96 , 88 , 73 , 95 , 82 ]print (f"学生人数:{len (scores)} " )print (f"最高分:{max (scores)} " )print (f"最低分:{min (scores)} " )print (f"总分:{sum (scores)} " )print (f"平均分:{sum (scores)/len (scores):.2 f} " )sorted (scores, reverse=True )print (f"成绩排名:{scores_sorted} " )for s in scores if s >= 60 ]print (f"及格人数:{len (passed)} " )for i, score in enumerate (scores):if score >= 90 :"优秀" elif score >= 80 :"良好" elif score >= 60 :"及格" else :"不及格" print (f"学生{i+1 } :{score} 分 - {grade} " )
10.12 小结 1 2 3 4 5 6 7 8 9 10 11 12 13 14 15 16 17 18 19 20 21 22 23 24 # 创建 1 , 2 , 3 ]# 增 4 ) # 末尾添加 0 , 0 ) # 指定位置插入 # 删 2 ) # 删除指定值 # 删除最后一个 # 改 0 ] = 100 # 修改元素 # 查 print (3 in nums) # 判断存在 print (nums.index (100 )) # 查找索引 # 遍历 for item in nums:print (item)# 推导式 2 for x in range(5 )]
操作
方法/语法
长度
len(list)
添加
append() / insert() / extend()
删除
remove() / pop() / del / clear()
排序
sort() / sorted()
反转
reverse() / [::-1]
遍历
for item in list / enumerate()
十一、Python 元组(tuple) 11.1 元组概述 元组是不可变 的有序序列,一旦创建就不能修改。
特性
说明
有序
元素有固定顺序,支持索引
不可变
创建后不能增删改元素
可重复
元素可以重复
可存任意类型
数字、字符串、列表等都可以
💡 何时用元组? 数据不需要修改时,如坐标、配置项、函数返回多个值等。
11.2 元组的创建 基本创建 1 2 3 4 5 6 7 8 9 10 t1 = ()t2 = tuple()t3 = (1 , 2 , 3 )t4 = ("张三" , "李四" , "王五" )t5 = (1 , "hello" , 3 .14 , True) # 混合类型print (t3) # (1 , 2 , 3 )
⚠️ 单元素元组(必须加逗号) 1 2 3 4 5 6 7 8 9 10 11 # 错误写法1 )class 'int '>(这是整数,不是元组!)t2 = (1, )print (type (t2 )) # <class 'tuple '>t3 = 1, print type (t3 )) # <class 'tuple '>
其他创建方式 1 2 3 4 5 6 7 8 9 tuple ([1 , 2 , 3 ]) print (t1) tuple ("hello" ) print (t2) tuple (range (5 )) print (t3)
11.3 元组索引与切片 与列表完全相同:
索引访问 1 2 3 4 5 6 7 fruits = ("苹果" , "香蕉" , "橙子" , "葡萄" )# 0 1 2 3 # -4 -3 -2 -1 print (fruits[0 ]) # 苹果 print (fruits[-1 ]) # 葡萄 print (fruits[2 ]) # 橙子
切片操作 1 2 3 4 5 6 7 8 nums = (0 , 1 , 2 , 3 , 4 , 5 , 6 , 7 , 8 , 9 )print (nums[2 :6 ]) # (2 , 3 , 4 , 5 )print (nums[:4 ]) # (0 , 1 , 2 , 3 )print (nums[6 :]) # (6 , 7 , 8 , 9 )print (nums[::2 ]) # (0 , 2 , 4 , 6 , 8 )print (nums[::-1 ]) # (9 , 8 , 7 , 6 , 5 , 4 , 3 , 2 , 1 , 0 )
11.4 元组不可变性 不能修改元素 特殊情况:元组内的可变对象 1 2 3 4 5 6 7 8 t = (1, 2, )
⚠️ 元组的不可变是指元素的引用 不可变,而非元素内容。
11.5 元组常用操作 1. 查找元素 1 2 3 4 5 6 7 8 9 10 11 t = ("苹果" , "香蕉" , "橙子" , "香蕉" )# in:判断存在 print ("香蕉" in t) # True print ("西瓜" in t) # False # index():查找索引 print (t.index ("橙子" )) # 2 # count():统计次数 print (t.count ("香蕉" )) # 2
2. 基本函数 1 2 3 4 5 6 nums = (3 , 1 , 4 , 1 , 5 , 9 , 2 , 6 )print (len(nums)) # 8 (长度)print (max(nums)) # 9 (最大值)print (min(nums)) # 1 (最小值)print (sum(nums)) # 31 (求和)
3. 元组排序(返回列表) 1 2 3 4 5 6 7 8 9 nums = (3 , 1 , 4 , 1 , 5 )sorted_list = sorted(nums)print (sorted_list) # [1, 1, 3, 4, 5] sorted_tuple = tuple(sorted(nums))print (sorted_tuple) # (1 , 1 , 3 , 4 , 5 )
11.6 元组方法汇总 元组只有两个方法(因为不可变):
方法
说明
示例
index(x)查找元素索引
t.index(1)
count(x)统计元素次数
t.count(1)
11.7 元组解包 基本解包 1 2 3 4 5 6 7 8 9 10 11 12 t = (1 , 2 , 3 )a , b, c = tprint (a, b, c) # 1 2 3 x , y = 10 , 20 print (x, y) # 10 20 x , y = y, xprint (x, y) # 20 10
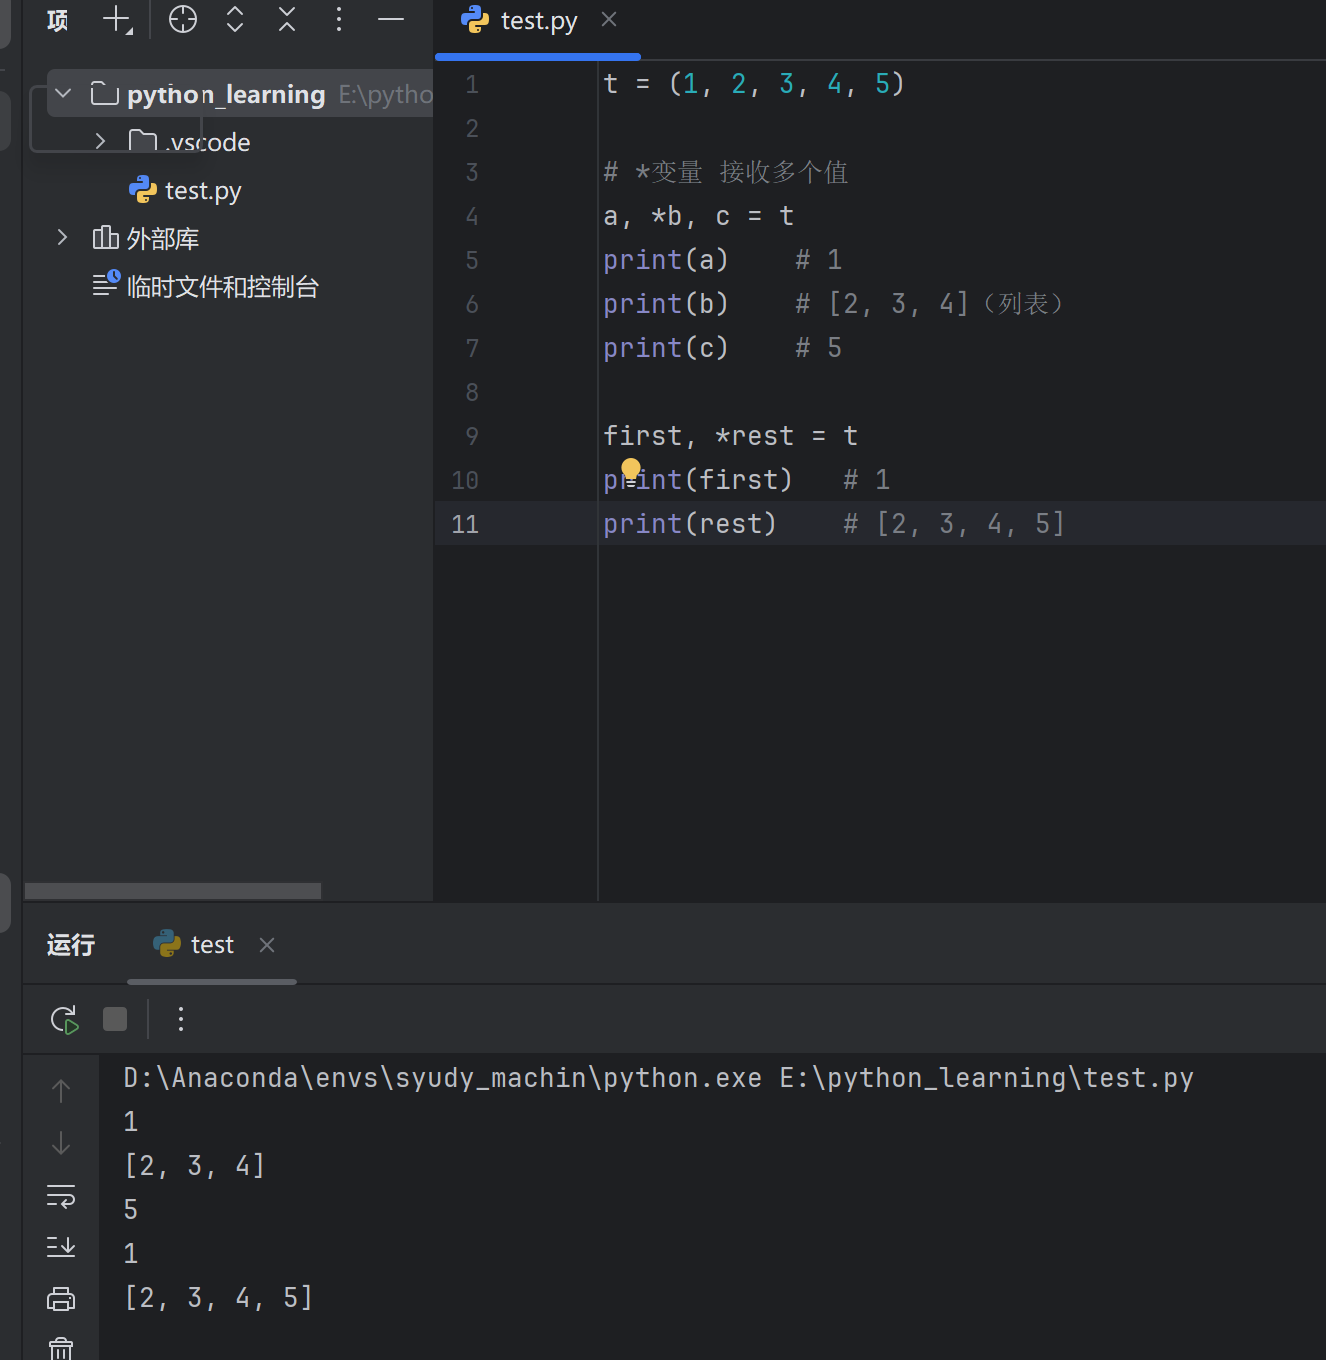
星号解包 1 2 3 4 5 6 7 8 9 10 11 t = (1 , 2 , 3 , 4 , 5 )print (a) print (b) print (c) print (first) print (rest)
函数返回值解包 1 2 3 4 5 6 7 8 9 10 11 def get_info ():return "张三" , 18 , "北京" print (f"{name} , {age} 岁, {city} " ) print (info) print (type (info))
11.8 元组遍历 1 2 3 4 5 6 7 8 9 10 11 12 13 14 15 fruits = ("苹果" , "香蕉" , "橙子" )for fruit in fruits:print (fruit)for i, fruit in enumerate (fruits):print (f"索引{i} : {fruit} " )0 while i < len (fruits):print (fruits[i])1
11.9 元组与列表对比
特性
列表 list
元组 tuple
符号
[]()
可变性
可变
不可变
方法数量
多
少(2个)
性能
较慢
较快
内存
较大
较小
可作字典键
✗
✓
相互转换 1 2 3 4 5 6 7 8 9 lst = [1, 2, 3] t = tuple(lst)print (t) # (1 , 2 , 3 )t = (1 , 2 , 3 )lst = list(t)print (lst) # [1, 2, 3]
11.10 元组的应用场景 1. 函数返回多个值 1 2 3 4 5 6 7 8 def min_max(nums):return min(nums), max(nums)result = min_max([3 , 1 , 4 , 1 , 5 , 9 ])print (result) # (1 , 9 )minimum , maximum = min_max([3 , 1 , 4 , 1 , 5 , 9 ])print (f"最小值:{minimum}, 最大值:{maximum}" )
2. 数据记录(类似结构体) 1 2 3 4 5 6 7 8 9 "张三" , 18 , "计算机科学" )print (f"{name} , {age} 岁, {major} 专业" )3 , 4 )print (f"坐标:({x} , {y} )" )
3. 字典的键 1 2 3 4 5 6 7 8 9 10 11 # 元组可以作为字典的键(不可变) 0 , 0 ): "原点" ,1 , 2 ): "点A" ,3 , 4 ): "点B" print (locations[(1 , 2 )]) # 点A # 列表不能作为键 # {[1 , 2 ]: "test" } ❌ 报错
4. 格式化字符串 1 2 3 info = ("张三" , 18, 95.5)print ("姓名:%s,年龄:%d,成绩:%.1f" % info)
11.11 嵌套元组 1 2 3 4 5 6 7 8 9 10 11 12 13 14 15 "张三" , 85 ),"李四" , 92 ),"王五" , 78 )print (students[0 ]) print (students[0 ][0 ]) print (students[1 ][1 ]) for name, score in students:print (f"{name} : {score} 分" )
11.12 综合示例 1 2 3 4 5 6 7 8 9 10 11 12 13 14 15 16 17 "张三" , 20 , ("语文" , 85 ), ("数学" , 92 )),"李四" , 19 , ("语文" , 78 ), ("数学" , 88 )),"王五" , 21 , ("语文" , 95 ), ("数学" , 90 ))print ("=" * 40 )print (f"{'姓名' :^8 } {'年龄' :^6 } {'语文' :^6 } {'数学' :^6 } {'平均' :^8 } " )print ("=" * 40 )for student in students:1 ] + math[1 ]) / 2 print (f"{name:^8 } {age:^6 } {chinese[1 ]:^6 } {math[1 ]:^6 } {avg:^8.1 f} " )print ("=" * 40 )
输出:
1 2 3 4 5 6 7 = = = = = = = = = = = = = = = = = = = = = = = = = = = = = = = = = = = = = = = = = = = = = = = = = = = = = = = = = = = = = = = = = = = = = = = = = = = = = = = = 20 85 92 88.5 19 78 88 83.0 21 95 90 92.5 = = = = = = = = = = = = = = = = = = = = = = = = = = = = = = = = = = = = = = = =
11.13 小结 1 2 3 4 5 6 7 8 9 10 11 12 13 14 15 16 17 18 19 20 21 t1 = (1 , 2 , 3 )t2 = (1 ,) t3 = tuple([1 , 2 , 3 ])t1 [0 ]) t1 [1 :3 ]) 1 in t1 ) t1 .index(2 )) t1 .count(1 )) b, c = t1 t1 t1 :
操作
语法/方法
创建
() 或 tuple()
访问
t[index] / t[start:end]
查找
in / index() / count()
长度
len(t)
解包
a, b, c = t
转列表
list(t)
💡 记住: 元组 = 不可变的列表,适用于不需要修改的数据。
十二、Python 字符串(str) 12.1 字符串概述 字符串是不可变 的有序字符序列。
特性
说明
有序
字符有固定顺序,支持索引
不可变
创建后不能修改单个字符
可重复
字符可以重复
12.2 字符串的创建 基本创建 1 2 3 4 5 6 7 8 9 10 11 12 13 14 15 16 17 18 19 'hello' "hello" """这是 多行 字符串""" '''也可以 用单引号''' print (s1) print (s3)
引号嵌套 1 2 3 4 5 6 7 8 9 10 "他说:'你好'" '他说:"你好"' "他说:\"你好\"" '他说:\' 你好\'' print (s1) # 他说:'你好' print (s3) # 他说:"你好"
12.3 字符串索引与切片 索引访问 1 2 3 4 5 6 7 8 s = "Hello Python" # 0123456789... # -12-11-10... print (s[0 ]) # H print (s[6 ]) # P print (s[-1 ]) # n print (s[-6 ]) # P
切片操作 1 2 3 4 5 6 7 s = "Hello Python" print (s[0 :5 ]) # Hello print (s[6 :]) # Python print (s[:5 ]) # Hello print (s[::2 ]) # HloPto(隔一个取) print (s[::-1 ]) # nohtyP olleH(反转)
字符串不可变 1 2 3 4 5 6 7 s = "hello" # s[0 ] = "H" ❌ 报错:字符串不支持修改 # 需要创建新字符串 "H" + s[1 :]print (s) # Hello
12.4 字符串常用操作 1. 查找方法 1 2 3 4 5 6 7 8 9 10 11 12 13 14 15 16 17 18 19 20 21 s = "Hello Python Hello" print (s.find ("Python" )) # 6print (s.find ("Java" )) # -1print (s.find ("Hello" , 5)) # 13(从索引5开始找)print (s.rfind("Hello" )) # 13print (s.index("Python" )) # 6print (s.count("Hello" )) # 2print (s.count("o" )) # 3print ("Python" in s) # True print ("Java" in s) # False
2. 大小写转换 1 2 3 4 5 6 7 s = "Hello Python" print (s.upper()) print (s.lower()) print (s.capitalize()) print (s.title()) print (s.swapcase())
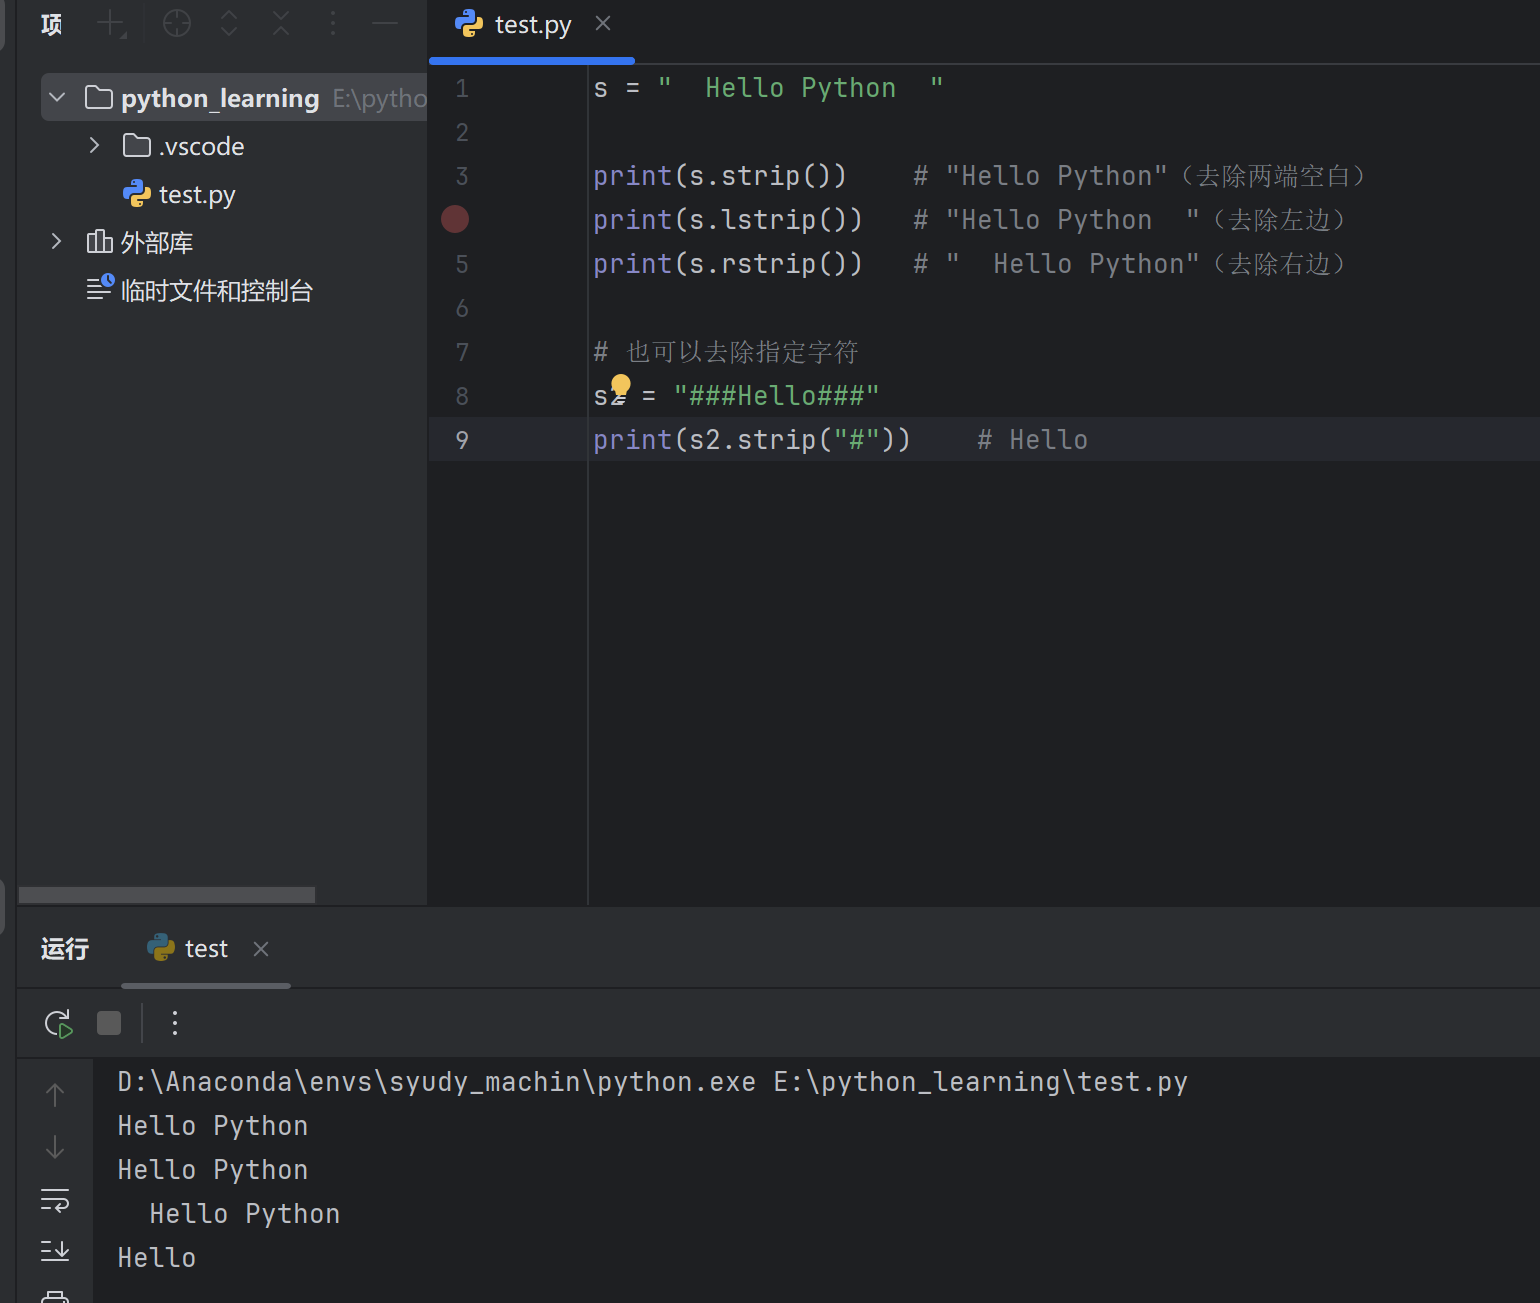
3. 去除空白字符 1 2 3 4 5 6 7 8 9 s = " Hello Python " print (s.strip()) print (s.lstrip()) print (s.rstrip()) "###Hello###" print (s2.strip("#" ))
4. 替换 1 2 3 4 5 s = "Hello Python Hello" # replace(旧, 新) print (s.replace("Hello" , "Hi" )) # Hi Python Hi print (s.replace("Hello" , "Hi" , 1 )) # Hi Python Hello(只替换1次)
5. 分割与连接 1 2 3 4 5 6 7 8 9 10 11 12 13 14 15 16 17 18 19 20 21 22 23 "apple,banana,orange" "," )print (lst) # ['apple' , 'banana' , 'orange' ]"Hello Python World" print (lst2) # ['Hello' , 'Python' , 'World' ]"a-b-c-d-e" print (s3.split("-" , 2)) # ['a' , 'b' , 'c-d-e' ]'apple' , 'banana' , 'orange' ]"," .join(lst)print (s) # apple,banana,orange"-" .join(lst)print (s2) # apple-banana-orange"" .join(lst)print (s3) # applebananaorange
6. 判断方法 1 2 3 4 5 6 7 8 9 10 11 12 13 14 s = "Hello123" print (s.startswith("Hello" )) # True print (s.endswith("123" )) # True print ("abc" .isalpha()) # True (全是字母)print ("123" .isdigit()) # True (全是数字)print ("abc123" .isalnum()) # True (字母或数字)print (" " .isspace()) # True (全是空白)print ("Hello" .isupper()) # False (全是大写)print ("hello" .islower()) # True (全是小写)print ("Hello World" .istitle()) # True (标题格式)
7. 对齐方法 1 2 3 4 5 6 7 s = "Python" print (s.center(20 )) # " Python " (居中) print (s.center(20 , "-" )) # "-------Python-------" print (s.ljust(20 , "-" )) # "Python--------------" (左对齐) print (s.rjust(20 , "-" )) # "--------------Python" (右对齐) print ("42" .zfill(5 )) # "00042" (左边补零)
12.5 字符串方法汇总
方法
说明
示例
find()查找子串位置
s.find("abc")
rfind()从右查找
s.rfind("abc")
index()查找(找不到报错)
s.index("abc")
count()统计次数
s.count("a")
upper()转大写
s.upper()
lower()转小写
s.lower()
strip()去除两端空白
s.strip()
replace()替换
s.replace("a", "b")
split()分割为列表
s.split(",")
join()连接列表
",".join(lst)
startswith()判断开头
s.startswith("Hi")
endswith()判断结尾
s.endswith(".py")
12.6 字符串格式化(回顾) 1. % 占位符 1 2 3 4 5 6 name = "张三" age = 18 score = 95 .5 print ("姓名:%s,年龄:%d,成绩:%.1f" % (name, age, score))
1 2 3 4 5 6 7 8 9 10 11 12 13 print ("{}的成绩是{}" .format("张三" , 95))print ("{0}和{1},{1}和{0}" .format("张三" , "李四" ))print ("{name}的成绩是{score}" .format(name ="张三" , score =95))print ("{:.2f}" .format(3.14159)) # 3.14print ("{:>10}" .format("hi" )) # " hi" (右对齐)print ("{:0>5}" .format(42)) # "00042"
3. f-string(推荐) 1 2 3 4 5 6 7 8 9 10 11 12 13 14 name = "张三" 18 95.678 print (f"姓名:{name} " )print (f"年龄:{age} " )print (f"成绩:{score:.2 f} " )print (f"明年:{age + 1 } 岁" )print (f"{name:>10 } " ) print (f"{name:<10 } " ) print (f"{name:^10 } " ) print (f"{name:*^10 } " )
12.7 字符串遍历 1 2 3 4 5 6 7 8 9 10 11 12 13 14 15 s = "Hello" for char in s:print (char)for i, char in enumerate (s):print (f"索引{i} : {char} " )0 while i < len (s):print (s[i])1
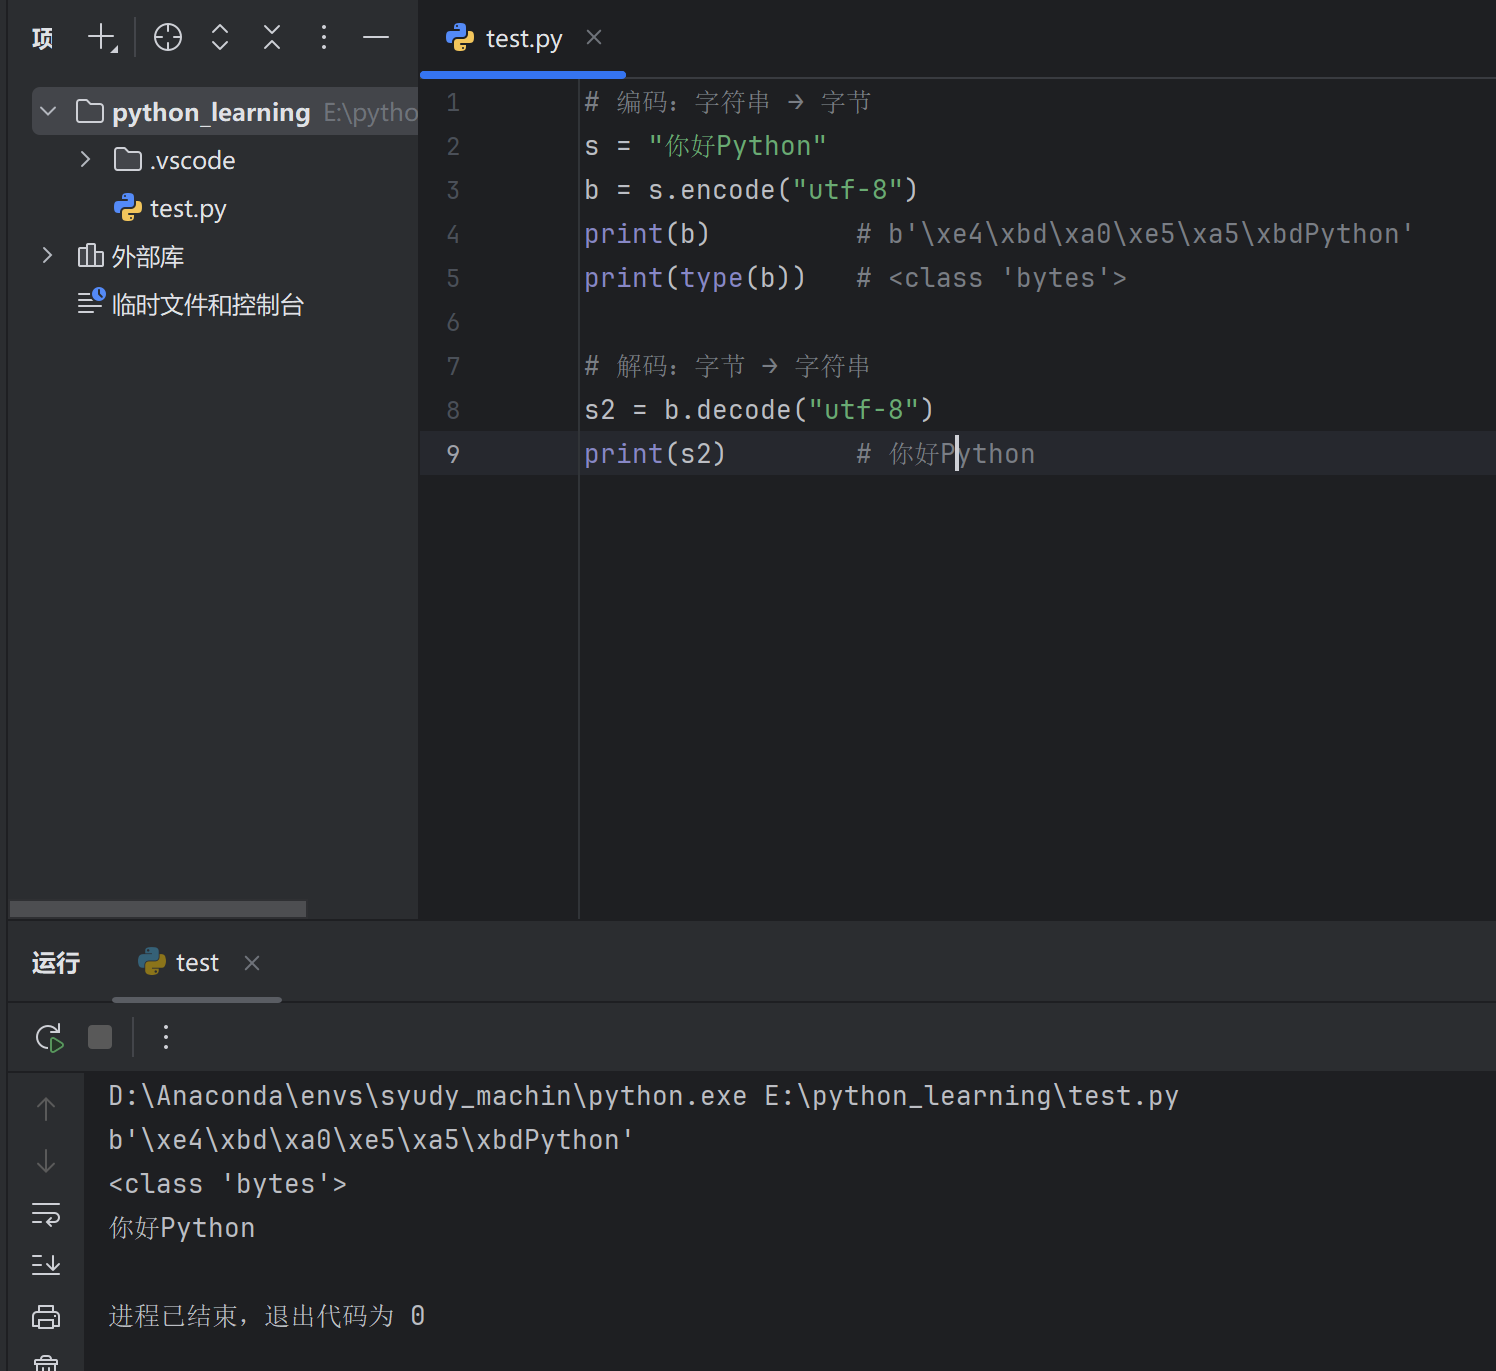
12.8 字符串编码 encode 和 decode 1 2 3 4 5 6 7 8 9 "你好Python" "utf-8" )print (b) print (type (b)) "utf-8" )print (s2)
ord 和 chr 1 2 3 4 5 6 7 8 9 print (ord ("A" )) print (ord ("a" )) print (ord ("中" )) print (chr (65 )) print (chr (97 )) print (chr (20013 ))
12.9 常用技巧 1. 字符串反转 1 2 s = "Hello" print (s[::-1 ]) # olleH
2. 判断回文 1 2 s = "level" print (s == s[::-1]) # True
3. 统计字符频率 1 2 3 s = "hello" for char in set (s):print (f"{char} : {s.count(char)} " )
4. 字符串乘法 1 2 print ("=" * 20 ) # ==================== print ("Hi! " * 3 ) # Hi! Hi! Hi!
5. 多行字符串去缩进 1 2 3 4 5 6 7 8 import textwrap""" 这是一段 带缩进的 多行文本 """ print (textwrap.dedent(s))
12.10 综合示例 示例1:单词统计 1 2 3 4 5 6 7 8 9 10 11 12 text = "Python is great and Python is easy to learn" words = text .lower().split()for word in words :word ] = word_count.get (word , 0 ) + 1 for word , count in word_count.items():"{word}: {count}" )
输出:
1 2 3 4 5 6 7 python : 2 is : 2 great : 1 and : 1 easy : 1 to : 1 learn : 1
示例2:密码验证 1 2 3 4 5 6 7 8 9 10 11 12 13 14 15 16 17 18 def check_password (pwd ):"""检查密码强度""" if len (pwd) < 8 :return "密码长度至少8位" any (c.isupper() for c in pwd)any (c.islower() for c in pwd)any (c.isdigit() for c in pwd)if not (has_upper and has_lower and has_digit):return "密码需包含大写、小写字母和数字" return "密码强度合格" print (check_password("abc" )) print (check_password("abcdefgh" )) print (check_password("Abcdefg1" ))
示例3:文本处理 1 2 3 4 5 6 7 8 9 10 11 12 13 text = " Hello, World! Python Programming " " " .join(text.split())print (cleaned) # Hello, World! Python Programming",.!" ) for w in cleaned.split()]print (words) # ['Hello' , 'World' , 'Python' , 'Programming' ]print (title) # Hello, World! Python Programming
12.11 小结 1 2 3 4 5 6 7 8 9 10 11 12 13 14 15 16 17 18 19 20 21 22 23 24 25 26 27 28 s = "Hello Python" print (s[0]) # Hprint (s[0:5]) # Helloprint (s[::-1]) # nohtyP olleHprint (s.find ("Python" )) # 6print ("Python" in s) # True print (s.upper()) # HELLO PYTHONprint (s.lower()) # hello pythonprint (s.split()) # ['Hello' , 'Python' ]print ("-" .join(["a" , "b" ])) # a-bprint (s.replace("Hello" , "Hi" )) # Hi Pythonprint (" hi " .strip()) # hi"张三" print (f"你好,{name}" ) # 你好,张三
操作类型
常用方法
查找
find() / index() / count() / in
转换
upper() / lower() / title()
分割连接
split() / join()
替换
replace()
去空白
strip() / lstrip() / rstrip()
判断
startswith() / endswith() / isdigit()
格式化
% / format() / f-string
💡 记住: 字符串不可变,所有修改操作都返回新字符串。
十三、Python 集合(set) 13.1 集合概述 集合是无序 且不重复 的元素集。
特性
说明
无序
元素没有固定顺序,不支持索引
不重复
自动去除重复元素
可变
可以增删元素
元素要求
必须是不可变类型(数字、字符串、元组)
💡 应用场景: 去重、成员检测、集合运算(交集、并集等)
13.2 集合的创建 基本创建 1 2 3 4 5 6 s1 = {1 , 2 , 3 , 4 , 5 }s2 = {"apple" , "banana" , "orange" }print (s1) # {1 , 2 , 3 , 4 , 5 }print (s2) # {'apple', 'banana', 'orange'}(顺序可能不同)
⚠️ 空集合只能用 set() 1 2 3 4 5 6 7 set ()print (type(s1)) # <class 'set' >print (type(s2)) # <class 'dict' >
自动去重 1 2 s = {1 , 2 , 2 , 3 , 3 , 3 , 4 }print (s) # {1 , 2 , 3 , 4 }
其他创建方式 1 2 3 4 5 6 7 8 9 10 11 12 s1 = set([1 , 2 , 3 , 2 , 1 ]) # 列表转集合print (s1) # {1 , 2 , 3 }s2 = set("hello" ) # 字符串转集合print (s2) # {'h', 'e', 'l', 'o'}s3 = set((1 , 2 , 3 )) # 元组转集合print (s3) # {1 , 2 , 3 }s4 = set(range(5 )) # range转集合print (s4) # {0 , 1 , 2 , 3 , 4 }
集合推导式 1 2 3 4 5 6 7 squares = {x**2 for x in range(1 , 6 )}print (squares) # {1 , 4 , 9 , 16 , 25 }evens = {x for x in range(10 ) if x % 2 == 0 }print (evens) # {0 , 2 , 4 , 6 , 8 }
13.3 集合的特性 1. 无序性(不支持索引) 2. 元素唯一性 1 2 3 4 5 s = {1 , 1 , 2 , 2 , 3 }print (s) # {1 , 2 , 3 }s .add(1 ) # 添加已存在的元素print (s) # {1 , 2 , 3 }(不变)
3. 元素必须可哈希(不可变) 1 2 3 4 5 6 7 8 s1 = {1 , 2 , 3 } s2 = {"a" , "b" , "c" } s3 = {(1 , 2 ), (3 , 4 )}
13.4 集合元素操作 1. 添加元素 1 2 3 4 5 6 7 8 9 10 11 12 13 14 15 s = {1 , 2 , 3 }s .add(4 )print (s) # {1 , 2 , 3 , 4 }s .add(2 ) # 添加重复元素,无效果print (s) # {1 , 2 , 3 , 4 }s .update([5 , 6 , 7 ])print (s) # {1 , 2 , 3 , 4 , 5 , 6 , 7 }s .update({8 , 9 }, [10]) # 可以添加多个可迭代对象 print(s) # {1, 2, 3, 4, 5, 6, 7, 8, 9, 10}
2. 删除元素 1 2 3 4 5 6 7 8 9 10 11 12 13 14 15 16 17 18 19 20 21 s = {1 , 2 , 3 , 4 , 5 }s .remove(3 )print (s) # {1 , 2 , 4 , 5 }s .discard(4 )print (s) # {1 , 2 , 5 }s .discard(10 ) # 不报错print (s) # {1 , 2 , 5 }item = s.pop()print (item) # 随机一个元素print (s) # 剩余元素s .clear()print (s) # set()
3. 查找元素 1 2 3 4 5 6 s = {1, 2, 3, 4, 5}print (3 in s) # True print (10 in s) # False print (10 not in s) # True
13.5 集合运算 集合支持数学集合运算,这是集合最强大的功能。
示意图 1 2 3 4 5 6 7 8 集合 A = {1, 2, 3, 4} 集合 B = {3, 4, 5, 6} 交集: {3, 4} 并集: {1, 2, 3, 4, 5, 6} 差集 A-B: {1, 2} 差集 B-A: {5, 6} 对称差集: {1, 2, 5, 6}
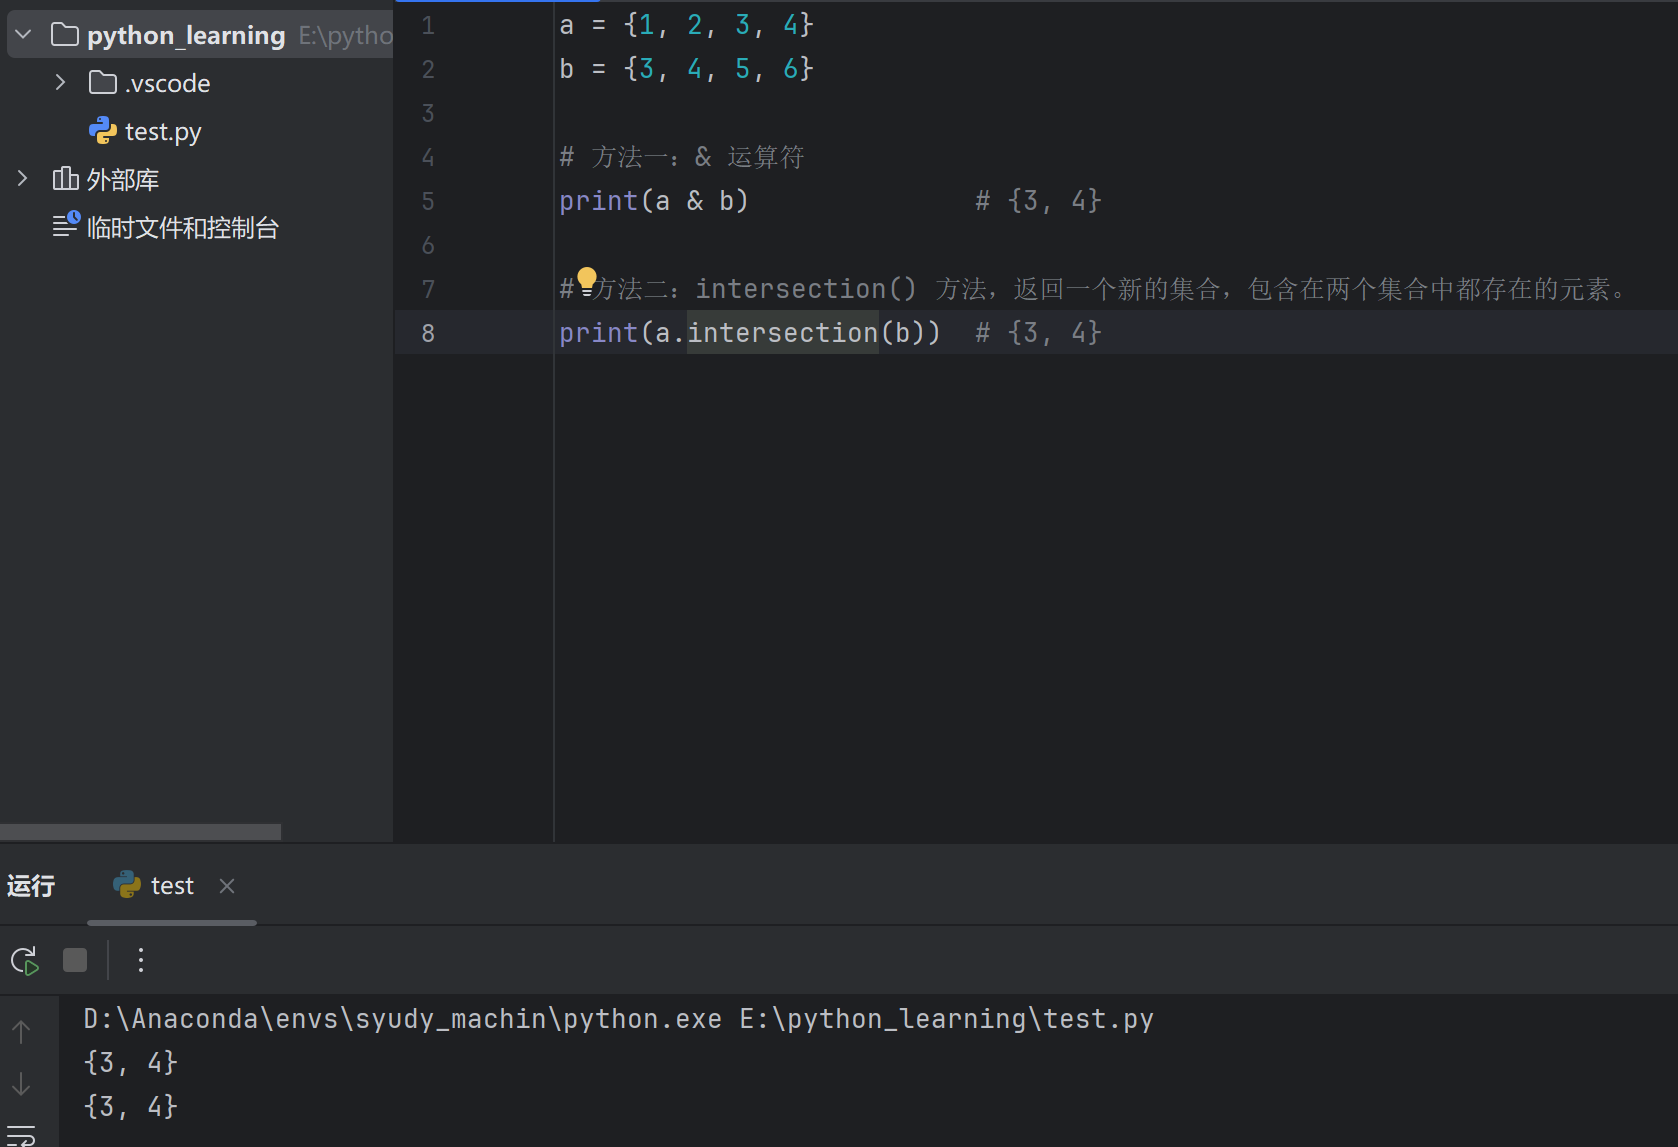
1. 交集(共同元素) 1 2 3 4 5 6 7 8 a = {1 , 2 , 3 , 4 }3 , 4 , 5 , 6 }print (a & b) print (a.intersection(b))
2. 并集(所有元素) 1 2 3 4 5 6 7 8 a = {1 , 2 , 3 , 4 }b = {3 , 4 , 5 , 6 }print (a | b) # {1 , 2 , 3 , 4 , 5 , 6 }print (a.union(b)) # {1 , 2 , 3 , 4 , 5 , 6 }
3. 差集(在A中但不在B中) 1 2 3 4 5 6 7 8 9 a = {1 , 2 , 3 , 4 }b = {3 , 4 , 5 , 6 }print (a - b) # {1 , 2 }print (b - a) # {5 , 6 }print (a.difference(b)) # {1 , 2 }
4. 对称差集(不同时存在于两个集合) 1 2 3 4 5 6 7 8 a = {1 , 2 , 3 , 4 }b = {3 , 4 , 5 , 6 }print (a ^ b) # {1 , 2 , 5 , 6 }print (a.symmetric_difference(b)) # {1 , 2 , 5 , 6 }
5. 集合运算汇总
运算
运算符
方法
说明
交集
&intersection()共同元素
并集
`
`
union()
差集
-difference()A有B没有
对称差集
^symmetric_difference()不共有的元素
13.6 集合关系判断 1 2 3 4 5 6 7 8 9 10 11 12 13 14 15 16 17 18 19 20 21 a = {1, 2, 3}print (a.issubset(b)) # True (a是b的子集)print (a <= b) # True print (a < b) # True (真子集)print (b.issuperset(a)) # True (b是a的超集)print (b >= a) # True print (b > a) # True (真超集)print (a == c) # True print (a.isdisjoint(d)) # True (没有共同元素)print (a.isdisjoint(b)) # False
13.7 集合方法汇总
方法
说明
示例
add(x)添加元素
s.add(1)
update(x)添加多个元素
s.update([1,2])
remove(x)删除元素(不存在报错)
s.remove(1)
discard(x)删除元素(不存在不报错)
s.discard(1)
pop()随机删除并返回
s.pop()
clear()清空
s.clear()
copy()复制
s.copy()
intersection()交集
a.intersection(b)
union()并集
a.union(b)
difference()差集
a.difference(b)
issubset()是否子集
a.issubset(b)
issuperset()是否超集
a.issuperset(b)
isdisjoint()是否无交集
a.isdisjoint(b)
13.8 集合遍历 1 2 3 4 5 6 7 8 9 10 11 12 13 s = {"apple" , "banana" , "orange" }for item in s:print (item)for item in sorted (s): print (item)for i, item in enumerate (s):print (f"{i} : {item} " )
13.9 不可变集合 frozenset frozenset 是不可变的集合,可以作为字典的键或其他集合的元素。
1 2 3 4 5 6 7 8 9 10 11 12 13 14 15 16 17 18 19 20 21 fs = frozenset([1 , 2 , 3 , 4 ])print (fs) # frozenset({1 , 2 , 3 , 4 })fs1 = frozenset([1 , 2 , 3 ])fs2 = frozenset([3 , 4 , 5 ])print (fs1 & fs2) # frozenset({3 })print (fs1 | fs2) # frozenset({1 , 2 , 3 , 4 , 5 })d = {frozenset([1 , 2 ]): "value" }print (d) # {frozenset({1 , 2 }): 'value'}s = {frozenset([1 , 2 ]), frozenset([3 , 4 ])}print (s) # {frozenset({1 , 2 }), frozenset({3 , 4 })}
13.10 实际应用 1. 列表去重 1 2 3 4 5 6 7 8 9 # 方法一:转集合再转列表 1 , 2 , 2 , 3 , 3 , 3 , 4 , 4 , 4 , 4 ]list (set (lst))print (unique ) # [1, 2, 3, 4] # 方法二:保持原顺序去重 3 , 1 , 2 , 2 , 3 , 1 , 4 ]list (dict.fromkeys (lst))print (unique ) # [3, 1, 2, 4]
2. 统计共同好友 1 2 3 4 5 6 7 8 9 10 11 12 13 14 15 "张三" , "李四" , "王五" , "赵六" }"李四" , "王五" , "钱七" , "孙八" }print (f"共同好友:{common}" ) # {'李四' , '王五' }print (f"A独有好友:{only_a}" ) # {'张三' , '赵六' }print (f"所有好友:{all_friends}" )
3. 快速成员检测 1 2 3 4 5 6 7 8 "admin" , "user1" , "user2" , "user3" }"admin" if username in valid_users:print ("用户有效" )else :print ("用户无效" )
4. 数据去重统计 1 2 3 4 5 6 "user1" , "user2" , "user1" , "user3" , "user2" , "user1" ]set (visits)print (f"独立访客数:{len (unique_visitors)} " ) print (f"访客列表:{unique_visitors} " )
5. 权限管理 1 2 3 4 5 6 7 8 9 10 11 12 13 14 15 16 17 18 19 20 21 "read" , "write" , "delete" , "manage" }"read" , "write" }"read" }"editor" "write" "admin" :"editor" :else: "操作允许" )else: "权限不足" )
13.11 综合示例 1 2 3 4 5 6 7 8 9 10 11 12 13 14 15 16 17 18 19 20 21 22 23 24 25 26 27 28 29 30 31 "张三" , "李四" , "王五" , "赵六" , "钱七" }"李四" , "王五" , "孙八" , "周九" , "吴十" }print ("=" * 40)print ("课程选修分析" )print ("=" * 40)print (f"同时选两门课:{both}" )print (f"人数:{len(both)}" )print (f"只选Python:{only_python}" )print (f"只选Java:{only_java}" )print (f"至少选一门:{at_least_one}" )print (f"总人数:{len(at_least_one)}" )print (f"只选一门课:{only_one}" )print ("=" * 40)
输出:
1 2 3 4 5 6 7 8 9 10 11 = = = = = = = = = = = = = = = = = = = = = = = = = = = = = = = = = = = = = = = = = = = = = = = = = = = = = = = = = = = = = = = = = = = = = = = = = = = = = = = = , '王五'}2 , '赵六', '钱七'}, '周九', '吴十'}, '李四', '王五', '赵六', '钱七', '孙八', '周九', '吴十'}8 , '赵六', '钱七', '孙八', '周九', '吴十'}= = = = = = = = = = = = = = = = = = = = = = = = = = = = = = = = = = = = = = = =
13.12 小结 1 2 3 4 5 6 7 8 9 10 11 12 13 14 15 16 17 18 19 20 21 22 23 24 25 s = {1 , 2 , 3 }s = set([1 , 2 , 3 ])s .add(4 )s .update([5 , 6 ])s .remove(1 ) # 不存在报错s .discard(1 ) # 不存在不报错s .pop() # 随机删除print (1 in s)a & b # 交集a | b # 并集a - b # 差集a ^ b # 对称差集for item in s:print (item)
操作
语法/方法
创建
{1, 2} 或 set()
添加
add() / update()
删除
remove() / discard() / pop()
交集
& 或 intersection()
并集
`
差集
- 或 difference()
去重
list(set(lst))
💡 记住: 集合 = 无序 + 不重复 + 集合运算
十四、Python 字典(dict) 14.1 字典概述 字典是键值对 (key-value)的无序集合。
特性
说明
键值对
每个元素由键(key)和值(value)组成
键唯一
键不能重复,值可以重复
键不可变
键必须是不可变类型(字符串、数字、元组)
值任意
值可以是任何类型
可变
可以增删改键值对
有序
Python 3.7+ 保持插入顺序
💡 应用场景: 存储关联数据,如用户信息、配置项、数据映射等。
14.2 字典的创建 基本创建 1 2 3 4 5 6 7 8 9 "name" : "张三" , "age" : 18, "city" : "北京" }"语文" : 85, "数学" : 92, "英语" : 78}print (person) # {'name' : '张三' , 'age' : 18, 'city' : '北京' }
其他创建方式 1 2 3 4 5 6 7 8 9 10 11 12 13 14 15 16 17 name ="张三" , age =18)print (d1) # {'name' : '张三' , 'age' : 18}"name" , "张三" ), ("age" , 18)])print (d2) # {'name' : '张三' , 'age' : 18}"name" , "age" , "city" ]"张三" , 18, "北京" ]print (d3) # {'name' : '张三' , 'age' : 18, 'city' : '北京' }"a" , "b" , "c" ], 0)print (d4) # {'a' : 0, 'b' : 0, 'c' : 0}
字典推导式 1 2 3 4 5 6 7 8 9 10 11 12 squares = {x: x**2 for x in range(1 , 6 )}print (squares) # {1 : 1 , 2 : 4 , 3 : 9 , 4 : 16 , 5 : 25 }evens = {x: x**2 for x in range(10 ) if x % 2 == 0 }print (evens) # {0 : 0 , 2 : 4 , 4 : 16 , 6 : 36 , 8 : 64 }d = {"a" : 1 , "b" : 2 , "c" : 3 }d_swap = {v: k for k, v in d.items()}print (d_swap) # {1 : 'a', 2 : 'b', 3 : 'c'}
14.3 访问字典元素 1. 通过键访问 1 2 3 4 5 6 person = {"name" : "张三" , "age" : 18 , "city" : "北京" }# 方括号访问 print (person["name" ]) # 张三 print (person["age" ]) # 18 # print(person["job"]) ❌ 报错:键不存在
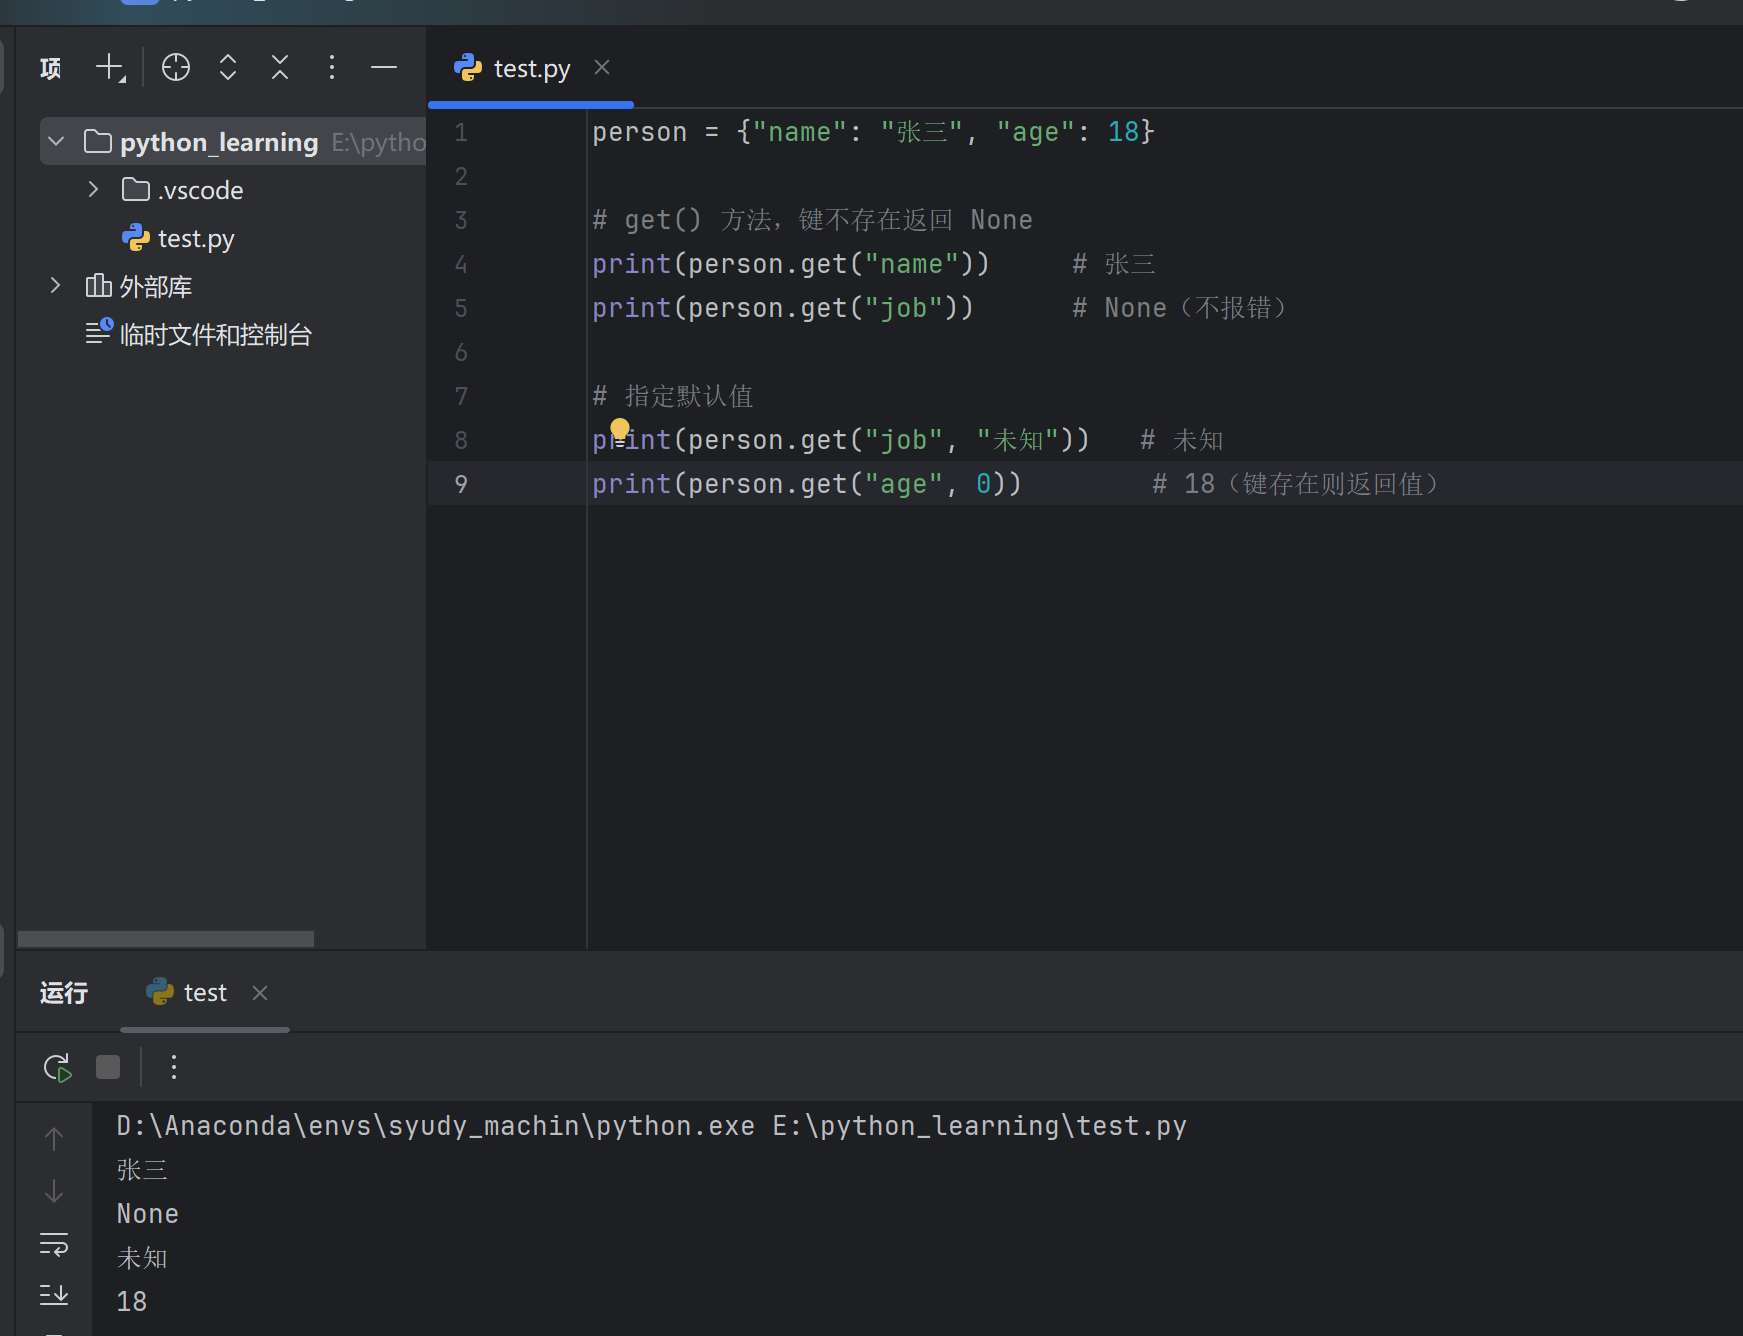
2. get() 方法(推荐) 1 2 3 4 5 6 7 8 9 person = {"name" : "张三" , "age" : 18 }print (person.get("name" )) print (person.get("job" )) print (person.get("job" , "未知" )) print (person.get("age" , 0 ))
3. 获取所有键、值、键值对 1 2 3 4 5 6 7 8 9 10 11 12 13 person = {"name" : "张三" , "age" : 18, "city" : "北京" }print (person.keys()) # dict_keys(['name' , 'age' , 'city' ])print (list(person.keys())) # ['name' , 'age' , 'city' ]print (person.values()) # dict_values(['张三' , 18, '北京' ])print (list(person.values())) # ['张三' , 18, '北京' ]print (person.items()) # dict_items([('name' , '张三' ), ('age' , 18), ('city' , '北京' )])print (list(person.items())) # [('name' , '张三' ), ('age' , 18), ('city' , '北京' )]
14.4 字典元素操作 1. 添加/修改元素 1 2 3 4 5 6 7 8 9 10 11 12 13 14 15 16 17 person = {"name" : "张三" , "age" : 18}"city" ] = "北京" print (person) # {'name' : '张三' , 'age' : 18, 'city' : '北京' }"age" ] = 20print (person) # {'name' : '张三' , 'age' : 20, 'city' : '北京' }"job" : "程序员" , "age" : 25})print (person) # {'name' : '张三' , 'age' : 25, 'city' : '北京' , 'job' : '程序员' }salary =10000)print (person) # {.. ., 'salary' : 10000}
2. 删除元素 1 2 3 4 5 6 7 8 9 10 11 12 13 14 15 16 17 18 19 20 21 22 23 person = {"name" : "张三" , "age" : 18, "city" : "北京" , "job" : "程序员" }"age" )print (age) # 18print (person) # {'name' : '张三' , 'city' : '北京' , 'job' : '程序员' }"salary" , "无" )print (job) # 无print (item) # ('job' , '程序员' )print (person) # {'name' : '张三' , 'city' : '北京' }"city" ]print (person) # {'name' : '张三' }print (person) # {}
3. setdefault() 方法 如果键存在返回其值,不存在则设置默认值:
1 2 3 4 5 6 7 8 9 10 11 person = {"name" : "张三" }"name" , "李四" )print (name) # 张三print (person) # {'name' : '张三' }"age" , 18)print (age) # 18print (person) # {'name' : '张三' , 'age' : 18}
14.5 字典遍历 1 2 3 4 5 6 7 8 9 10 11 12 13 14 15 16 17 person = {"name" : "张三" , "age" : 18, "city" : "北京" }for key in person:print (key)for key in person.keys():print (key)for value in person.values():print (value)for key, value in person.items():print (f"{key}: {value}" )
输出:
1 2 3 name: 张三age: 18 city: 北京
14.6 字典方法汇总
方法
说明
示例
get(key, default)获取值,不存在返回默认值
d.get("name", "无")
keys()获取所有键
d.keys()
values()获取所有值
d.values()
items()获取所有键值对
d.items()
update(dict2)更新/合并字典
d.update({"a": 1})
pop(key, default)删除并返回值
d.pop("name")
popitem()删除最后一项
d.popitem()
setdefault(key, default)设置默认值
d.setdefault("age", 0)
clear()清空字典
d.clear()
copy()浅拷贝
d.copy()
14.7 字典判断操作 1 2 3 4 5 6 7 8 9 10 11 12 13 14 person = {"name" : "张三" , "age" : 18}print ("name" in person) # True print ("job" in person) # False print ("job" not in person) # True print ("张三" in person) # False print ("张三" in person.values()) # True print (len(person) == 0) # False print (bool(person)) # True (非空为True )
14.8 嵌套字典 1 2 3 4 5 6 7 8 9 10 11 12 13 14 15 16 "001" : {"name" : "张三" , "age" : 18, "scores" : {"语文" : 85, "数学" : 92}},"002" : {"name" : "李四" , "age" : 19, "scores" : {"语文" : 78, "数学" : 88}},"003" : {"name" : "王五" , "age" : 17, "scores" : {"语文" : 95, "数学" : 90}}print (students["001" ]["name" ]) # 张三print (students["001" ]["scores" ]["数学" ]) # 92for sid, info in students.items():info ["name" ]info ["scores" ]["数学" ]print (f"学号:{sid}, 姓名:{name}, 数学:{math_score}" )
输出:
1 2 3 学号:001, 姓名:张三, 数学:92
14.9 字典排序 字典本身无序,但可以按键或值排序后遍历:
按键排序 1 2 3 4 5 6 7 8 9 scores = {"语文" : 85 , "数学" : 92 , "英语" : 78 , "物理" : 88 }for key in sorted (scores.keys()):print (f"{key} : {scores[key]} " )for key in sorted (scores.keys(), reverse=True ):print (f"{key} : {scores[key]} " )
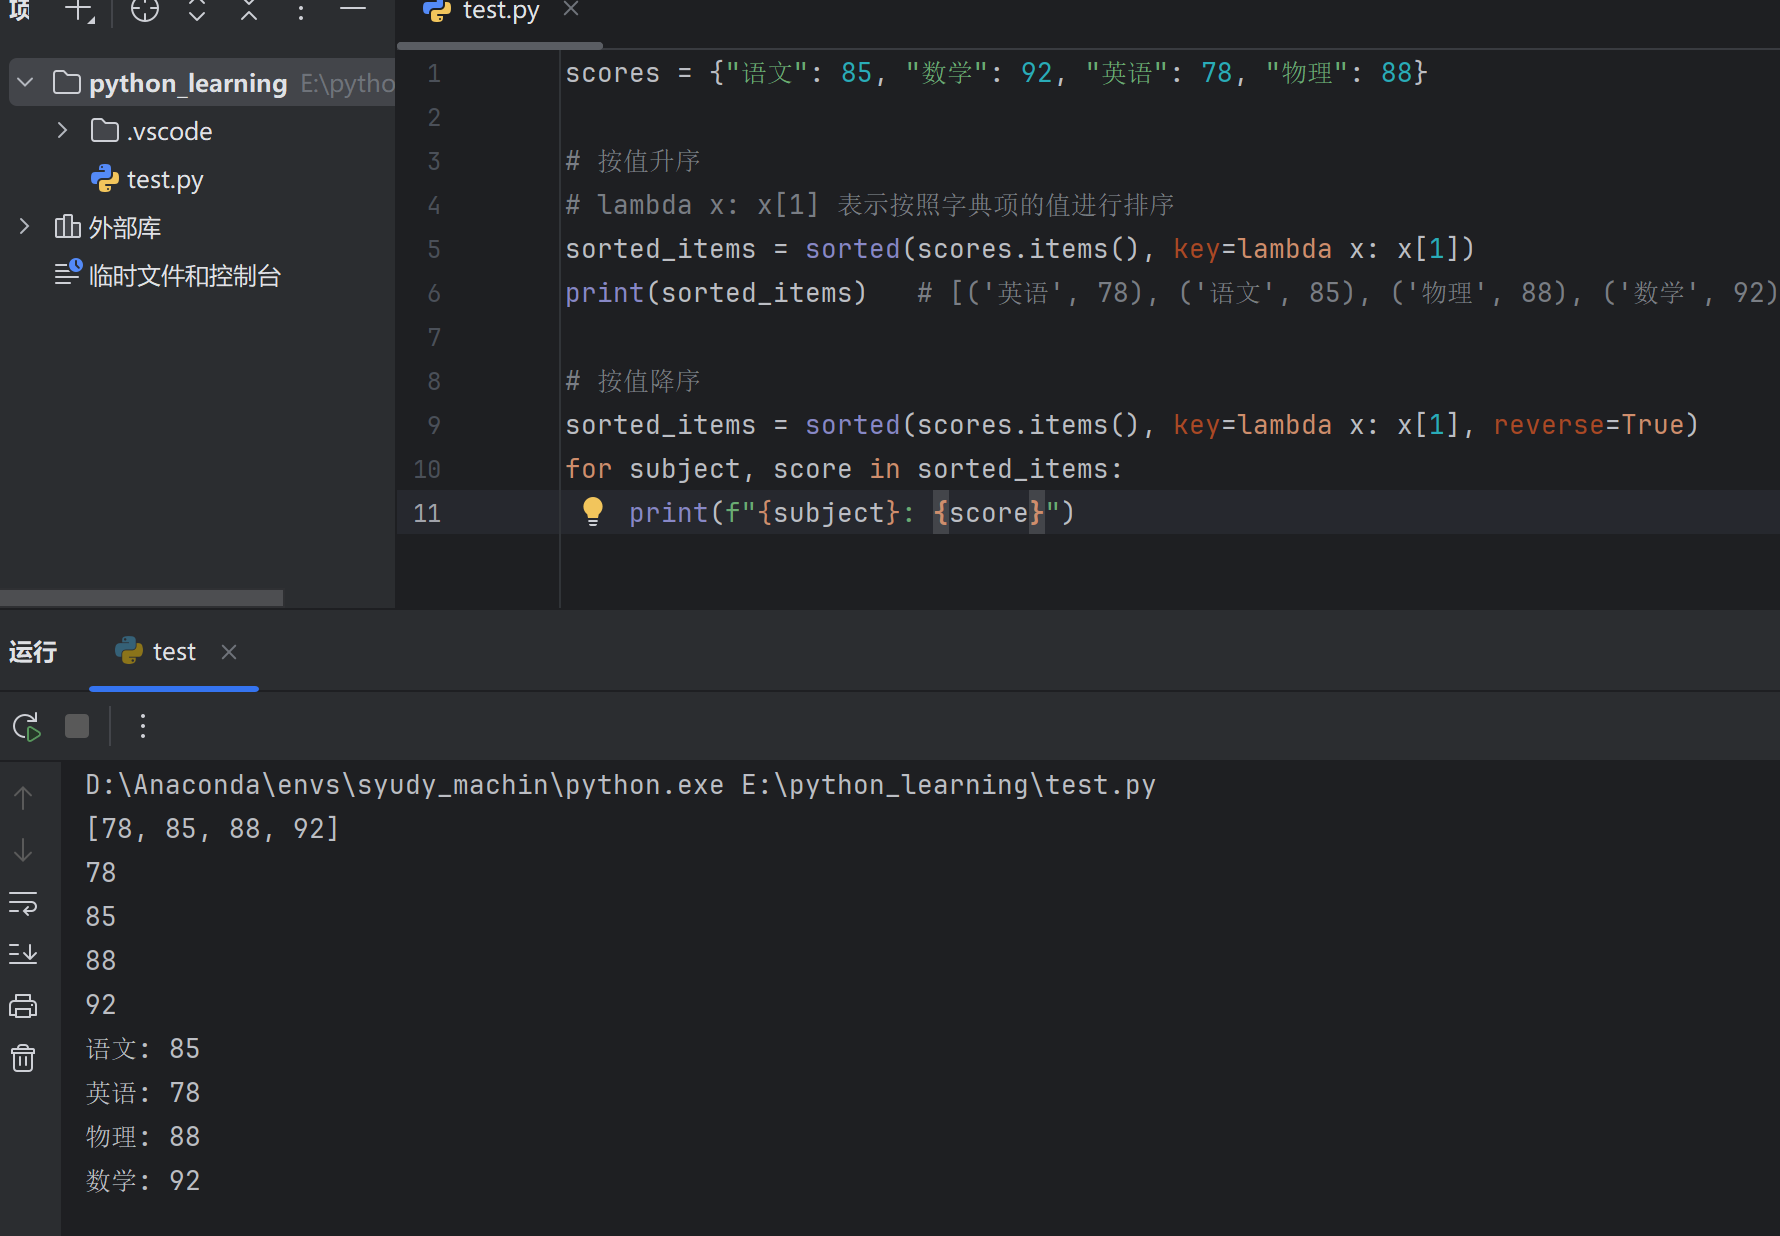
按值排序 1 2 3 4 5 6 7 8 9 10 scores = {"语文" : 85, "数学" : 92, "英语" : 78, "物理" : 88}key =lambda x: x[1])print (sorted_items) # [('英语' , 78), ('语文' , 85), ('物理' , 88), ('数学' , 92)]key =lambda x: x[1], reverse =True )for subject, score in sorted_items:print (f"{subject}: {score}" )
输出:
1 2 3 4 数学: 92 物理: 88 语文: 85 英语: 78
14.10 字典合并 1 2 3 4 5 6 7 8 9 10 11 12 13 14 15 16 17 18 19 20 d1 = {"a" : 1, "b" : 2}"c" : 3, "d" : 4}"a" : 100, "e" : 5} # 键 "a" 与 d1 重复print (d1_copy) # {'a' : 1, 'b' : 2, 'c' : 3, 'd' : 4}*d1 , **d2 }print (merged) # {'a' : 1, 'b' : 2, 'c' : 3, 'd' : 4}*d1 , **d3 }print (merged) # {'a' : 100, 'b' : 2, 'e' : 5}print (merged) # {'a' : 1, 'b' : 2, 'c' : 3, 'd' : 4}
14.11 实际应用 1. 统计字符频率 1 2 3 4 5 6 7 8 9 10 11 12 13 14 15 16 17 18 19 20 21 22 23 text = "hello world" # 方法一:普通循环 count = {}for char in text:if char in count :count [char ] += 1 else :count [char ] = 1 print (count )# 方法二:get() 方法 count = {}for char in text:count [char ] = count .get(char , 0 ) + 1 print (count )# 方法三:setdefault() count = {}for char in text:count .setdefault(char , 0 )count [char ] += 1 print (count )
输出:
1 {'h': 1 , 'e': 1 , 'l': 3 , 'o': 2 , ' ': 1 , 'w': 1 , 'r': 1 , 'd': 1 }
2. 分组统计 1 2 3 4 5 6 7 8 9 10 11 12 13 14 15 16 17 18 19 20 21 students = ["name" : "张三" , "class" : "A班" , "score" : 85 },"name" : "李四" , "class" : "B班" , "score" : 92 },"name" : "王五" , "class" : "A班" , "score" : 78 },"name" : "赵六" , "class" : "B班" , "score" : 88 },"name" : "钱七" , "class" : "A班" , "score" : 95 }for student in students:"class" ]if class_name not in groups:for class_name, members in groups.items():print (f"\n{class_name} :" )for s in members:print (f" {s['name' ]} : {s['score' ]} 分" )
3. 配置管理 1 2 3 4 5 6 7 8 9 10 11 12 13 14 15 16 17 18 # 默认配置"host" : "localhost" ,"port" : 8080 ,"debug" : False ,"timeout" : 30 "port" : 3000 ,"debug" : True 'host' : 'localhost' , 'port' : 3000 , 'debug' : True , 'timeout' : 30 }
4. 缓存/记忆化 1 2 3 4 5 6 7 8 9 10 11 12 13 14 15 16 17 if n in cache: return cache[n]if n <= 1 :result = nelse :result = fibonacci(n-1 ) + fibonacci(n-2 )result return result 50 ))
5. 数据映射/转换 1 2 3 4 5 6 7 8 9 10 11 12 13 14 15 16 17 18 19 20 21 22 23 1 : "星期一" , 2 : "星期二" , 3 : "星期三" ,4 : "星期四" , 5 : "星期五" , 6 : "星期六" , 7 : "星期日" 3 print (week_map.get(day, "无效" )) def get_grade (score ):90 , 100 ): "优秀" ,80 , 89 ): "良好" ,60 , 79 ): "及格" ,0 , 59 ): "不及格" for (low, high), grade in grade_map.items():if low <= score <= high:return gradereturn "无效成绩" print (get_grade(85 ))
14.12 综合示例 Python
1 2 3 4 5 6 7 8 9 10 11 12 13 14 15 16 17 18 19 20 21 22 23 24 25 26 27 28 29 30 31 32 33 34 35 36 37 38 39 40 41 42 43 "001" : {"name" : "张三" , "scores" : {"语文" : 85 , "数学" : 92 , "英语" : 78 }},"002" : {"name" : "李四" , "scores" : {"语文" : 78 , "数学" : 88 , "英语" : 95 }},"003" : {"name" : "王五" , "scores" : {"语文" : 92 , "数学" : 85 , "英语" : 88 }}def print_report ():print ("=" * 55 )print (f"{'学号' :^8 } {'姓名' :^8 } {'语文' :^8 } {'数学' :^8 } {'英语' :^8 } {'平均' :^8 } " )print ("=" * 55 )for sid, info in students.items():"name" ]"scores" ]sum (scores.values()) / len (scores)print (f"{sid:^8 } {name:^8 } {scores['语文' ]:^8 } {scores['数学' ]:^8 } {scores['英语' ]:^8 } {avg:^8.1 f} " )print ("=" * 55 )def get_subject_avg (subject ):"""计算某科目平均分""" sum (s["scores" ].get(subject, 0 ) for s in students.values())return total / len (students)def get_top_student ():"""获取总分最高的学生""" max (students.keys(), lambda x: sum (students[x]["scores" ].values()))return top_sid, students[top_sid]print ("\n各科平均分:" )for subject in ["语文" , "数学" , "英语" ]:print (f" {subject} : {get_subject_avg(subject):.1 f} " )sum (info["scores" ].values())print (f"\n总分最高:{info['name' ]} ({total} 分)" )
输出:
text
1 2 3 4 5 6 7 8 9 10 11 12 13 14 ======================================================= 001 张三 85 92 78 85.0 002 李四 78 88 95 87.0 003 王五 92 85 88 88.3 ======================================================= 语文: 85.0 数学: 88.3 英语: 87.0
14.13 小结 1 2 3 4 5 6 7 8 9 10 11 12 13 14 15 16 17 18 19 20 21 22 23 24 "name" : "张三" , "age" : 18}name ="张三" , age =18)print (d["name" ]) # 直接访问(键不存在报错)print (d.get ("name" )) # get访问(键不存在返回None)print (d.get ("job" , "无" )) # 指定默认值"city" ] = "北京" "job" : "程序员" })"age" ) # 删除并返回值"city" ] # 删除键for key in d: # 遍历键for value in d.values(): # 遍历值for k, v in d.items(): # 遍历键值对print ("name" in d) # 键是否存在
操作
语法/方法
创建
{} 或 dict()
访问
d[key] 或 d.get(key)
添加/修改
d[key] = value
删除
pop() / del / popitem()
获取键/值/项
keys() / values() / items()
合并
update() 或 {**d1, **d2}
判断
key in d
💡 记住: 字典 = 键值对 + 键唯一 + 快速查找
十五、Python 类与面向对象编程 15.1 面向对象概述 面向对象编程(OOP)是一种编程思想,将数据和操作封装成对象 。
核心概念
概念
说明
示例
类(Class)
对象的模板/蓝图
“人”这个概念
对象(Object)
类的具体实例
“张三”这个人
属性(Attribute)
对象的特征/数据
姓名、年龄
方法(Method)
对象的行为/功能
说话、走路
三大特性
特性
说明
封装
将数据和方法包装在类中,隐藏内部细节
继承
子类继承父类的属性和方法
多态
同一方法在不同对象中有不同表现
15.2 类的定义与实例化 基本语法 1 2 3 4 5 6 7 8 9 10 class 类名 :"""类的文档说明""" def __init__ (self, 参数 ):"""构造方法,创建对象时自动调用""" self .属性 = 参数def 方法名 (self ):"""实例方法""" pass
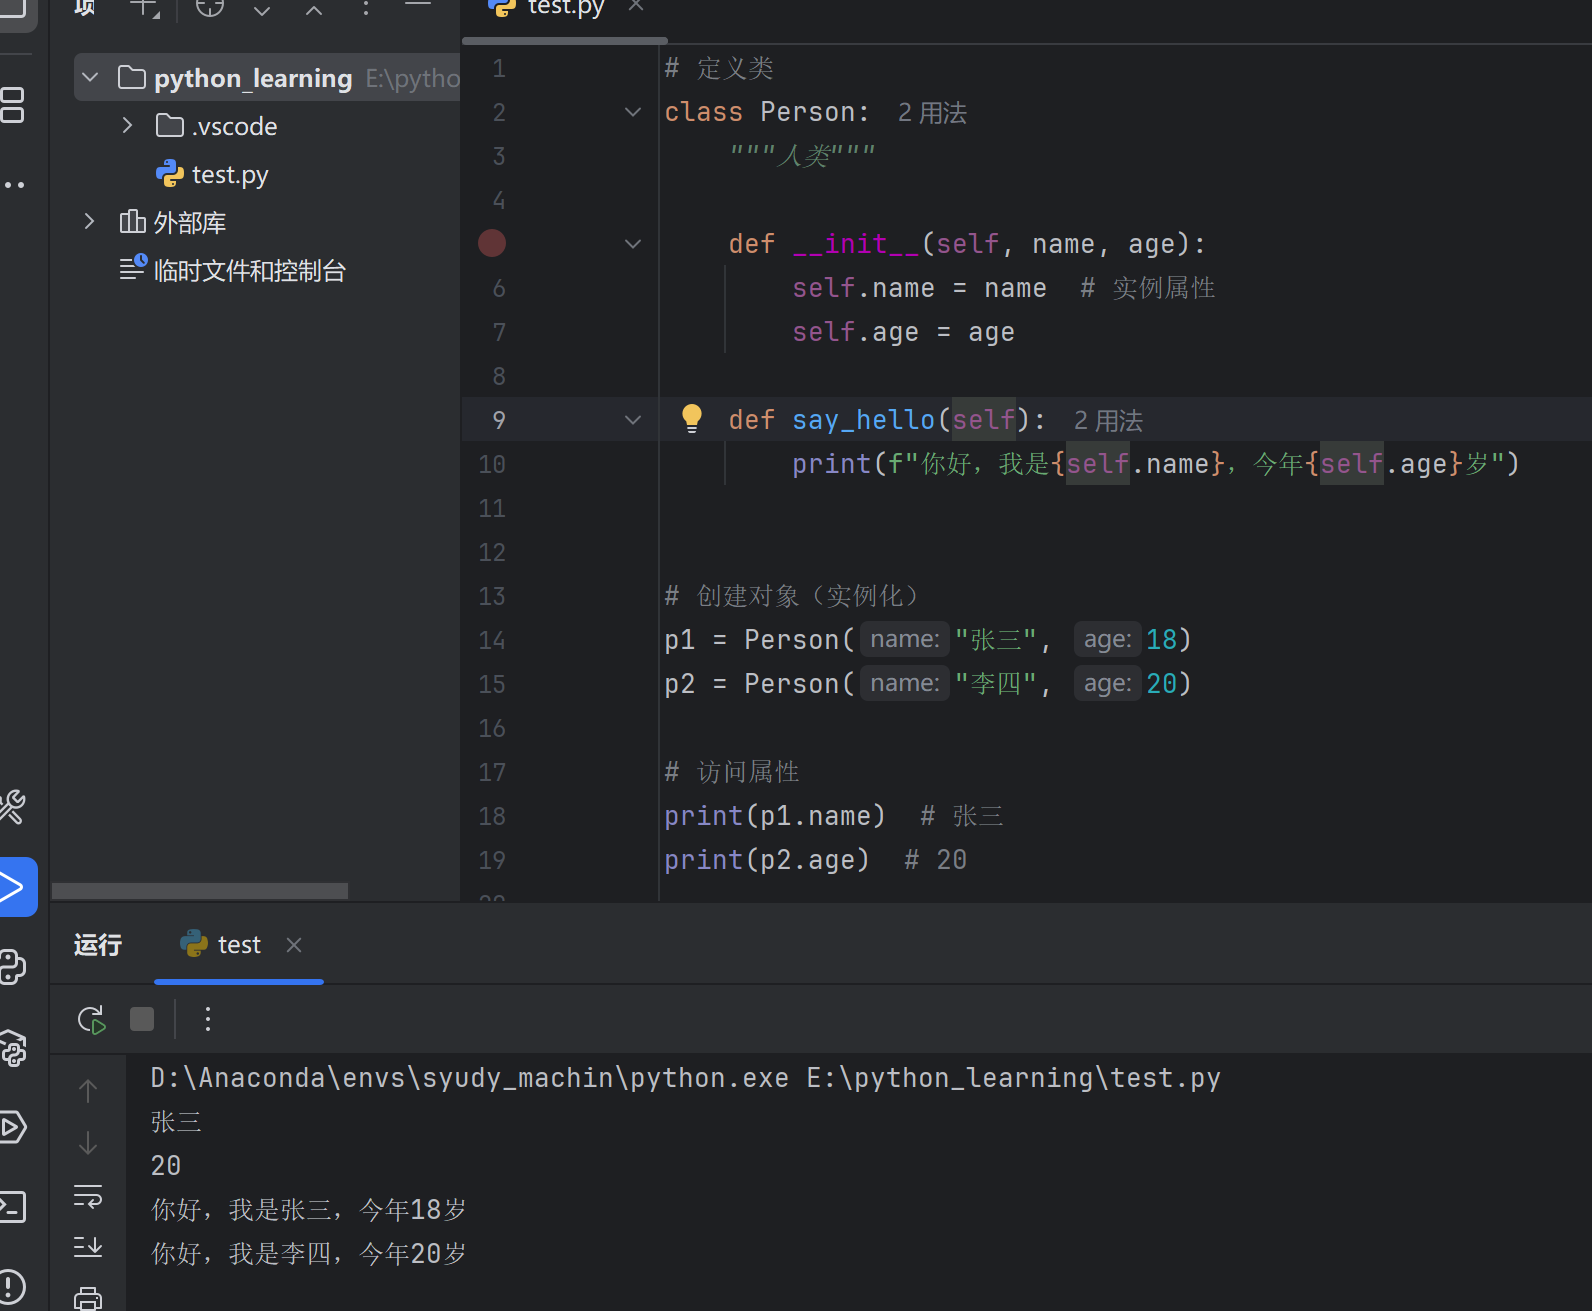
简单示例 1 2 3 4 5 6 7 8 9 10 11 12 13 14 15 16 17 18 19 20 21 22 class Person :"""人类""" def __init__ (self, name, age ):self .name = name self .age = agedef say_hello (self ):print (f"你好,我是{self.name} ,今年{self.age} 岁" )"张三" , 18 )"李四" , 20 )print (p1.name) print (p2.age)
15.3 构造方法 __init__ __init__ 是特殊方法,在创建对象时自动调用 。
1 2 3 4 5 6 7 8 9 10 11 12 13 class Student :def __init__ (self, name, score=0 ):"""构造方法""" print (f"创建学生:{name} " )self .name = nameself .score = score"张三" , 85 ) "李四" ) print (s1.score) print (s2.score)
15.4 self 关键字 self 代表当前对象本身 ,类似于其他语言中的 this。
1 2 3 4 5 6 7 8 9 10 11 12 13 14 15 16 17 class Dog :def __init__ (self, name ):self .name = name def bark (self ):print (f"{self.name} 在汪汪叫" )def introduce (self ):print (f"我是{self.name} " )self .bark()"旺财" )
💡 注意: self 必须是实例方法的第一个参数,调用时不需要传递。
15.5 实例属性与类属性 实例属性 属于每个对象独有 ,通过 self.属性 定义
1 2 3 4 5 6 7 8 9 10 11 12 13 class Person :def __init__ (self, name ):self .name = name "张三" )"李四" )print (p1.name) print (p2.name) "王五" print (p1.name) print (p2.name)
类属性 属于类本身 ,所有对象共享。
1 2 3 4 5 6 7 8 9 10 11 12 13 14 15 16 class Person :"人类" 0 def __init__ (self, name ):self .name = name1 "张三" )"李四" )print (Person.species) print (p1.species) print (Person.count)
区别对比 1 2 3 4 5 6 7 8 9 10 11 12 13 14 15 16 17 18 class Demo :"类属性" def __init__ (self ):self .instance_attr = "实例属性" "修改后" print (d1.class_attr) print (d2.class_attr) "d1的属性" print (d1.instance_attr) print (d2.instance_attr)
15.6 实例方法、类方法、静态方法 1. 实例方法 最常用,第一个参数是 self,可以访问实例属性和类属性。
1 2 3 4 5 6 7 8 9 class Person :def __init__ (self, name ):self .name = namedef say_hello (self ): print (f"你好,我是{self.name} " )"张三" )
2. 类方法 使用 @classmethod 装饰器,第一个参数是 cls(代表类本身)。
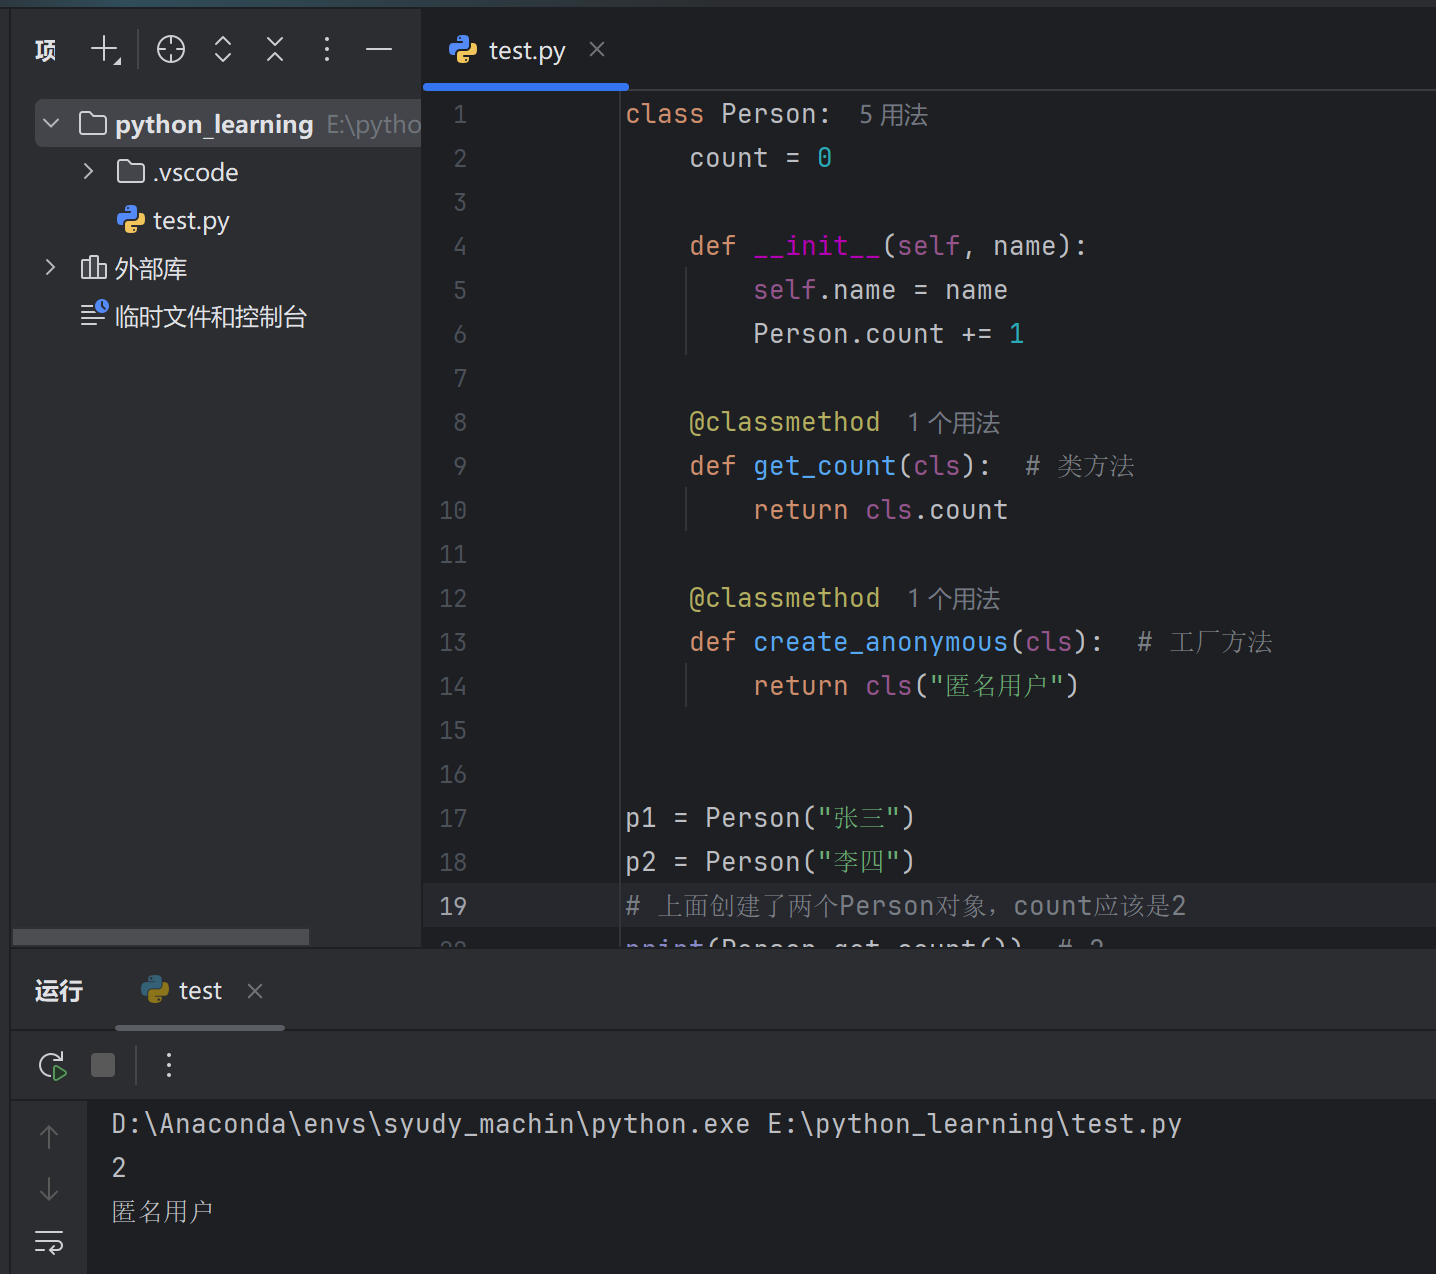
1 2 3 4 5 6 7 8 9 10 11 12 13 14 15 16 17 18 19 20 21 22 class Person :0 def __init__ (self, name ):self .name = name1 @classmethod def get_count (cls ): return cls.count @classmethod def create_anonymous (cls ): return cls("匿名用户" )"张三" )"李四" )print (Person.get_count()) print (p3.name)
3. 静态方法 使用 @staticmethod 装饰器,不需要 self 或 cls 参数。
1 2 3 4 5 6 7 8 9 10 11 12 13 14 15 16 class MathUtils : @staticmethod def add (a, b ):return a + b @staticmethod def is_even (n ):return n % 2 == 0 print (MathUtils.add(3 , 5 )) print (MathUtils.is_even(4 )) print (m.add(1 , 2 ))
三种方法对比
方法类型
装饰器
第一个参数
访问能力
实例方法
无
self实例属性、类属性
类方法
@classmethodcls类属性
静态方法
@staticmethod无
无(独立函数)
15.7 访问控制 Python 使用命名约定 来表示访问级别。
公有属性/方法 1 2 3 4 5 6 7 8 9 10 class Person :def __init__ (self , nameself .name = name def say_hello (self "你好,{self.name}" )Person ("张三" )
私有属性/方法(双下划线开头) 1 2 3 4 5 6 7 8 9 10 11 12 13 14 15 16 17 18 19 20 21 22 23 24 25 26 class BankAccount :def __init__ (self, balance ):self .__balance = balance def __check_balance (self ): return self .__balance >= 0 def deposit (self, amount ):self .__balance += amountdef withdraw (self, amount ):if self .__balance >= amount:self .__balance -= amountreturn True return False def get_balance (self ):return self .__balance1000 )print (account.get_balance()) print (account._BankAccount__balance)
受保护属性/方法(单下划线开头) 1 2 3 4 5 6 7 8 9 class Person :def __init__ (self, name, age ):self .name = name self ._age = age self .__id = "001" "张三" , 18 )print (p.name) print (p._age)
访问级别总结
命名方式
含义
示例
name公有
self.name
_name受保护(约定)
self._name
__name私有
self.__name
__name__特殊方法
__init__
15.8 继承 子类可以继承父类的属性和方法。
基本继承 1 2 3 4 5 6 7 8 9 10 11 12 13 14 15 16 17 18 19 20 21 22 23 24 25 class Animal :def __init__ (self , nameself .name = namedef speak (self "{self.name}在叫" )class Dog (Animal ):def bark (self "{self.name}汪汪叫" )class Cat (Animal ):def meow (self "{self.name}喵喵叫" )Dog ("旺财" )Cat ("咪咪" )
方法重写 子类可以重写父类的方法。
1 2 3 4 5 6 7 8 9 10 11 12 13 14 15 16 17 18 19 20 class Animal :def __init__ (self, name ):self .name = namedef speak (self ):print (f"{self.name} 在叫" )class Dog (Animal ):def speak (self ): print (f"{self.name} 汪汪汪!" )class Cat (Animal ):def speak (self ): print (f"{self.name} 喵喵喵!" )"旺财" )"咪咪" )
super() 调用父类 1 2 3 4 5 6 7 8 9 10 11 12 13 14 15 16 17 18 19 20 21 22 23 24 25 26 27 28 class Animal :def __init__ (self, name ):self .name = nameprint ("Animal 初始化" )def speak (self ):print (f"{self.name} 在叫" )class Dog (Animal ):def __init__ (self, name, breed ):super ().__init__(name) self .breed = breedprint ("Dog 初始化" )def speak (self ):super ().speak() print ("汪汪汪!" )"旺财" , "金毛" )print (dog.name) print (dog.breed)
多重继承 1 2 3 4 5 6 7 8 9 10 11 12 13 14 15 16 17 18 19 20 21 22 23 class Father :def skill (self ):print ("爸爸的技能:编程" )class Mother :def skill (self ):print ("妈妈的技能:绘画" )def cook (self ):print ("做饭" )class Child (Father, Mother): def play (self ):print ("玩游戏" )print (Child.__mro__)
15.9 多态 同一方法在不同对象中有不同的行为。
1 2 3 4 5 6 7 8 9 10 11 12 13 14 15 16 17 18 19 20 21 22 23 24 25 26 27 class Animal :def speak (self ):pass class Dog (Animal ):def speak (self ):return "汪汪汪" class Cat (Animal ):def speak (self ):return "喵喵喵" class Duck (Animal ):def speak (self ):return "嘎嘎嘎" def animal_speak (animal ):print (animal.speak())for animal in animals:
15.10 常用特殊方法(魔术方法) 以双下划线开头和结尾的特殊方法。
常用魔术方法
方法
说明
触发时机
__init__构造方法
创建对象时
__str__字符串表示
print(obj) 或 str(obj)
__repr__官方字符串表示
repr(obj) 或交互式输出
__len__长度
len(obj)
__eq__相等比较
obj1 == obj2
__lt__小于比较
obj1 < obj2
__add__加法
obj1 + obj2
__getitem__索引访问
obj[key]
__setitem__索引赋值
obj[key] = value
__iter__迭代器
for item in obj
__call__调用对象
obj()
示例 1 2 3 4 5 6 7 8 9 10 11 12 13 14 15 16 17 18 19 20 21 22 23 24 25 26 27 28 29 30 31 32 33 34 35 36 37 38 39 40 41 42 43 44 45 46 47 class Book :def __init__ (self, title, price ):self .title = titleself .price = pricedef __str__ (self ):return f"《{self.title} 》- ¥{self.price} " def __repr__ (self ):return f"Book('{self.title} ', {self.price} )" def __eq__ (self, other ):return self .title == other.titledef __lt__ (self, other ):return self .price < other.pricedef __add__ (self, other ):return self .price + other.price"Python入门" , 59 )"Python进阶" , 79 )"Python入门" , 69 )print (book1) print (repr (book1)) print (book1 == book3) print (book1 < book2) print (book1 + book2) for b in books:print (b)
__getitem__ 和 __len__ 示例1 2 3 4 5 6 7 8 9 10 11 12 13 14 15 16 17 18 19 20 21 22 23 24 25 26 27 class Playlist :def __init__ (self ):self .songs = []def add (self, song ):self .songs.append(song)def __len__ (self ):return len (self .songs)def __getitem__ (self, index ):return self .songs[index]def __iter__ (self ):return iter (self .songs)"歌曲1" )"歌曲2" )"歌曲3" )print (len (playlist)) print (playlist[0 ]) print (playlist[-1 ]) for song in playlist:print (song)
15.11 property 属性装饰器 将方法转换为属性访问方式。
Python
1 2 3 4 5 6 7 8 9 10 11 12 13 14 15 16 17 18 19 20 21 22 23 24 25 26 27 28 29 30 31 32 33 34 35 36 37 38 39 class Circle :def __init__ (self, radius ):self ._radius = radius @property def radius (self ):"""获取半径""" return self ._radius @radius.setter def radius (self, value ):"""设置半径""" if value < 0 :raise ValueError("半径不能为负数" )self ._radius = value @property def area (self ):"""计算面积(只读属性)""" return 3.14159 * self ._radius ** 2 @property def perimeter (self ):"""计算周长(只读属性)""" return 2 * 3.14159 * self ._radius5 )print (circle.radius) print (circle.area) print (circle.perimeter) 10 print (circle.area)
15.12 综合示例 示例:学生管理系统 Python
1 2 3 4 5 6 7 8 9 10 11 12 13 14 15 16 17 18 19 20 21 22 23 24 25 26 27 28 29 30 31 32 33 34 35 36 37 38 39 40 41 42 43 44 45 46 47 48 49 50 51 52 53 54 55 56 57 58 59 60 61 62 63 64 65 66 67 68 69 70 71 72 73 74 75 76 77 78 79 80 81 82 83 84 85 86 87 88 89 90 91 92 93 94 95 96 class Student :"""学生类""" "Python学院" 0 def __init__ (self, name, age, student_id=None ):self .name = nameself .age = ageself ._scores = {}1 self .student_id = student_id or f"STU{Student._count:04d} " def add_score (self, subject, score ):"""添加成绩""" if 0 <= score <= 100 :self ._scores[subject] = scoreelse :raise ValueError("成绩必须在0-100之间" ) @property def average (self ):"""平均分""" if not self ._scores:return 0 return sum (self ._scores.values()) / len (self ._scores) @property def scores (self ):"""获取成绩(只读)""" return self ._scores.copy() @classmethod def get_count (cls ):"""获取学生总数""" return cls._countdef __str__ (self ):return f"[{self.student_id} ] {self.name} , {self.age} 岁" def __repr__ (self ):return f"Student('{self.name} ', {self.age} , '{self.student_id} ')" def __lt__ (self, other ):return self .average < other.averageclass GraduateStudent (Student ):"""研究生类""" def __init__ (self, name, age, research_area, student_id=None ):super ().__init__(name, age, student_id)self .research_area = research_areadef __str__ (self ):return f"[{self.student_id} ] {self.name} (研究生), 研究方向:{self.research_area} " print ("=" * 50 )print ("学生管理系统" )print ("=" * 50 )"张三" , 18 )"李四" , 19 )"王五" , 24 , "人工智能" )"语文" , 85 )"数学" , 92 )"英语" , 78 )"语文" , 90 )"数学" , 88 )"英语" , 95 )for s in students:print (s)print (f"\n学生总数:{Student.get_count()} " )print (f"所属学校:{Student.school} " )print (f"\n{s1.name} 的成绩:" )for subject, score in s1.scores.items():print (f" {subject} : {score} " )print (f" 平均分: {s1.average:.1 f} " )print (f"\n按平均分排序:" )for s in sorted ([s1, s2], reverse=True ):print (f" {s.name} : {s.average:.1 f} " )
输出:
text
1 2 3 4 5 6 7 8 9 10 11 12 13 14 15 16 17 18 19 ================================================== 语文: 85 数学: 92 英语: 78 平均分: 85.0 李四: 91.0 张三: 85.0
15.13 小结 Python
1 2 3 4 5 6 7 8 9 10 11 12 13 14 15 16 17 18 19 20 21 22 23 24 25 26 27 28 29 30 31 32 class MyClass :"类属性" def __init__ (self , valueself .value = value self ._protected = 1 self .__private = 2 def instance_method (self return self .value@classmethod def class_method (cls ): return cls.class_attr@staticmethod def static_method (): return "静态方法" @property def prop (self return self ._protecteddef __str__ (self return f"MyClass({self.value})" class ChildClass (MyClass ):def __init__ (self , value, extrasuper ().__init__(value)self .extra = extra
概念
说明
class定义类
__init__构造方法
self当前对象
cls当前类
@classmethod类方法
@staticmethod静态方法
@property属性装饰器
super()调用父类
__xx__魔术方法
💡 记住: 类 = 属性(数据) + 方法(行为)